My take on the Tweed Deluxe(5E3) paradigm-with audio samples

Make it loud here.
User avatar
sookwinder
Mods
Mods
Posts: 11179
Joined: Mon Sep 11, 2006 6:47 pm
Location: Melbourne Australia

My take on the Tweed Deluxe(5E3) paradigm-with audio samples

Post by sookwinder » Sun Mar 17, 2013 1:58 am

My take on the Tweed Deluxe (5E3) paradigm.

Let me say from the start … this was an enjoyable build for me. The majority of the things I tried worked out, some even better than I had imagined. I only shocked myself with 240V once this time. Concepts and build ideas I had learnt (the hard way) in previous builds, such a star earths, worked out perfectly. In short this build is not just a prototype, but a great amp that will be used and enjoyed.

I want to thank at the start a small number of people. Jay and Yannis for help with the faceplate design and creation of the artwork for the manufacture of the face plates. Brad for his advice and ideas of use of different types of capacitors. James as a sounding board for my wacky ideas and another OSG member, one of our Kiwi members … tubeswell … his many informative posts on the various other amp forums were extremely educational as far as tweed amps and 5E3s in particular. Thanks to all.

As the title to the thread says, this amp build is my attempt at designing/building a tweed style amp that, just like Milton the Monster has, has a drop of Tweed Deluxe, a drop of Brown Deluxe and some BF thrown in for good measure.

And before any 5E3 purists start slapping their foreheads, if I had have wanted a vintage 5E3 I would have just gone out and bought myself a vintage 5E3. There are plenty out there and with the current exchange rate between the USA and Oz they are pretty cheap. But rather than buy a vintage amp, I’d rather build and tailor an amp to my specs, incorporating all the great aspects of the original 5E3 design.

The unique design attributes that the 5E3 can produce some superb sounds. Likewise there are some unique design attributes that the 5E3 has … for example I am totally blown over by the unique volume/volume/tone control set up on the 5E3. So rather than change the great attributes in the 5E3, as some people do when building their 5E3 clones, I wanted to see if I could capture in my own design the standard 5E3 idea but at the same time add some “extras” (extras that can be made “transparent”) that may allow a tweed inspired amp to have a little more versatility.

Also the 5E3 design uses a cathodyne Phase Inverter, which when designed correctly produces great creamy OD and the two power valves are cathode biased which again I prefer. So these two design philosophies of the 5E3 are positives as far as I am concerned, although many do not see it that way.

This whole project started about 12 months back, while I was still in the final stages of my Impro Reverb build. James (jimboyogi) had also considered the idea of a tweed like amp build, so we both started down the path that is the 5E3.

One thing I have truly learnt over the past couple of years is that the best way to build an amp is when you don’t have to or need to build an amp. The best scenario is if you can do a little of the build/design, then leave it for a while, then go back and do some more and so on and so on…. I have achieved far better outcomes when I didn’t have the pressure of “it must be built by such ‘n such a date”. Far fewer mistakes are made.

A month or two back Brad made a comment in another unrelated amp thread that he had built a “clone” amp but although it worked out great, it didn’t float his boat as far as something exciting to do (not his words exactly, but that was the intent of what he said). I tend to agree. Building just a clone of something is perfect when you want to have an amp in the style of a great historical design and (a) you can’t locate an original or (b) originals are far too expensive …. But for me much of the enjoyment is learning about the amp, the design of the amp, faults (intended or unintended) in the design, how people have overcome or improved aspects of the design and ultimately all that information solidifying into your own design, with the little extras that you wish to add and then finally the build and by that time you know backwards everything that needs to be done … sort of like cooking a gumbo or a strew in a way….

Enough waffle… on with it …

1. BACKGROUND TO THE DESIGN / BUILD

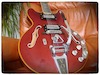
The amp is called a NIGHTBIRD REVERB.

Even though I was intending to build an amp based on a Tweed Deluxe, it was not going to look like a Tweed amp .. ie no tweed. I like tolex, I like the size of a BF Princeton cabinet and as that size cab is actually similar to the original 5E3, I stayed with that as the basis for my “amp look”. However I did not want this amp to look BF is style, I wanted a more in your face look to it and a font on the faceplates that were far less conservative… not quite as over the top as the “FUCK YOU” amps that we have seen lately, but certainly something that could not be confused with the traditional BF or SF amps. Will searching the web for various font types that I could use on the face plates, I come across a font type called “NIGHTBIRD”… the font itself was crap, but I used the name. The font I ended up using is called FLUX ARCHITECT.

Image

But I am getting ahead of myself.

The 5E3 is a simple design (well actually a very complicated simple design) utilising:
- a 12AY7 for the two channel inputs, using the same cathode capacitor/resistor pair
- a 12AX7 as the a second gain stage and as a cathodyne phase inverter
- two 6V6 power valves, which are cathode biased

It has somewhere around 12watts output (somewhat hard to define as the amp gets into OD distortion quite quickly), has two channels (normal and bright), two volume controls that are INTERACTIVE and a single tone control. The two separate channels can be jumped to achieve yet another voicing for the amp. Many of those who have the 5E3 as their main amp believe with the correct combination / adjustment of both volume controls, almost any tonal sound can be produced by the 5E3. But the reality is that the 5E3 cannot do cleans like a BF amp ( can sort of come close), but then again if you want cleans like a BF then maybe you should be playing a BF amp.

It is the fact that the 5E3 can get into distortion (PI distortion) so quickly and produce a nice creamy or extreme OD that makes it a popular amp. Great music has and is still being made with the 5E3 design.

Doing research, reading everything I could about the 5E3as well as the available information about the many manufacturers of “clone” kits, a number of issues/fix ups became apparent.

1. Earth issues (hums) can be of concern. Lots of solutions available depending if you want to stay true to the original design or use slightly more modern ideas

2. The 5E3 can fart out. Probably due to the fact that it uses a 25uF cathode cap on the preamp, but has none of the filtering that a BF amp tone stack allows. Essentially far too much low end gets through. This can be addressed by “tone shaping” and using smaller cathode caps on the preamp 12AY7, and elsewhere in the design if required. Further the use of (say) 0.02uF coupling caps rather than 0.1uF caps has been often suggested in the various forums dedicated to the 5E3. Again to assist in lowering the “farting out” tendencies.

3. The interactivity of the two volume controls seems to annoy/frustrate some users of the 5E3. Essentially you can set the volume for channel 1 when you are plugged into channel 1, but adjustment of the volume control for channel 2 will also affect the volume and tone of channel 1 even though nothing is plugged into the channel 2 input. Some solutions are to change the input design to match that of the Brown Deluxe (6G3) amp where the two volume controls are not interactive and there are two tone controls.
On some of the 5E3 newsgroups it is verboten to even mention how to do this “Tweed to Brown” conversion of the volume/tone controls. You are expected to purchase a kit from … well from someone …. Reading the many threads where newbies ask the un-askable question and then get accused of being a cheapskate for not paying the $25 for the “special magical kit” left a bad taste in my mouth (similar to my experiences years ago at the FDP).

4. Lack of clean headroom, distortion starting at about 2 – 3 on the scale (scale goes to 12). Again a function of the level of signal going through the system and there are a number of fi\x ups people use. Some increase the HT of the PI, others try combinations of different size capacitors. Others would say that this is what the amp does, love it, live with it, use it. One of the interesting discussions I read on this topic was the use of a Master Volume set up that allowed you to have the great OD sound, but at lower usable volume levels.

5. Then there is the issue that when the 5E3 was designed the wall voltage (in the USA) was 110-117 volts. This has crept up over the past 50 years. Plus modern 5Y3 rectifier valves sometimes are more like GZ34s than 5Y3 and put out more HT (B+) than was originally designed for. Both these issues can lead modern clones to OD the PI to early, which results in the cathodyne PI not operating at desired voltages and producing a harsh OD

So I wanted a design that would allow the interactivity of the two volume and single tone control (as per the 5E3) but which also (at the click of a switch) allowed the volume controls to be independent and non-interactive ….essentially a 5E3 // 6G3 switch.

Another great feature of all of the larger tweed amps is the ability to jumper one channel into the other and produce an increased signal volume (both preamp channels are then amplifying the guitar signal at the same time) This is achieved because the Tweed amps have two inputs for each of the two input channels. A jumper lead connects the low impedance input of one channel into the high impedance input of the other channel.

The amp I would be making (as per the BF topography) has only two inputs. Normally in the single channel BF Princeton one input is high impedance, the other low impedance. In my design one input would be for the Bright Channel and one for the Normal Channel. So I needed to come up with a design that, again at the flick of a switch, allowed the two channels to be jumped and the guitar signal sent to both channels.

All my designs get spring reverb. I like spring reverb.

All my designs get a Negative Feedback switch. Installing a NFB switch is 30 seconds of work in the design stage and 15 minutes in the build stage.

Because the music I play/write is at the BF/SF end of the spectrum, I wanted a control that allowed me to (yes you guessed it, at the click of a switch) remove some of the mids from the system and get a more BF sound. This would allow me to use the amp as a lounge room / couch amp when I am wanting a more BF sound. I didn’t necessarily want this feature to be used as a main feature because as mentioned previously if you want to play live with a BF sound, then use a BF amp. This idea was just to allow a more quiet, mellow sound for use when I watch TV and noodle around.

After reading much of the past 5 or 6 years of threads at various newsgroups dedicated to 5E3 and/or tweed amps, two other areas where additions to the standard 5E3 design are often made intrigued me.

The first is associated with the fact that the two preamp channels (of the 12AY7) have a common cathode resistor and capacitor. Discussions went down the path of saying it was possible to achieve different voicings for a particular input channel depending on whether there was a common or separate cathode capacitor/resistor for the two input channels. So I set about designing it so I could switch between common and separate input channel cathode resistors and capacitors.

The second idea which some have tried is to add cathode capacitor to the second stage amplification (first stage of the 12AX7). Sort of like a FAT switch, for want of a better descriptor. Essentially what this does is to assume you have reduced the size of the cathode capacitor anyway on the second gain stage, to remove some of the farting tendencies and then just reinstates the larger size cathode capacitor that the original design has. Again an intriguing idea and one that I decided to designed for.

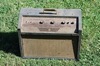
The other difference my amp would have from the standard 5E3 Tweed Deluxe is that I would be using a vintage 10” Jensen speaker rather than the 12” used in the 5E3. I had seven 10” Jensens to choose from, all from the 50s and 60s. Some were P10R 25 watters, smooth and ribbed cones. Some were P10Q 35 watters with smooth cones.

2. THE DESIGN AND CHOICE OF COMPONENTS
2.1 Cathode and coupling capacitors
Pretty much as soon as I had read half a dozen threads on the 5E3, it was apparent that the majority of people who built 5E3 clones and who knew what they were doing preferred to reduce the size of the cathode capacitors on the preamp valve and the 2nd gain stage. Not using the 5E3 standard 25uF value but rather 5uF or 10 uF. The logic behind this appeared sound and helped with reducing the level of fartiness in the amp. This then lead me to the idea of not using electrolytic capacitors, but rather some other type. After some discussions with Brad, I decided to go the “film capacitor route” and bought a range of Solen caps from 0.68uF through to 4.7uF.

My design would have “the common preamp cathode cap” as 4.7uF and when I switched to separate cathode modes for the inputs the Normal channel would stay with 4.7uF and the Bright channel would be 0.68uF. Certainly a far cry from the 25uF in the standard 5E3 design.

The 5E3 uses 0.1uF sized coupling caps. Many people have voiced their 5E3 clones by the use of different sized coupling caps to reduce the level of fartiness by lowering the size of the coupling caps. My starting point was 0.02uF in lieu of the 0,1uF. I did though have a selection of both Jupiter and Mallory 150s caps to choose from if I found the 0.02uF not to my liking. I wanted to use the Jupiter on the Bright channel and throughout the rest of the amp and the M150s on the Normal channel.
Image

2.2 The JUMP switch
This switch allows both channels to be jumped, without the need of a jumper cable.
With the guitar lead in the BRIGHT input, both channels (BRIGHT and NORMAL) can be used together in any combination, via the interactive volume controls.
Image
Image
Image
Image

With the RCA connectors used for the reverb input/output there is always this washer with a tab attached to enable a wire to be soldered to it. I have never used this and always removed it… but always kept them. I was able to utilise these to earth the wire shielding of the leads going from the Bright and Normal inputs to the preamp valve.

2.3 5E3/6G3 switch
I decided to call the switch that changed to volume controls from interactive to non-interactive the 5E3 / 6G3 switch because the Brown Deluxe (6G3) has no interactivity between the controls for each channel. I wanted to keep the same 5E3 tone control set up (ie a tone control on the Bright channel) but have a way of stopping the interactivity between volume controls if desired. In the end all it took was a couple of hours staring at the 6G3 circuit, a slider switch and two 220k resistors.

The unexpected benefit of this switch was when used in conjunction with the jump switch, it is possible to select any blend of the two channels independent of each other. Ranging from only one of the channels, through to 100% of both channels to only the other channel.
Image
Image

2.4 BF switch
This is essentially just a MIDs filter, using two capacitors and tow resistors. The switch just diverts the signal into or bypassing the filter. My initial thought was to filter out the areas of the signal that the standard BF tone stack would reduce …. around 500Hz. I used one of the freeware circuit analysis software programs to determine the values of the caps and resistors to achieve an 8dB reduction (100k, 10k, 0.022uF, 0.005uF). However when I first set this up and tested it the result was just dullness .. all the sparkle had been removed. I then realised that the “skirt” of the filter was removing a large portion of the higher frequencies as well. After some more analysis and experimentation I came up with a filter (centred just above 100Hz) that produced an almost BF sound, albeit at a lower volume than when the BF filter is not in the signal path. It’s perfect for quiet noodling on the couch when watching TV late at night.
Image
Image
Image
Image
Image

2.5 FAT switch
Well not some much FAT, but maybe more rumble. This switch just brings in 25uF in parallel with the 1uF cathode capacitor on the second gain stage. On a BF amp this switch would be more noticeable, but on a 5E3 based amp the change is far more subtle. When used it adds back a whole lot of volume below 100Hz. In reality I suspect I will not be using this switch much … maybe with a Bass VI or a baritone guitar.
Image
Image
relaxing alternative to doing actual work ...

User avatar
sookwinder
Mods
Mods
Posts: 11179
Joined: Mon Sep 11, 2006 6:47 pm
Location: Melbourne Australia

Re: My take on the Tweed Deluxe (5E3) paradigm.

Post by sookwinder » Sun Mar 17, 2013 2:03 am

2.6 COMMON / SEPARATE PREAMP CATHODES switch
The standard set up for the two preamp cathodes is that they are common (750R and 4.7uF). The switch allows the cathodes to be independent (Bright channel 1.5k and 0.68uF, Normal channel 1.5k and 4.7uF).
To be honest I really could not hear much difference with the cathodes common or separate. There maybe a setting of the volume/tone controls that could produce a different tonality with separate cathodes on the preamp, but I haven’t found it.

Most likely the cathodes will remain common, unless I think of some magical addition I can make to the design that will produce variation in tonality.
Image

2.7 MASTER VOLUME
The idea of a master volume control was quite appealing. Various designs can be used to achieve a MV in a Push-Pull amp such as a 5E3. Some have their supporters and some have their detractors. In fact it was the MV part of the design that I was most concerned about as this was an area where “noise” could be introduced to the system.

The design I used was a variation on the LAR/MAR PPI MV … translated to equal the Larry of Larry Amps and Mark Abrahamian post Phase Inverter Master Volume.

It uses a dual pot to replace the two 220k bias resistors for the power valves resistors. The set up I used was with a 500k dual pot, and two 390k resistors to create the two 220k bias resistors. When the MV dual pot is on “full” the signal sees zero resistance along with the bias to ground apparent two 220k resistors (combination in parallel of the 500k and the 390k).
Image
Image
Image

But as the dual pot is turned down, the signal starts to see an increasing resistance (which will eventually reach 500k) and the volume decreases accordingly.

This PPIMV was very successful, and works like a charm with no increase in “noise” as the volume gets lower as can occurr in other MV designs. Extremely happy with this addition to the 5E3 design.

2.8 REVERB
The reverb circuit is just a copy of what I have used in previous amp builds.

2.9 TRANSFORMERS, RECTIFIER & PHASE INVERTER
I again used Mercury Magnetics transformers . As well as being very happy with their product and their customer interaction, I get a good deal with them.

I needed a PT that could get the HT (B+) I required, had enough capacity to handle two 6V6 valves, two 12AX7, one 12AT7 and one 12AY7. I didn’t a PT that would produce a too high HT, given I was using a GZ34 rectifier rather than the 5Y3 which is used in the 5E3. Having a too high HT is often cited for the harshness in the OD produced in many 5E3 clones.

I intended to change some the components used in the cathodyne PI from those shown in the 5E3. This would allow the PI to accommodate a slightly higher HT and not produce the harsh OD. Further… a slight modification as shown by Merlin Blencowe in his book on preamp design to the PI helped the cathodyne function optimally (I had used the set up successfully in my previous amp build).

The PT used was the MERCURY MAGNETICS TONE CLONE PLUS FDP-20M/E. This is a lower HT (B+) version of the BF Deluxe PT with nominal output of 312VAC.

The OT was slightly larger than that used in the 5E3: a MERCURY MAGNETICS
TONE CLONE PLUS FTDO-59X with 8K primary and 8ohm secondary.

2.10 EARTH – GROUNDING
After the “dark 6 months” I spent sorting out my many earth and grounding issues with the previous build I again used successfully the star-ground concept, along with two distinct brass rod/busses.
Image

Four star earth points were used (a) for the 240V AC input (b) for the PT, heaters and high voltage end of the circuit (c) for the preamp and reverb recovery and (d) reverb transformer, reverb pedal and the Power filter cap associated with the input valve. Using a wing-nut and star washers, the earth lines can be secured and if required “undone” with a twist of the wing-nut

As far as I am concerned, this is the only way to earth/ground an amp.
Image
Image
Image
Image

2.11 DOGHOUSE
The filtering capacitors for the power supply are located on the circuit board in the original 5E3 design. There are 16uF / 16uF / 16uF.
As I was using up a lot of circuit board real-estate with the additional “features” I moved the filtering caps to the DOGHOUSE located under the amp chassis. I would have done this anyway as it allows a shorter length lead for the preamp HT (B+)

Given the smaller size and obvious cost reduction of modern capacitors a more appropriate 30uF / 20uF / 20uF / 20uF was used as the power supply filter. (This design was used on my previous build when I used a GZ34 rectifier)
Image

3. ARTWORK – FACEPLATES
As mentioned previously I had selected the name, the font type and now needed to get the faceplate and backplate designed and manufactured. I was not going to use “normal BF/SF” amp knobs but rather either white or cream coloured “Jaguar” style knobs. No numbers, just a pointer on the knob. I wanted to achieve a slightly “in your face” appearance, but at the same time a minimalist appearance if possible.

I sent the completed artwork off to my man in Thailand who produced the faceplates for my previous builds. This time however he emailed me a photo of the completed plates before he shipped them to me and asked me to “OK them”. This was strange… it had never happened before. As I looked at the photos closely I realised that rather than stamping out the holes and leaving the borders for the switches and potentiometers and pilot light, he (or his worker) had punched out holes that included all the borders. That is … every holes was too big… including the holes for the slider switch screws !!!
Image

I rejected these and he went away and remade them for me….. this is why projects sometimes take 9 months to complete !!
Image

The faceplates are white with red graphics and will be used in conjunction with a red tolexed PR sized cab I had originally used for my Impro Reverb build When I eventually used the Foam Green (Teal) tolex cab from MOJO for that build, this red cab became spare.

4. VALVES
Two NOS/NIB 1960s RCA 6V6GTA were selected from my stash, along with a NIB Mullard GZ34. I managed to pick up quite cheaply on ebay 5 NIB late 50s RCA 6072s. The 6072 is the low noise version of the 12AY7.

The reverb circuit uses a RCA grey plate 12AT7 and a grey plate 12AX7. The 12AX7 doesn’t need to be super strong, as there is plenty of gain in the circuit.

The overall second stage gain for the amp and Phase Inverter uses a Wurlitzer labelled mid 60s grey plate RCA 12AX7.
Image
Image

5. SPEAKER
I have seven 10” Alnico Jensens from the late 50s and early 60s. I expected that I would prefer the 1955 P10Q (35 watter) smooth cone Concert series speaker. But what was way in front as far as punch and being able to make the OD sound creamy and exciting at the same time was the stock standard 1957 P10R (25 watter) ribbed cone Jensen. It just shows that a type of speaker that works on one type of amp may not be the best for a different style of amp.

6. WIRING
Again I used the Teflon covered wire I had previously used in the Impro Reverb build. It allows you to produce a cleaning build and get those wires crossing at 90 degrees far more easily
Image
Image

The use of turrets rather than eyelets in some of the positions on the circuit board for components I wasn’t certain about was a good idea. (such as coupling caps, cathode resistor for the power valves and the N FB resistor)
Image
Image
Image

7. OTHER STUFF
A certain amount of “heavy metal” work was required to fit the PT into the PR chassis. I was not expecting this and was a little taken aback when I first tried to mount the PT. But the misunderstanding was soon overcome and the PT worked superbly.
Image

Those who know the 5E3 circuit can probably “see” the original volume/tone circuit within this…
Image

Can’t forget the valve label
Image

Still haven’t worked out whether I will go with the white knobs or the cream knobs
Image
Image
Image

Image
Image
Image
Image
Image

My new stainless steel work bench in my third bedroom
Image
Image

CONCLUSION
Well the amp sounds great… It has all of the OD and crunch that people talk about when discussing the 5E3 Tweed Deluxe (and other Tweeds when it comes to it).
I am very impressed with the (let’s be honest) weird volume & tone controls that the 5E3 has. Before playing this amp (in a pure 5E3 mode) I never thought it could be as good as people made out. But… there are great rock n roll sounds there to be had, plus some others if you spend time learning about the amp and how it works.

As I intimated above, the extras I added to the design can be made transparent if I just want the amp to be in pure 5E3 mode.

Of the extras I added to the 5E3 original design the following work beautifully and in my opinion enhance the usefulness of the amp for me and my music. Others may feel they do not need them, but then it’s just horses for courses as the say.
- the spring reverb
- the 5E3/6G3 interactive/non interactive volume controls switch
- the BF switch
- the jump the two input channels switch
- the NFB switch (yeah it works, but it’ll probably stay off most of the time)
- the master volume control

The “FAT” switch, while certainly adding a great low end, most likely will not be used unless I have plugged in a bass VI or baritone guitar.

The switch to have either common or separate cathode caps/resistors while functioning as designed, didn’t really achieve much to my ears in this type of amp. Maybe in a BF or SF but in a tweed I can not hear much variation.

Of the changes I made to the original circuit (not discussed above)
- lowering the value of the cathode capacitors on the preamp valve and the second gain stage. Very useful to remove the fartiness (which I experienced when I first tried out the standard 25uF value cathode caps)
- Lowering the value of the coupling capacitors. Again a useful tool for removing the fartiness and tone shaping the amp to your specific needs. Many have used 0.005uF as coupling caps, rather than the 0.1uF standard 5E3 value. I stayed with 0,02uF for both the normal and the bright channels, although I did use different types/manufacturers of the caps for each channel (Jupiter and Mallory). Even with both channels using 0.02uF there is certainly sufficient variation between the channels to not warrant the coupling caps being any smaller in value.
- Higher HT and improvement of the cathodyne PI to run optimally. Having read Merlin Blencowe’s book on preamp design, it is just a given that one would make these changes to improve the PI OD and not allow it to become dirty.

When James (jimboyogi) gets some free time from his wine tasting job, I’ll get him to come over and we can record some samples of the amp in various guises and modes.

Stay tuned….. and again thanks to those who have helped me with this project.
relaxing alternative to doing actual work ...

User avatar
Ex Lion Tamer
PAT. # 2.972.923
PAT. # 2.972.923
Posts: 3312
Joined: Sat Dec 25, 2010 9:07 pm

Re: My take on the Tweed Deluxe (5E3) paradigm.

Post by Ex Lion Tamer » Sun Mar 17, 2013 5:31 am

That is very cool, I love everything about it! It looks cool, I like the options you've introduced. I bet it sounds great! One dumb question... Would it be possible to build the master volume in a way that it would allow to take it out of the circuit ? Maybe an extra switch somewhere, or a push-pull knob? I know Matchless does this in the DC-30.

User avatar
Ex Lion Tamer
PAT. # 2.972.923
PAT. # 2.972.923
Posts: 3312
Joined: Sat Dec 25, 2010 9:07 pm

Re: My take on the Tweed Deluxe (5E3) paradigm.

Post by Ex Lion Tamer » Sun Mar 17, 2013 5:33 am

Oh!

"When the MV dual pot is on “full” the signal sees zero resistance along with the bias to ground apparent two 220k resistors (combination in parallel of the 500k and the 390k)."

So basically it's out of the circuit, right? How's the headroom? My limited experience with 5E3 circuits gave me the impression that they get dirty fast.

User avatar
Langwich
PAT. # 2.972.923
PAT. # 2.972.923
Posts: 317
Joined: Fri Oct 07, 2011 4:19 am
Location: SFV, SoCal

Re: My take on the Tweed Deluxe (5E3) paradigm.

Post by Langwich » Sun Mar 17, 2013 5:57 am

Wow?

I mean, WOW!

User avatar
Fiddy
PAT. # 2.972.923
PAT. # 2.972.923
Posts: 12396
Joined: Thu Nov 29, 2007 11:38 am
Location: Canada Dry

Re: My take on the Tweed Deluxe (5E3) paradigm.

Post by Fiddy » Sun Mar 17, 2013 12:12 pm

Excellent post and build Sook. I like how you did the heater wires. I need to rework mine on my 5X3 clone. I have noticed that even wiggling the wires around from their set position increases and decreases hum for me.

Also, question on the grounding wing-nut. How are you ensuring it doesn't become loose with vibration?

User avatar
jimboyogi
PAT. # 2.972.923
PAT. # 2.972.923
Posts: 2083
Joined: Tue May 27, 2008 2:38 am
Location: Melbourne
Contact:

Re: My take on the Tweed Deluxe (5E3) paradigm.

Post by jimboyogi » Sun Mar 17, 2013 2:53 pm

Amazing design and build David. You just keep getting better and better at this!

Looking forward to trying it out :)

User avatar
sookwinder
Mods
Mods
Posts: 11179
Joined: Mon Sep 11, 2006 6:47 pm
Location: Melbourne Australia

Re: My take on the Tweed Deluxe (5E3) paradigm.

Post by sookwinder » Sun Mar 17, 2013 6:03 pm

tribi9 wrote:Also, question on the grounding wing-nut. How are you ensuring it doesn't become loose with vibration?
Two ways.... firstly the hole I drill for the bolt, I drill it undersize and then with a rat tail file I widen the hole ever so slightly to allow the bolt to be "screwed" in... ie... I cannot push the bolt through the hole easiliy, but rather I must screw the bolt through the hole.
Secondly the star washers I used between each of the multiple earth leads on the star point keep the leads connected and so do not turn or vibrate lose.
Ex Lion Tamer wrote:Oh!
"When the MV dual pot is on “full” the signal sees zero resistance along with the bias to ground apparent two 220k resistors (combination in parallel of the 500k and the 390k)."
So basically it's out of the circuit, right? How's the headroom? My limited experience with 5E3 circuits gave me the impression that they get dirty fast.


Yeah the MV (and infact all other extras) can be made transparent in the circuit , to achieve the original 5E3 circuit.
As far as head room.... yes the 5E3 (and this amp I built) do get into OD reasonably quickly but I have not found it annoiying or harsh OD.
There are positions with setting the Volumes which allow to get a cleaner sound and as i said I have not problems with the sound...

I suspect much of the issues about the 5E3 clones are the harsh of bad sounding OD because (a) B+ value far too high for the original spec cathodyne PI and (2) people using 12AX7 rather than 12 AY7 in the preamp.... too much signal, bad OD.

In short I was really really hapopy with the sounds ... I too was worried it would be dirt from 2 on the dial ... but it is no where near that... very useful tones through out.
relaxing alternative to doing actual work ...

User avatar
PorkyPrimeCut
PAT. # 2.972.923
PAT. # 2.972.923
Posts: 24473
Joined: Tue Nov 28, 2006 7:46 am
Location: Leipzig
Contact:

Re: My take on the Tweed Deluxe (5E3) paradigm.

Post by PorkyPrimeCut » Sun Mar 17, 2013 6:29 pm

Bloody hell!! Great job!!!

I can only assume that the insanely techy side of it was a success & well executed (I'm on holiday, suffering from sunburn, drunk & the words won't keep still so I haven't read much & have just looked at the pictures instead. Heheh). It certainly looks tidy & all the parts look like they must be too notch.

My reverb tank build was kind of painting by numbers so whilst I can relate to the soldering, wire arrangements & cleanliness of the build I kind of bow down to your understanding of what it all actually does!

The tolexing, on the other hand, I can completely relate to & it looks fantastic. I really like the way you only used the chrome corners on the bottom section, presumedly where it's more likely to get knocks. Everything else looks clean as a whistle!!!
You think you can't, you wish you could, I know you can, I wish you would. Slip inside this house as you pass by.

User avatar
knathan
PAT. # 2.972.923
PAT. # 2.972.923
Posts: 2923
Joined: Fri Aug 08, 2008 12:54 pm
Location: Seattle
Contact:

Re: My take on the Tweed Deluxe (5E3) paradigm.

Post by knathan » Sun Mar 17, 2013 6:52 pm

You put a lot of great thought into this- VERY cool sook!

User avatar
StevenO
PAT. # 2.972.923
PAT. # 2.972.923
Posts: 17771
Joined: Wed Oct 18, 2006 7:06 pm

Re: My take on the Tweed Deluxe (5E3) paradigm.

Post by StevenO » Sun Mar 17, 2013 7:01 pm

I've been wanting a Tweed Deluxe for a long time now, and along with this and having seen Low last night (Tweed Vibrolux, in this case), I'm back to wanting a Tweed again. Reading about your changes to the circuit makes me think I'd might not be entirely satisfied with any of the various clones out there... :unsure:

Very cool, Sook. Your work always fascinates, impresses, and intimidates me all at once. Truly amazing! :)

User avatar
sookwinder
Mods
Mods
Posts: 11179
Joined: Mon Sep 11, 2006 6:47 pm
Location: Melbourne Australia

Re: My take on the Tweed Deluxe (5E3) paradigm.

Post by sookwinder » Sun Mar 17, 2013 7:28 pm

StevenO wrote:. Reading about your changes to the circuit makes me think I'd might not be entirely satisfied with any of the various clones out there...
I think the clones "as they are" may not give you what you want, they wouldn't give me what I want. But certain changes even to a clone 5E3 would get to running pretty well...ie
- use a vintage 5Y3 rectifier rather than a modern version ( a vintage 5Y3 should only cost you $25)
-reduce the size of the coupling caps to something manageable ... say 0.02uF
-reduce the size of the cathode caps on the pre amp (say 4.7uF and 10uF or both 4.7uF)
-use star grounding rather than the "brass plate"
-make sure the PT doesn't put out too high a B+ or alternately use the component values for the cathodyne PI I used rather than the 5E3 values (I will stick up a layout drawing and schematic of my design in a day or so

The above changes are not really that difficult ... and would hopefully get away from the scenario where the OD is dirty and rough, as oppossed to creamy OD. They would improve a clone 5E3 so I would enjoy it (remembering I like BF/SF tonality, so too much dirty OD is not my thing)
relaxing alternative to doing actual work ...

User avatar
spindizzy
PAT. # 2.972.923
PAT. # 2.972.923
Posts: 413
Joined: Sun Jun 28, 2009 10:34 pm
Location: Melbourne, Australia

Re: My take on the Tweed Deluxe (5E3) paradigm.

Post by spindizzy » Mon Mar 18, 2013 7:40 pm

I heartily concur with what everyone else has voiced here - another great build by you.

Any chance of some sound-files?

User avatar
OffYourFace
Mods
Mods
Posts: 13733
Joined: Thu May 03, 2007 2:59 pm
Location: Los Angeles, CA

Re: My take on the Tweed Deluxe (5E3) paradigm.

Post by OffYourFace » Mon Mar 18, 2013 8:33 pm

impressive David!! looks beautiful :) looking fwd to clips

User avatar
sdbthai41
PAT. # 2.972.923
PAT. # 2.972.923
Posts: 120
Joined: Sat Dec 25, 2010 9:02 pm
Location: Bangkok, Thailand

Re: My take on the Tweed Deluxe (5E3) paradigm.

Post by sdbthai41 » Mon Mar 18, 2013 8:38 pm

Fantastic! Who is your guy in Thailand who does the faceplates? I am based in Thailand and build amps as a hoppy and I normally send overseas to have it done. It would be great to have it done locally.

Post Reply