1979 Gibson Marauder Restoration
- cooterfinger
- PAT. # 2.972.923
- Posts: 419
- Joined: Tue Mar 06, 2007 4:07 pm
- Location: Blue Ridge, GA
- Contact:
1979 Gibson Marauder Restoration
I got this project in a trade with another forum member awhile back. I wanted to wait until I had enough progress to show before I posted since it’s probably going to take me quite some time to finish.
In my mind the key to this whole restoration would be the neck. If I could get the neck back in shape then everything else would fall into place.
The problems that needed to be addressed were.
One, these necks were finished natural in 1979, so the crappy red enamel spray paint would have to go.
Two, the headstock had a hole drilled in it where someone tried to repair it. The glue had started to separate on one of the headstock wings. It could have been steamed off and reglued but now it has a hole drilled in it where they were using a screw instead.
Three, it needs a refret and the fretboard has some nasty divots in it.
"Smells like Rock N' Roll"
- cooterfinger
- PAT. # 2.972.923
- Posts: 419
- Joined: Tue Mar 06, 2007 4:07 pm
- Location: Blue Ridge, GA
- Contact:
Re: 1979 Gibson Marauder Restoration
Step 1: Strip the paint.
After one application.
After the second application the glue on the separated headstock gave way and fell off. That was a plus since I was going to have to remove it anyway.
You can see the serial number a little better now. There’s still some finish down in the stamp but it’s getting a little more legible.
Step 2: Headstock repair.
My wife had asked if I could cut her maple cutting board down a little because it was too big to for her to handle easily. I was happy to oblige. I cut a small donor block from the cutting board scrape to glue to the headstock. I routed one edge of the block perfectly flat and routed half of a tuner hole in it. It would have been a major pain to plug and redrill half a tuner hole if I hadn’t.
Cut and rough sanded to shape.
Tweaked a little and repair is done. While working on the headstock I also cleaned the paint out of the stamped serial number on the back. I took a mechanical pencil and lightly filled in the stamp to make sure I hadn’t messed them up any.
"Smells like Rock N' Roll"
- cooterfinger
- PAT. # 2.972.923
- Posts: 419
- Joined: Tue Mar 06, 2007 4:07 pm
- Location: Blue Ridge, GA
- Contact:
Re: 1979 Gibson Marauder Restoration
Well, the neck needs a lot of fret filing before I can do any finishing on it so I thought I'd move on to the body.
Before:
After:
Just kidding.
A new Alder body.
Templates.
Before:
After:
Just kidding.
A new Alder body.
Templates.
"Smells like Rock N' Roll"
- cooterfinger
- PAT. # 2.972.923
- Posts: 419
- Joined: Tue Mar 06, 2007 4:07 pm
- Location: Blue Ridge, GA
- Contact:
Re: 1979 Gibson Marauder Restoration
Mockup of body complet with amber (earwax) switch tip.
"Smells like Rock N' Roll"
- noisepunk
- PAT. # 2.972.923
- Posts: 16807
- Joined: Sat Apr 03, 2010 5:55 pm
- Location: glasgow, scotland
- Contact:
Re: 1979 Gibson Marauder Restoration
Lookin' pretty sweet. Finish color?
- Pepe Silvia
- PAT. # 2.972.923
- Posts: 5701
- Joined: Thu May 14, 2009 11:44 am
- Location: Philadelphia
Re: 1979 Gibson Marauder Restoration
Very cool. I've always had a soft spot for these. Would love one in Pelham Blue or dark cherry
-
- PAT. # 2.972.923
- Posts: 2590
- Joined: Tue Oct 09, 2012 5:36 pm
- PorkyPrimeCut
- PAT. # 2.972.923
- Posts: 24472
- Joined: Tue Nov 28, 2006 7:46 am
- Location: Leipzig
- Contact:
Re: 1979 Gibson Marauder Restoration
Heheh! You totally had me with the before & after shots!!
You think you can't, you wish you could, I know you can, I wish you would. Slip inside this house as you pass by.
-
- PAT. # 2.972.923
- Posts: 2590
- Joined: Tue Oct 09, 2012 5:36 pm
Re: 1979 Gibson Marauder Restoration
I thought that was hilarious.PorkyPrimeCut wrote:Heheh! You totally had me with the before & after shots!!
- cooterfinger
- PAT. # 2.972.923
- Posts: 419
- Joined: Tue Mar 06, 2007 4:07 pm
- Location: Blue Ridge, GA
- Contact:
Re: 1979 Gibson Marauder Restoration
I was thinking of going with clear poly but I'm still not sure.noisepunk wrote:Lookin' pretty sweet. Finish color?
"Smells like Rock N' Roll"
- countertext
- PAT. # 2.972.923
- Posts: 4148
- Joined: Wed Sep 28, 2011 6:25 pm
- Location: Tacoma
Re: 1979 Gibson Marauder Restoration
I let out an audible "Guhhhhh!" as I leaned closer to my monitor...PorkyPrimeCut wrote:Heheh! You totally had me with the before & after shots!!
- mulesing
- PAT. # 2.972.923
- Posts: 197
- Joined: Wed Mar 07, 2012 8:14 pm
Re: 1979 Gibson Marauder Restoration
leave the original body with that gnarly finish! lol
- ludobag1
- PAT. # 2.972.923
- Posts: 2547
- Joined: Sun Nov 23, 2008 4:28 pm
- Location: france
Re: 1979 Gibson Marauder Restoration
citistrip works !
it change old alder body with paint in new body
i have believe
it change old alder body with paint in new body
i have believe
- maximee
- PAT. # 2.972.923
- Posts: 926
- Joined: Mon Mar 05, 2012 2:07 pm
- Location: Germany
Re: 1979 Gibson Marauder Restoration
Very keen to see how this turns out. I have a Gibson S-1, basically the same thing with different pickups. These are weird gibsons. Is yours also pretty heavy?
Mine also needs major fret leveling or probably better a refret. I've read somewhere that Gibsons of that era had crazy low frets from factory... Can somebody confirm this!?
I've never encountered frets that low in any guitar...
What are you going to do about the frets?
Mine also needs major fret leveling or probably better a refret. I've read somewhere that Gibsons of that era had crazy low frets from factory... Can somebody confirm this!?
I've never encountered frets that low in any guitar...
What are you going to do about the frets?
- cooterfinger
- PAT. # 2.972.923
- Posts: 419
- Joined: Tue Mar 06, 2007 4:07 pm
- Location: Blue Ridge, GA
- Contact:
Re: 1979 Gibson Marauder Restoration
I like the Gibson S-1 as well. Maybe I'll find one someday, this one kinda fell in my lap so I'm happy about thatmaximee wrote:Very keen to see how this turns out. I have a Gibson S-1, basically the same thing with different pickups. These are weird gibsons. Is yours also pretty heavy?
Mine also needs major fret leveling or probably better a refret. I've read somewhere that Gibsons of that era had crazy low frets from factory... Can somebody confirm this!?
I've never encountered frets that low in any guitar...
What are you going to do about the frets?
even though it needs some work.
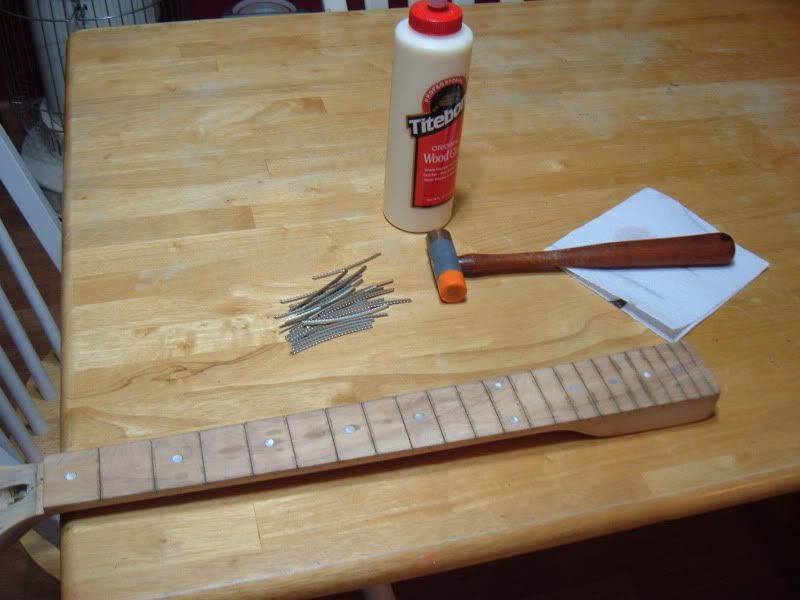
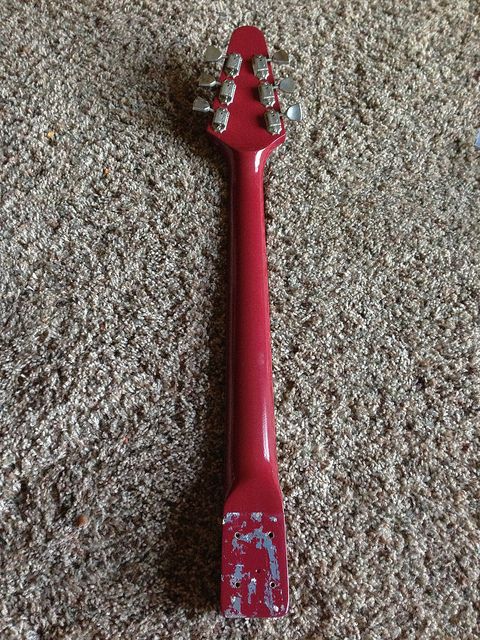
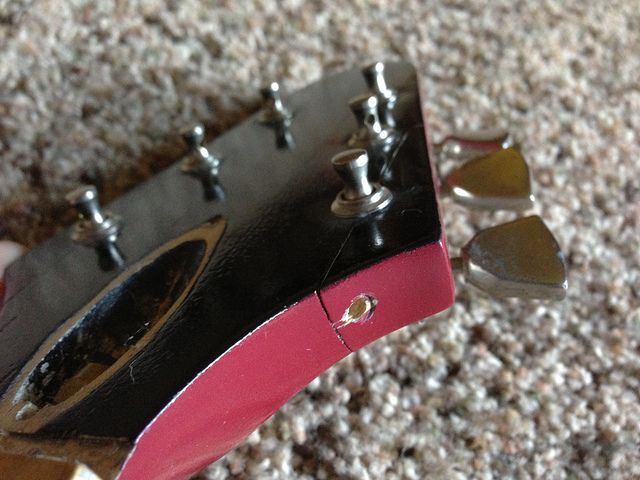
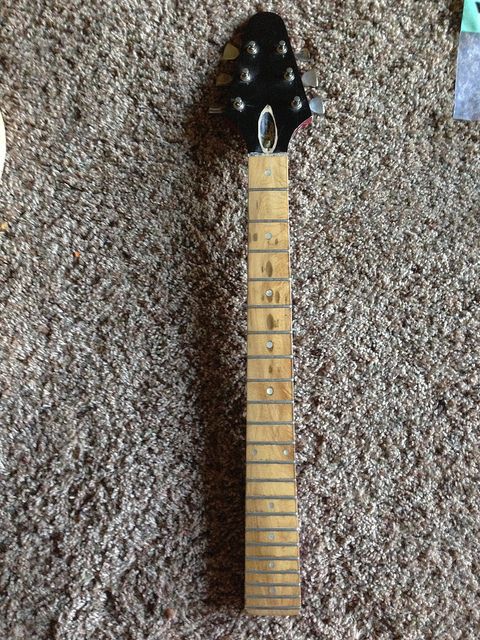
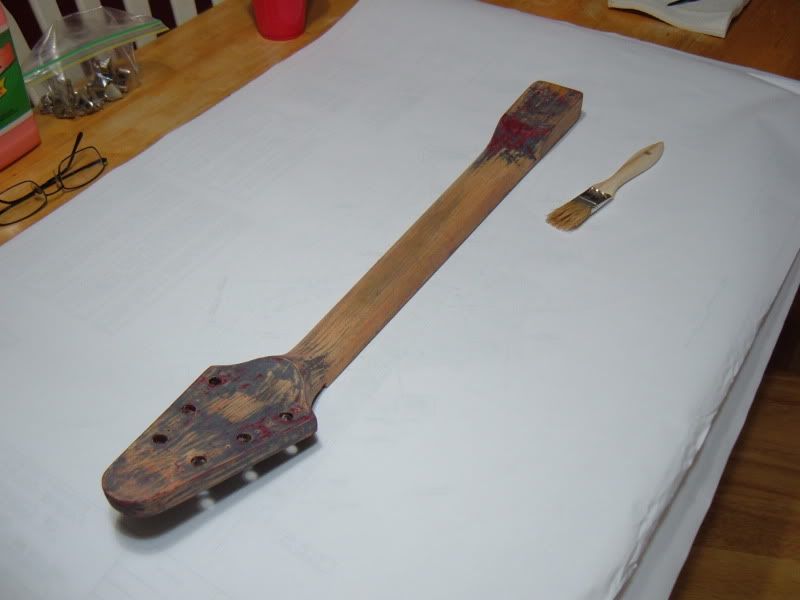
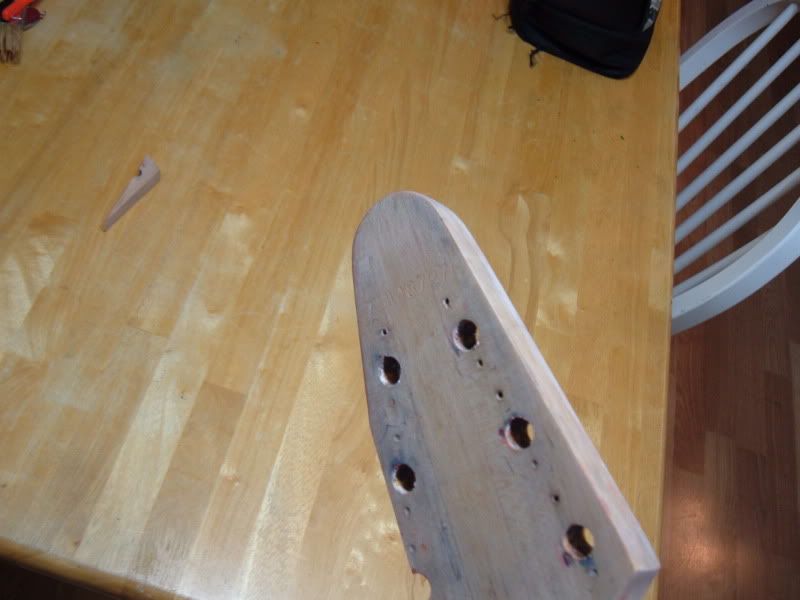
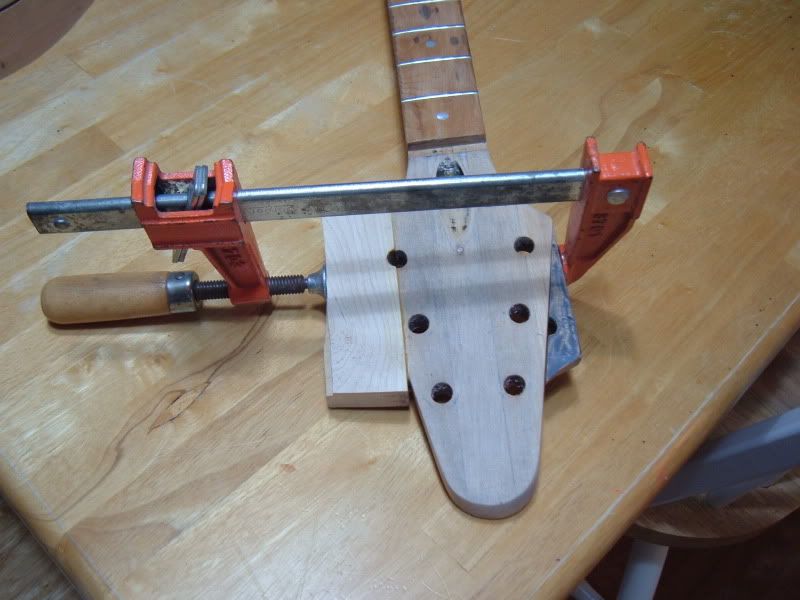
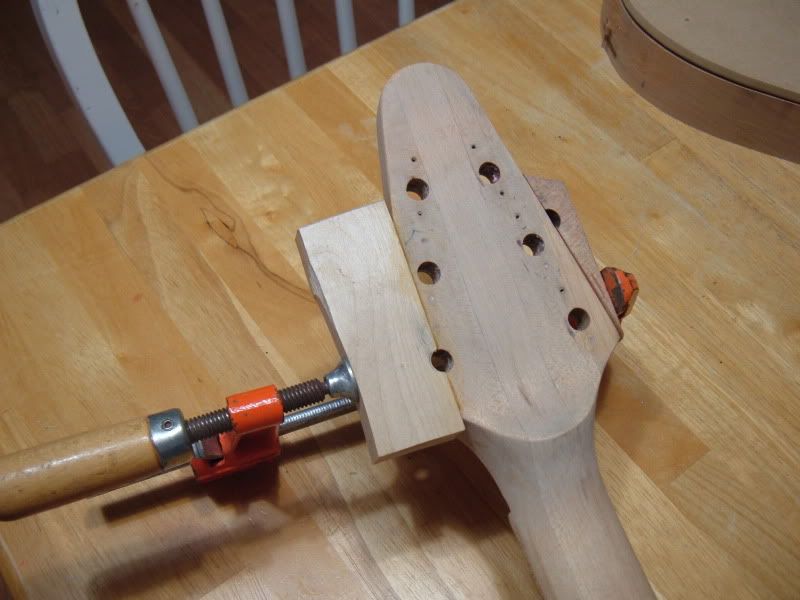
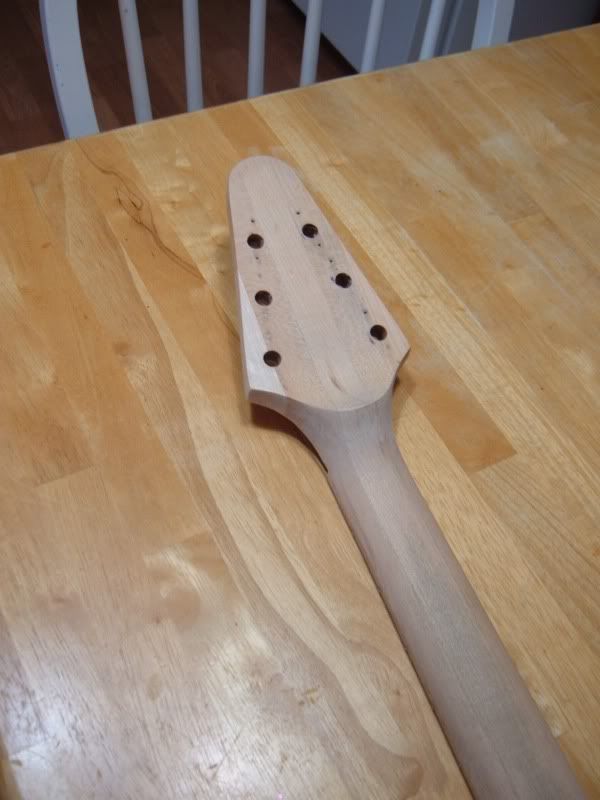
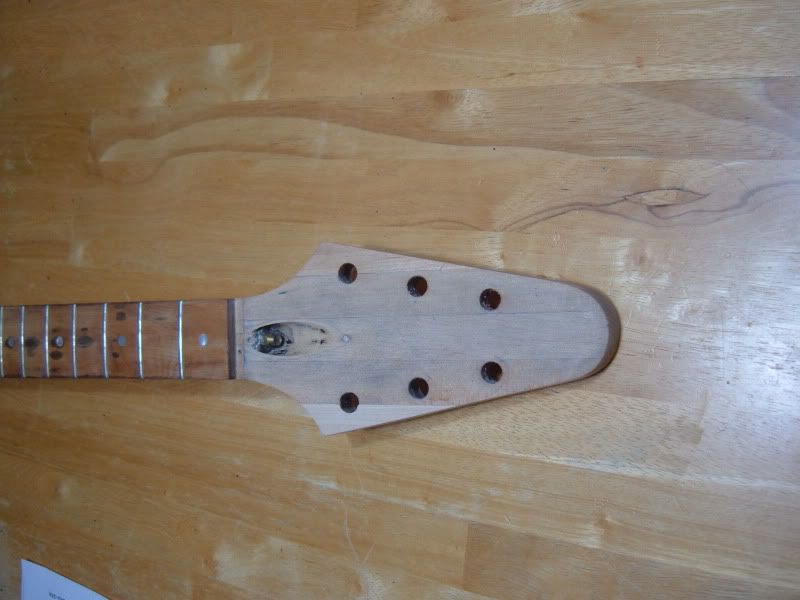
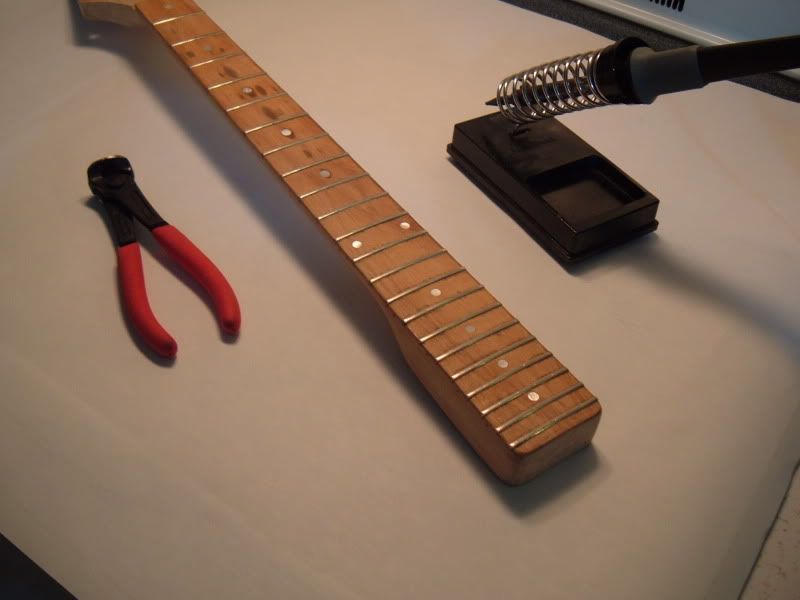
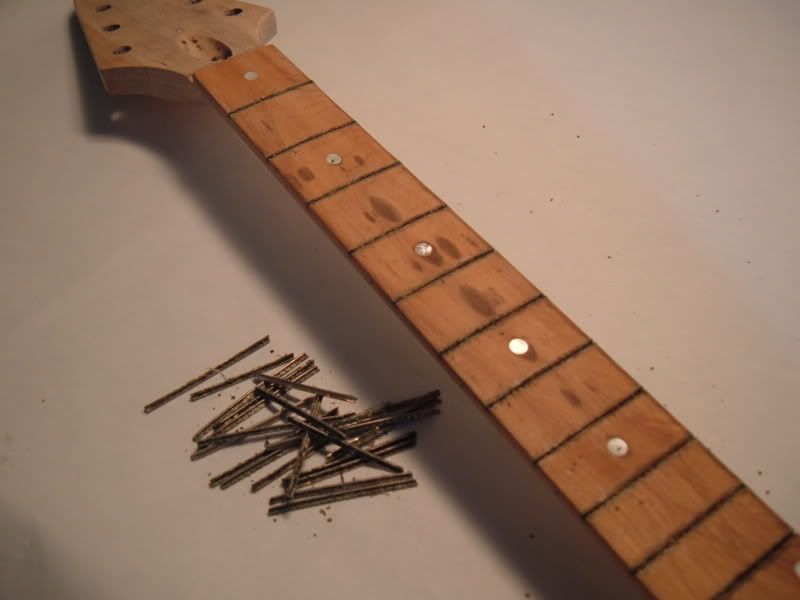
I've done some more work on the neck to take care of the worn frets and fretboard divots.
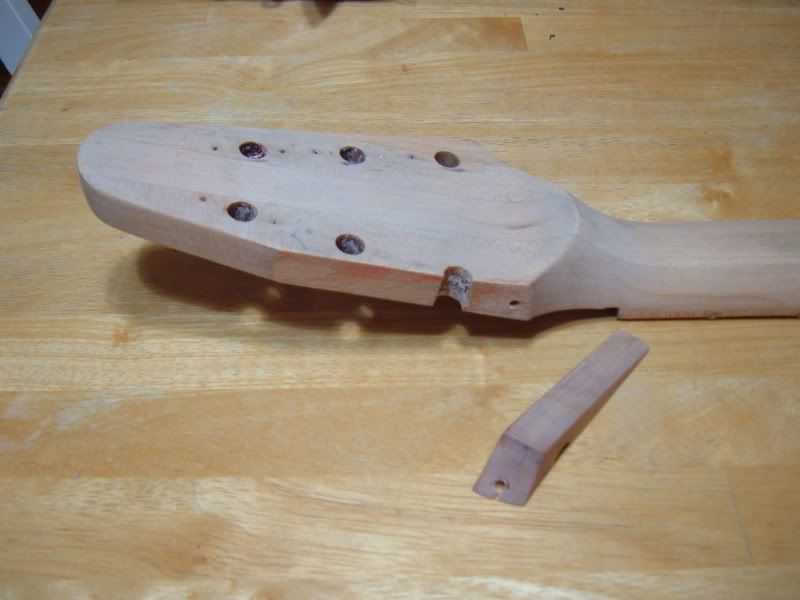
Step 1: Pull the frets. I used a soldering iron to heat each fret before pulling them.
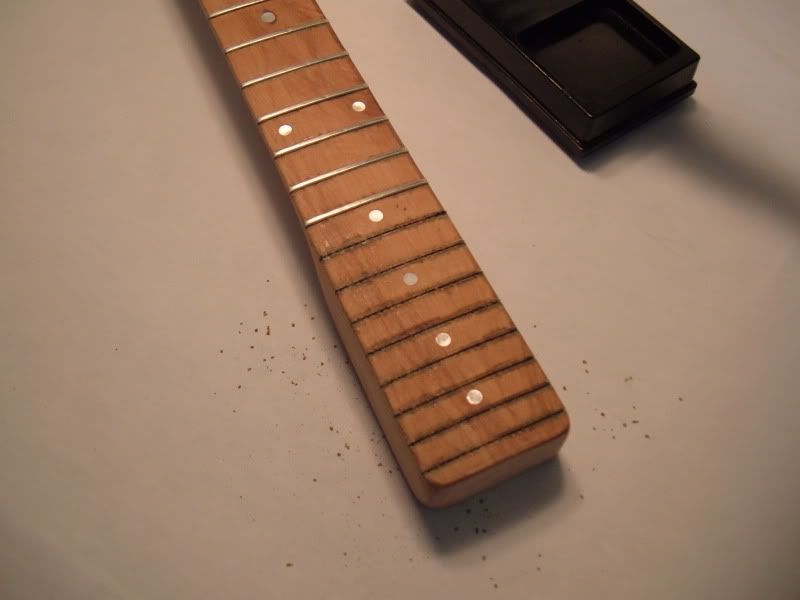
Once they were pulled I took some fine sandpaper and a 12" radius block to the fretboard.
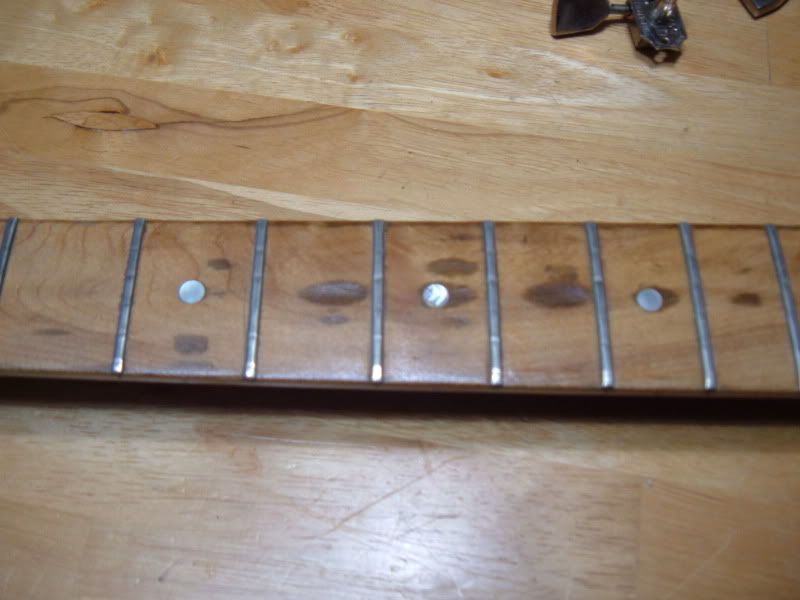
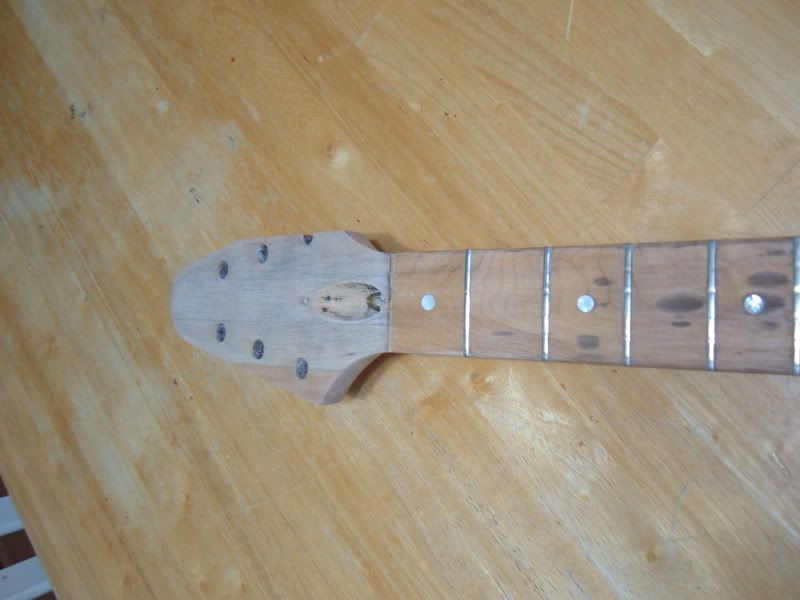
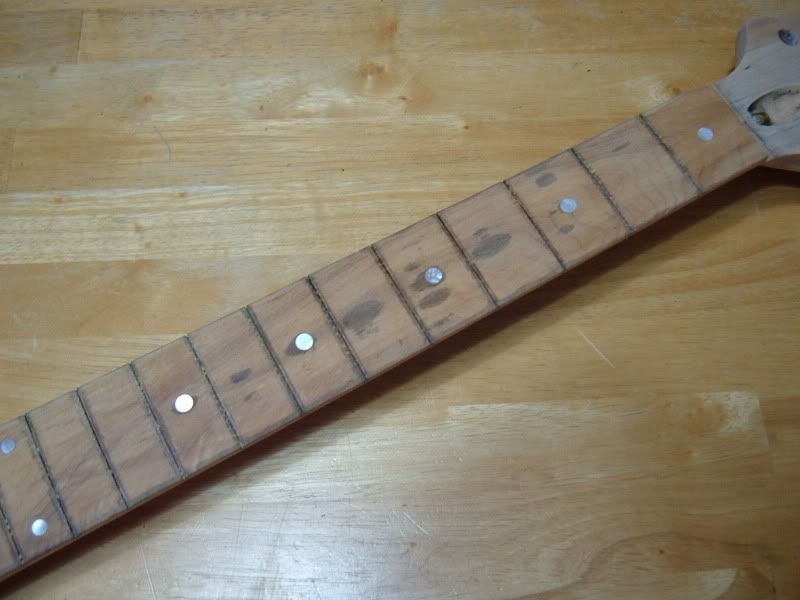
Step 2: Steam out the divots. For this I took an exacto knife with a new blade and lighty scored the divots along the grain. Then I took a damp handtowel and laid it on the divot and applied the tip of a clothes iron to the cloth for 3 or 4 seconds. I did this repeatedly to get the wood grain to swell and make the divot disappear. The deep divots are still there but they are much more shallow and can barely be felt when I run my fingers over them.
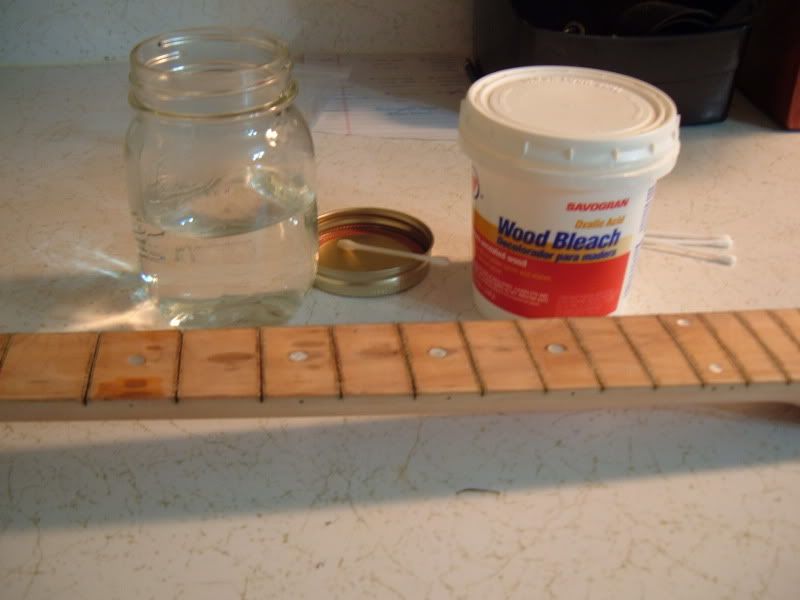
Step 3: Bleach out the stains. I used a little wood bleach to lighten the stains on the fretboard and on the back of the neck.
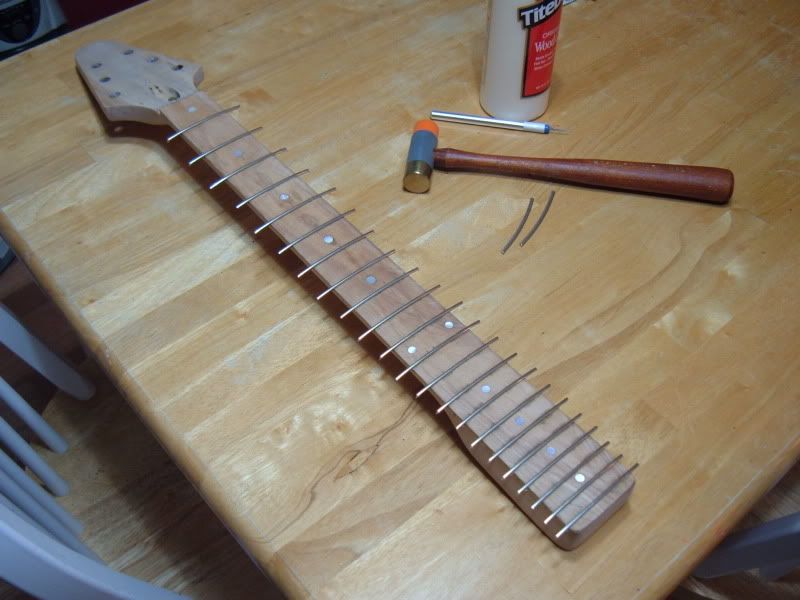
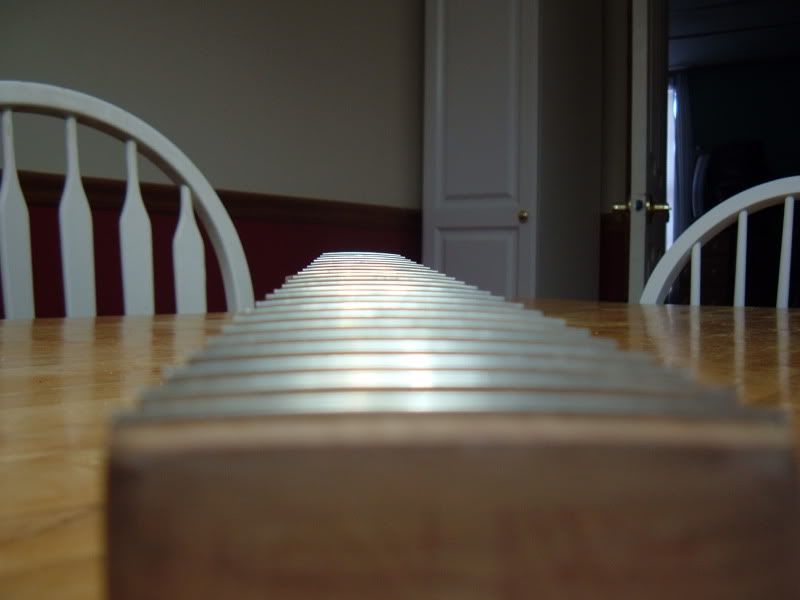
Step 4: New frets. I cleaned out the fret slots with an exacto and started the refret.
"Smells like Rock N' Roll"