MAYA - A baby Jaguar-shaped Duosonic

Talk about modding or building your own guitar from scratch.
User avatar
Amon 7.L
PAT. # 2.972.923
PAT. # 2.972.923
Posts: 743
Joined: Sun Aug 28, 2011 5:45 am

Re: MAYA - A baby Jaguar-shaped Duosonic

Post by Amon 7.L » Thu May 23, 2019 12:58 pm

It has been a few days shy of two months since the guitar has been painted and still didn't look completely cured.
Nonetheless, this weekend I decide to go ahead and proceed with the sanding and polishing stage.
I've started wet-sanding with 800 grit:
Image
Image
Of course, being that I had only one can of black and in spite of what the label said, the coverage hasn't been that thick, so... I had some sand thru. First of which in an open area :fp:

I was kind of digging the matte finish and I was bummed by the exposed primer around the tailpiece post hole so I just went ahead mocking things up and see how it looked with a spare black jaguar plate I had lying around in my parts bin. Not too bad, especially if I'll have to make a new one in black matte aluminium. (I also had to make another control plate because the other one has been mounted in my jagstang.)
Image

Anyway... frankly, at this point I was really enjoying the process and I just kept rubbing my way up to the higher grits 'till 2500 said it's enough.
Image
... and a polished mock-up
Image

Because I would have been disappointed if disaster didn't happen... Murphy much obliged:
Image
D'u no woh? Alkyd paint is an adorable trickster... As soon as I was wiping off the body, I've noticed the latex gloves I was wearing were having a blast at pissing off the black surface... it all went sort of melting, bubbling and flaking off. A major disaster. A galaxy/nebulae patterned disaster. Of course, I love it.

I had to remove gloves and start again with the sanding & polishing saga but the best I could do was to contain and smooth the damages out and move on. This is how it looks with the current bridge & tailpiece set up:
Image

It sure is functional but, there's still the toronado bridge option going on... so... Time to make a removable plug for the tom recess:
Image
Superimposing said bridge onto the body..
Image
Put some masking tape to mark the string thru holes location, drilled the two mounting holes and reattached the toronado bridge.... A quick moment at the drill press for the outer 4 holes and a scary heartbeat with the hand drill for the remaining inner two. All fine for now ( I didn't stabbed the body all the way thru and the back is fully intact)
Image

I didn't have enough time to finish the job on the back but I can't wait see how my first ferrules take will come out.

User avatar
Amon 7.L
PAT. # 2.972.923
PAT. # 2.972.923
Posts: 743
Joined: Sun Aug 28, 2011 5:45 am

Re: MAYA - A baby Jaguar-shaped Duosonic

Post by Amon 7.L » Fri May 24, 2019 12:23 pm

Quick update.
Today I managed to finish the job on the back side. Pushing my luck, I went on the drill press and run the bit all the way thru the outer four holes, the bit and the board were perfectly squared but the wood's fibers had their saying and even thou aligned, the E-E holes were spread an extra 1.5 mm apart from each other from what I have at the top of the body.
No big deal, just an adrenaline rush and I went on with printing a template for the ferrules layout, glued it on a board, drilled and finally double-side taped on the back of the body. One more trip at the drill press for the outer 4 holes and then hand drill for the inner 2.
Everything fine. no tear out, no paint chipping out.
Most important, the spread is even!
Image
At this stage I didn't want to install the ferrules right away 'cause the fitting is super snug and I'm afraid I won't be able to take'em out if I need to, so I just pushed'em just a bit in to see how they look.
It's my very first time doing this procedure, I'm so happy it went fine without much hassle.
Image

Now the body is modular and can be used with both the Toronado bridge and the TOM & Stoptail configuration without worrying about re-routing/plugging the bulks out if want to test other ideas.

The paint is still proving to be a real mischievous bugger, it just reacts to everything, even paper towels. I had to polish it again to remove some imprinting left during the routing. Oh well, tough luck I guess.

Next on the schedule: the wiring and the neck.
RE the former I'd like to ask you what kind of switching combinations would you go for with this set-up?
Image
Is it possible with those 2 3-Way ON-OFF-ON switches to get: Neck/Both/Bridge and a coil split for the mini hb?

User avatar
Rgand
PAT. # 2.972.923
PAT. # 2.972.923
Posts: 1171
Joined: Sun Mar 05, 2017 3:55 pm

Re: MAYA - A baby Jaguar-shaped Duosonic

Post by Rgand » Fri May 24, 2019 3:19 pm

I cover the body when working on it with Frisket Film to protect it from miscellaneous debris when working on it. I put it on the wood before finish to keep from getting scratches when routing and again after finishing to do the assembly.

User avatar
epizootics
PAT. # 2.972.923
PAT. # 2.972.923
Posts: 719
Joined: Wed Jun 28, 2017 10:29 pm
Location: Lyon, France

Re: MAYA - A baby Jaguar-shaped Duosonic

Post by epizootics » Fri May 24, 2019 9:32 pm

Those Disaster Galaxies actually look pretty great :) Maybe there's room for a few more?

Keep it going, you're almost there!
In terms of wiring, and if you don't want to add any other positions, the easiest way I can think of would be to use an ON/ON/ON DPDT switch that would act as a position selector and an ON/ON SPDT to split the coil. This way you would have no 'silent' positions, but maybe you want the kill switch effect in there?

User avatar
Amon 7.L
PAT. # 2.972.923
PAT. # 2.972.923
Posts: 743
Joined: Sun Aug 28, 2011 5:45 am

Re: MAYA - A baby Jaguar-shaped Duosonic

Post by Amon 7.L » Sat May 25, 2019 3:55 am

Rgand wrote:
Fri May 24, 2019 3:19 pm
I cover the body when working on it with Frisket Film to protect it from miscellaneous debris when working on it. I put it on the wood before finish to keep from getting scratches when routing and again after finishing to do the assembly.
This is really cool, I never heard of this product and I had to google something up to see what it actually is and, damn, it's what airbrush artists often use for their work... It's giving me ideas.. :ph34r:

epizootics wrote:
Fri May 24, 2019 9:32 pm
Those Disaster Galaxies actually look pretty great :) Maybe there's room for a few more?

Keep it going, you're almost there!
In terms of wiring, and if you don't want to add any other positions, the easiest way I can think of would be to use an ON/ON/ON DPDT switch that would act as a position selector and an ON/ON SPDT to split the coil. This way you would have no 'silent' positions, but maybe you want the kill switch effect in there?
Ahahahahah, if the paint keeps reacting to everything like it's doing now, Galaxies are bound to expand to unknown reach :D
The constellation of Doom would eventually be around the corner.

You're definitely right, using two ON/ON/ON DPDT would be ideal (I have 3 guitars with that pu selector + split configuration and I LOVE IT), but this time around I just have those two ON/OFF/ON switches in my parts bin and I would like to know from you mad skilled wiring wizards what can be done with this given set up.
I'm looking forward to hear from you guys :)

User avatar
Rgand
PAT. # 2.972.923
PAT. # 2.972.923
Posts: 1171
Joined: Sun Mar 05, 2017 3:55 pm

Re: MAYA - A baby Jaguar-shaped Duosonic

Post by Rgand » Sat May 25, 2019 5:29 am

Amon 7.L wrote:
Sat May 25, 2019 3:55 am
Rgand wrote:
Fri May 24, 2019 3:19 pm
I cover the body when working on it with Frisket Film to protect it from miscellaneous debris when working on it. I put it on the wood before finish to keep from getting scratches when routing and again after finishing to do the assembly.
This is really cool, I never heard of this product and I had to google something up to see what it actually is and, damn, it's what airbrush artists often use for their work... It's giving me ideas.. :ph34r:
It's much like the plastic coating that comes on pickguard material. It was recommended to me by a professional luthier on the Warmoth forum.

User avatar
Amon 7.L
PAT. # 2.972.923
PAT. # 2.972.923
Posts: 743
Joined: Sun Aug 28, 2011 5:45 am

Re: MAYA - A baby Jaguar-shaped Duosonic

Post by Amon 7.L » Sat May 25, 2019 11:47 am

Rgand wrote:
Sat May 25, 2019 5:29 am
Amon 7.L wrote:
Sat May 25, 2019 3:55 am
Rgand wrote:
Fri May 24, 2019 3:19 pm
I cover the body when working on it with Frisket Film to protect it from miscellaneous debris when working on it. I put it on the wood before finish to keep from getting scratches when routing and again after finishing to do the assembly.
This is really cool, I never heard of this product and I had to google something up to see what it actually is and, damn, it's what airbrush artists often use for their work... It's giving me ideas.. :ph34r:
It's much like the plastic coating that comes on pickguard material. It was recommended to me by a professional luthier on the Warmoth forum.
I'm thinking... Do you think it's possible to paint on top of it?
I mean, the current paint is reacting to everything, even to the low tack masking tape after a few minutes application it shows lines and whatnot. I was working on it this afternoon and still founding more issues on the surface, so, if this film can act as a stable barrier between the current finish and a new one on top, it could be a way to customized it.

Note:
This post has been edited due to an error on my part whilst compiling a schematic request to fellow Shadoweclipse13.
Sorry for the confusion I might have caused.

User avatar
Rgand
PAT. # 2.972.923
PAT. # 2.972.923
Posts: 1171
Joined: Sun Mar 05, 2017 3:55 pm

Re: MAYA - A baby Jaguar-shaped Duosonic

Post by Rgand » Sat May 25, 2019 1:18 pm

Amon 7.L wrote:
Sat May 25, 2019 11:47 am
Rgand wrote:
Sat May 25, 2019 5:29 am
Amon 7.L wrote:
Sat May 25, 2019 3:55 am


This is really cool, I never heard of this product and I had to google something up to see what it actually is and, damn, it's what airbrush artists often use for their work... It's giving me ideas.. :ph34r:
It's much like the plastic coating that comes on pickguard material. It was recommended to me by a professional luthier on the Warmoth forum.
I'm thinking... Do you think it's possible to paint on top of it?
I mean, the current paint is reacting to everything, even to the low tack masking tape after a few minutes application it shows lines and whatnot. I was working on it this afternoon and still founding more issues on the surface, so, if this film can act as a stable barrier between the current finish and a new one on top, it could be a way to customized it.

Note:
This post has been edited due to an error on my part whilst compiling a schematic request to fellow Shadoweclipse13.
Sorry for the confusion I might have caused.
I can't say about that. It's a type of vinyl so paint probably won't stick. Can't say how it would work as a tape to mask some part off. I guess you could always try it but it sounds like the paint you have is pretty nasty stuff. If you just want to mask off a portion or a design, have you tried fine line tape from an automotive paint supply?

User avatar
Amon 7.L
PAT. # 2.972.923
PAT. # 2.972.923
Posts: 743
Joined: Sun Aug 28, 2011 5:45 am

Re: MAYA - A baby Jaguar-shaped Duosonic

Post by Amon 7.L » Sat May 25, 2019 3:02 pm

Rgand wrote:
Sat May 25, 2019 1:18 pm
Amon 7.L wrote:
Sat May 25, 2019 11:47 am
Rgand wrote:
Sat May 25, 2019 5:29 am

It's much like the plastic coating that comes on pickguard material. It was recommended to me by a professional luthier on the Warmoth forum.
I'm thinking... Do you think it's possible to paint on top of it?
I mean, the current paint is reacting to everything, even to the low tack masking tape after a few minutes application it shows lines and whatnot. I was working on it this afternoon and still founding more issues on the surface, so, if this film can act as a stable barrier between the current finish and a new one on top, it could be a way to customized it.

Note:
This post has been edited due to an error on my part whilst compiling a schematic request to fellow Shadoweclipse13.
Sorry for the confusion I might have caused.
I can't say about that. It's a type of vinyl so paint probably won't stick. Can't say how it would work as a tape to mask some part off. I guess you could always try it but it sounds like the paint you have is pretty nasty stuff. If you just want to mask off a portion or a design, have you tried fine line tape from an automotive paint supply?
Mmm, I see. I never worked with vinyl before and I guess I'm better off without messing with a nasty platform such as this alkyd.
I definitely tried the tape from automotive supply, it's the "low tack" I was talking about in the previous post, it doesn't work properly, it just leaves marks no matter what.
I was on the verge of painting the competition stripes with the other spray can of Dakota-ish Red alkyd paint I have, but I'd be surely tickling the dragon's tail if I were to do it.
In spite of what I've read online and what's written in the can itself, it doesn't build up this acclaimed thick film nor does have this "GREAT BOND WITH BOTH PLASTIC, METAL AND WOOD", it doesn't fully harden in 2 weeks (I'm now well over a month and still is unstable to say the least), last nail on the coffin: you can't over coating it with anything. No nitro, no acrylics, no sintetics. Nothing.
Unless you're a pro painter with experience with this particular resin, I'd suggest to stay away from this specimen.

User avatar
Rgand
PAT. # 2.972.923
PAT. # 2.972.923
Posts: 1171
Joined: Sun Mar 05, 2017 3:55 pm

Re: MAYA - A baby Jaguar-shaped Duosonic

Post by Rgand » Sat May 25, 2019 9:08 pm

Amon 7.L wrote:
Sat May 25, 2019 3:02 pm
Rgand wrote:
Sat May 25, 2019 1:18 pm
Amon 7.L wrote:
Sat May 25, 2019 11:47 am


I'm thinking... Do you think it's possible to paint on top of it?
I mean, the current paint is reacting to everything, even to the low tack masking tape after a few minutes application it shows lines and whatnot. I was working on it this afternoon and still founding more issues on the surface, so, if this film can act as a stable barrier between the current finish and a new one on top, it could be a way to customized it.

Note:
This post has been edited due to an error on my part whilst compiling a schematic request to fellow Shadoweclipse13.
Sorry for the confusion I might have caused.
I can't say about that. It's a type of vinyl so paint probably won't stick. Can't say how it would work as a tape to mask some part off. I guess you could always try it but it sounds like the paint you have is pretty nasty stuff. If you just want to mask off a portion or a design, have you tried fine line tape from an automotive paint supply?
Mmm, I see. I never worked with vinyl before and I guess I'm better off without messing with a nasty platform such as this alkyd.
I definitely tried the tape from automotive supply, it's the "low tack" I was talking about in the previous post, it doesn't work properly, it just leaves marks no matter what.
I was on the verge of painting the competition stripes with the other spray can of Dakota-ish Red alkyd paint I have, but I'd be surely tickling the dragon's tail if I were to do it.
In spite of what I've read online and what's written in the can itself, it doesn't build up this acclaimed thick film nor does have this "GREAT BOND WITH BOTH PLASTIC, METAL AND WOOD", it doesn't fully harden in 2 weeks (I'm now well over a month and still is unstable to say the least), last nail on the coffin: you can't over coating it with anything. No nitro, no acrylics, no sintetics. Nothing.
Unless you're a pro painter with experience with this particular resin, I'd suggest to stay away from this specimen.
Well, heck. You could always make some samples and see how you so with those.

User avatar
Amon 7.L
PAT. # 2.972.923
PAT. # 2.972.923
Posts: 743
Joined: Sun Aug 28, 2011 5:45 am

Re: MAYA - A baby Jaguar-shaped Duosonic

Post by Amon 7.L » Mon May 27, 2019 11:04 am

Rgand wrote:
Sat May 25, 2019 9:08 pm
Amon 7.L wrote:
Sat May 25, 2019 3:02 pm
Rgand wrote:
Sat May 25, 2019 1:18 pm

I can't say about that. It's a type of vinyl so paint probably won't stick. Can't say how it would work as a tape to mask some part off. I guess you could always try it but it sounds like the paint you have is pretty nasty stuff. If you just want to mask off a portion or a design, have you tried fine line tape from an automotive paint supply?
Mmm, I see. I never worked with vinyl before and I guess I'm better off without messing with a nasty platform such as this alkyd.
I definitely tried the tape from automotive supply, it's the "low tack" I was talking about in the previous post, it doesn't work properly, it just leaves marks no matter what.
I was on the verge of painting the competition stripes with the other spray can of Dakota-ish Red alkyd paint I have, but I'd be surely tickling the dragon's tail if I were to do it.
In spite of what I've read online and what's written in the can itself, it doesn't build up this acclaimed thick film nor does have this "GREAT BOND WITH BOTH PLASTIC, METAL AND WOOD", it doesn't fully harden in 2 weeks (I'm now well over a month and still is unstable to say the least), last nail on the coffin: you can't over coating it with anything. No nitro, no acrylics, no sintetics. Nothing.
Unless you're a pro painter with experience with this particular resin, I'd suggest to stay away from this specimen.
Well, heck. You could always make some samples and see how you so with those.
Yeah, I might give it a try at some point and see comes out.

In the meantime, during the downpour that has graced us this entire weekend, I did some work on the neck. I had already cut the maple blank last year, so I just went on reshaping the headstock to a smaller jazzmaster-ish shape, slotted & glued the fretboard.
Last and most annoying part: block sanded the radius... It took long hours.

There was a tiny chip on the fretboard but nothing to worry about as it would have been gone after the sanding.
Image

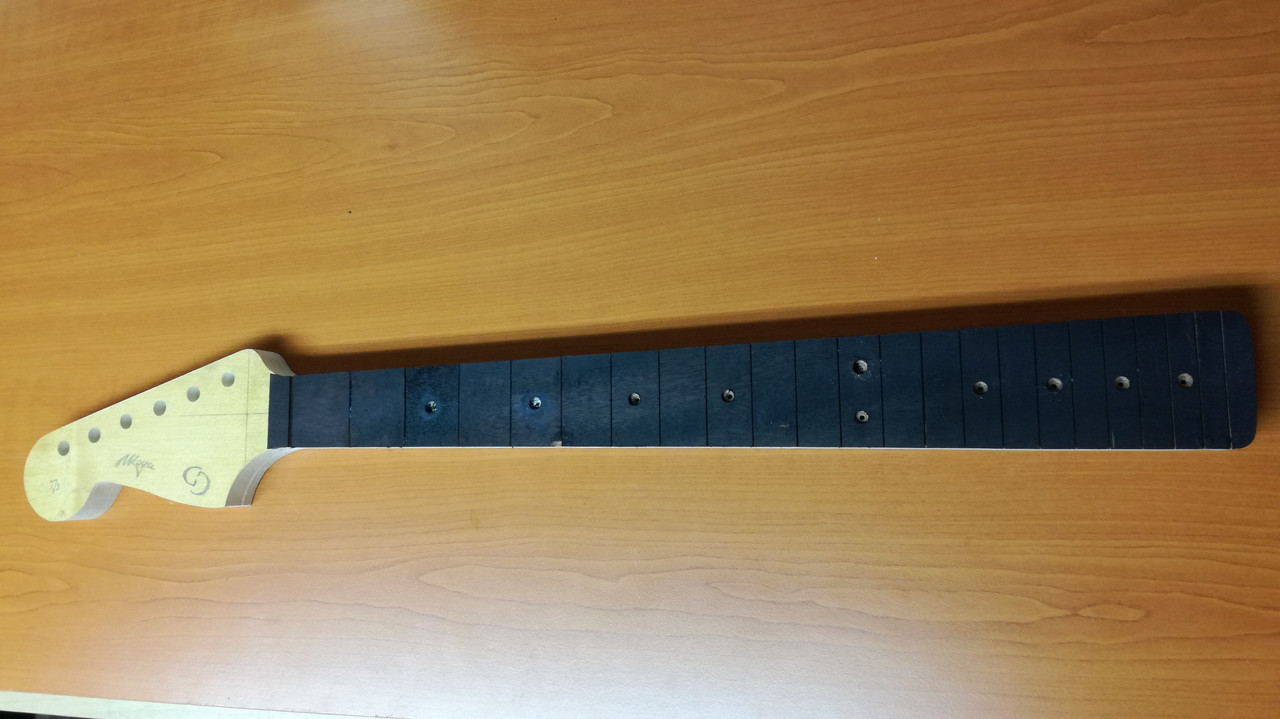
Also, I put some shellac on the raw headstock to see how it looks and dyed the fretboard black to help me out tracking the developing of the radius during the sanding stage.
Image

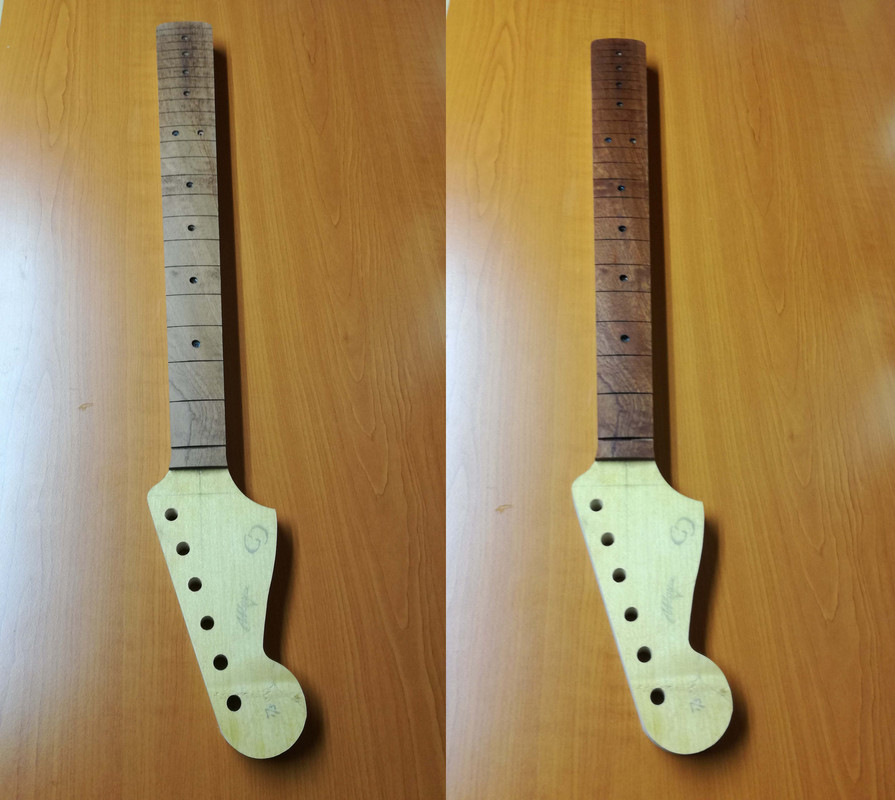
Finished fretboard sporting with a comfy 9.5" radius. (raw on the left side, with moisture on the right)
Image

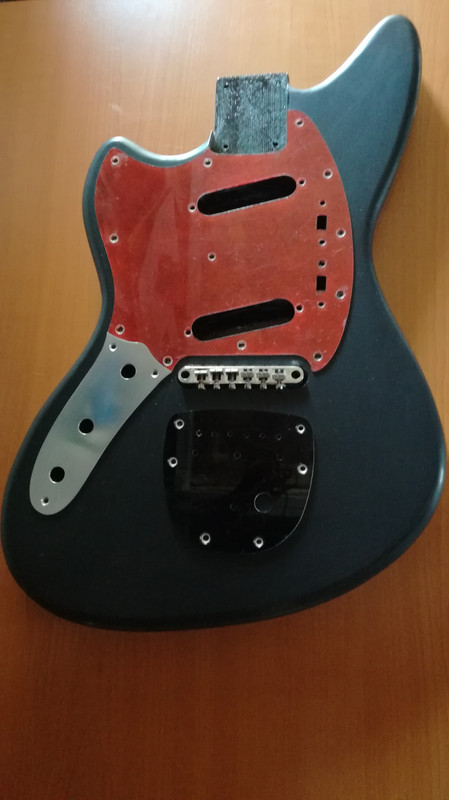
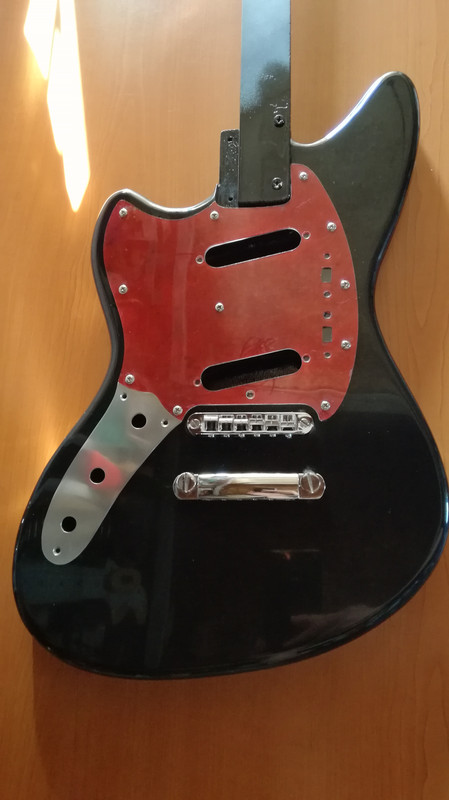
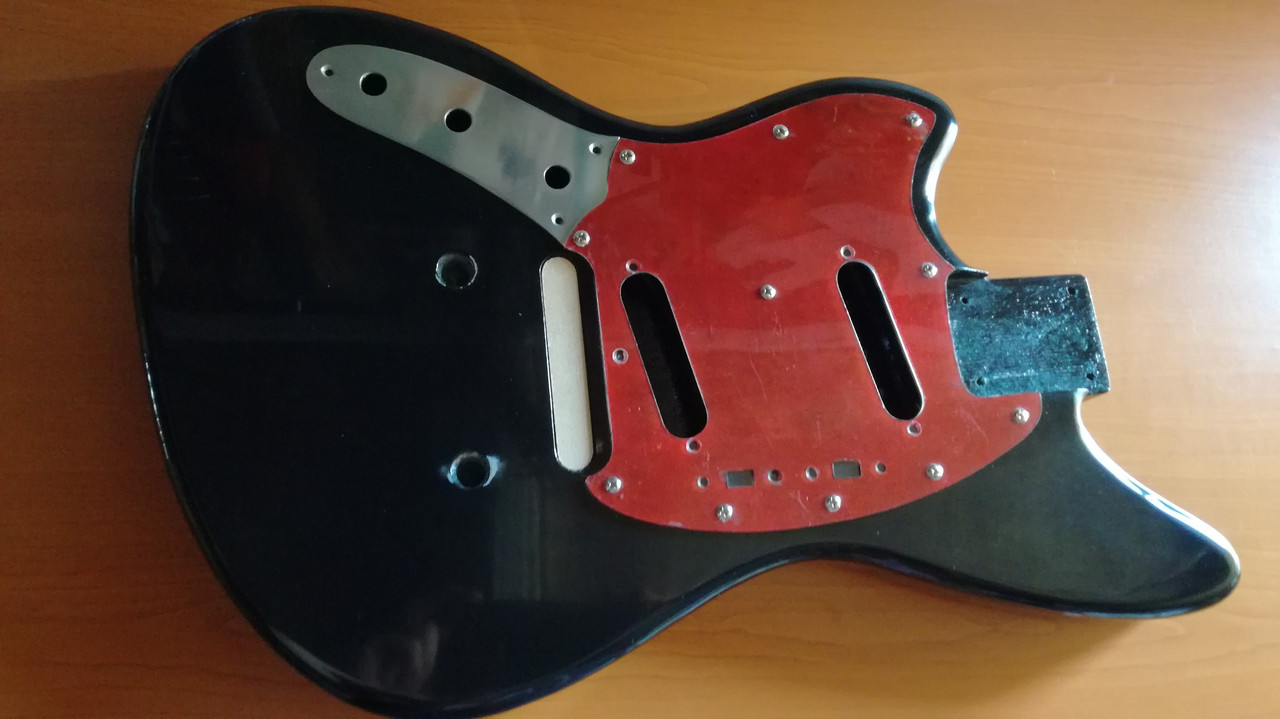
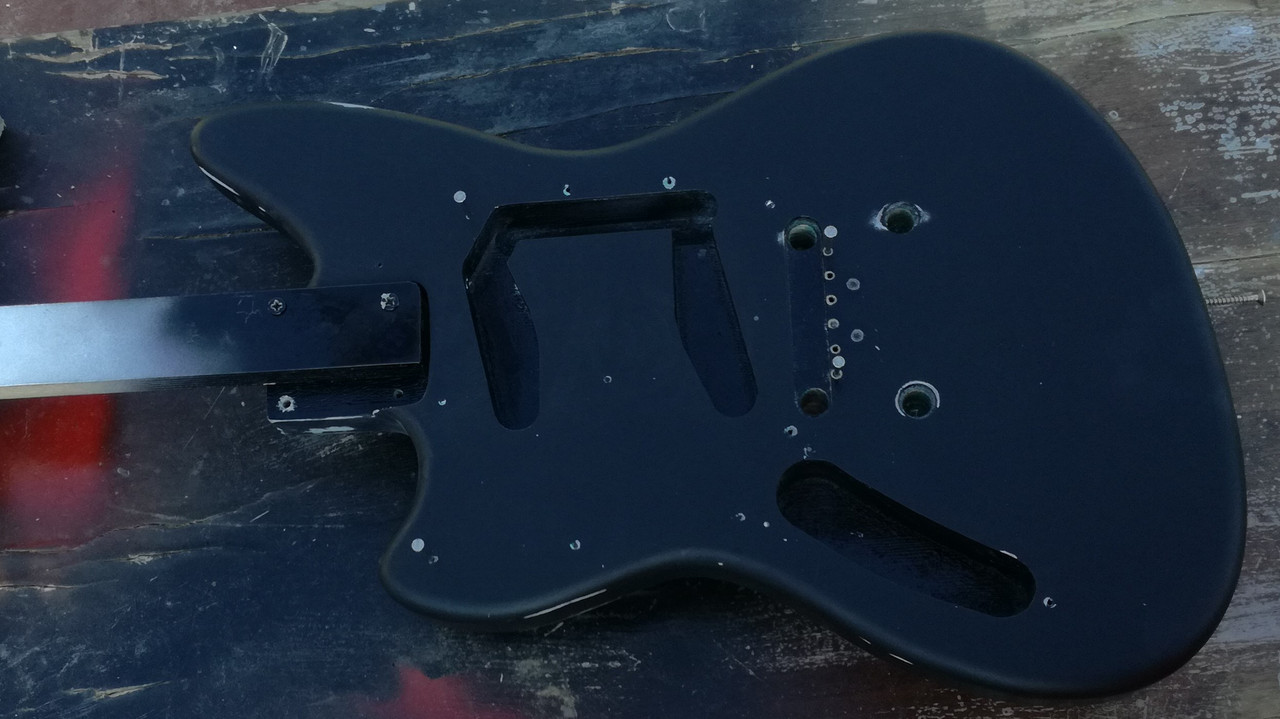
What else..., oh yeah! I've also spray painted the removable plugs for the TOM recess and for the stoptailpiece.
As a job I can't say it's impressive but it's definitely expressive:
Image

mock up:
Image

I wanted to keep moving forward with the neck but I happily discovered that whilst I have plenty of side dot sticks, I DON'T HAVE ANY FRET DOTS LEFT!! :wtf: :fp:

WARNING, ALERT, BEWARE: incoming brainfart.
By now you must have had the impression that this is not a scratch build but a long length attack of DIY nonsense, I can't blame you for that.

Anyhow, let's move on and get back on the tracks.
I took a look around in the parts bin and I found a massive bubble-wrapped/air-proof sealed brick. Of course I had to nuke each bubble with the most enjoyable happy grin on my face before just easily take it out but, heck.. there it is, the answer to ALL of my problems:
Image
Yes. Fucking clay.
I remember this is trustable stuff, I used it great success two years ago when I've been asked by a Potter enthusiastic ex-gf to make some wands to complete our costumes. Yes, nothing short of the Elder Wand.
Image
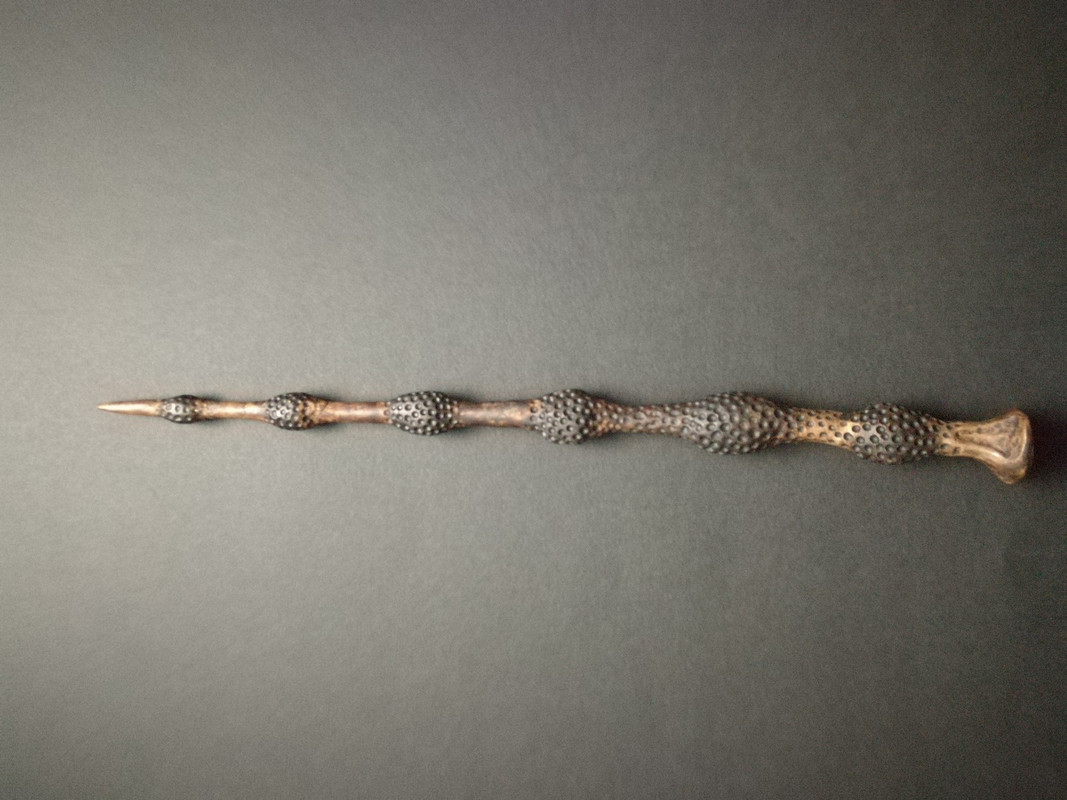
This FIMO clay has proven IN THE PAST to be extremely easy to work with, it bonds great with wood, it accepts dyes like a champ without any side effect and fortunately the package is still like brand new and perfectly usable.

I just had to go ahead with a scrap of wood, drilled some holes and tested some natural 24hrs air-dried FIMO dots onto it.
As foreseen by my lizard brain, what has worked IN THE PAST is not going to work WITH ME in the present.

"What has happened?" You'd ask, well... For one, the dots don't keep their round shape when you install'em, two: they crack when you sand'em (in case they didn't crack during installation in the first place.)

I have a mild OCD-driven orientation when dealing with shapes/sizes/proportions and geometry in general, that means that nothing short of a "perfect match" equals to a horde hamsters screeching inside my brain.
In order to stop said unpleasant noise I had to think fast, faster, ludicrously faster and: BANG! There it is, the old man's trick: baking soda+superglue.
It's easy and fast, furthermore: it hardens pretty rocky.

Same show: same scrap woods, different holes but this time filled with said baking soda and then a few drops of superglue.
Dried rock solid, I even had some very welcome resistance whilst sanding the dots flat, again… they cracked.
Image

What should I do to achieve a trusty dot that can handle the fretboard ebonizing process without getting stained?

I've eventually thought about using crayons as a dot markers but they're too thick to start with (nothing fixable with a jig if it's a feasible alternative) and I never messed with them so far... Too many thoughts.

User avatar
Steadyriot.
PAT. # 2.972.923
PAT. # 2.972.923
Posts: 1272
Joined: Wed Mar 09, 2011 2:16 pm
Location: The Netherlands

Re: MAYA - A baby Jaguar-shaped Duosonic

Post by Steadyriot. » Wed May 29, 2019 2:11 am

Bummer on the dots!
Crayons are cool but I bet they won't really stick (unless you melt them into the holes! Hmm...) because they are wax. They'd wear down fast too because of that.

You could try some Apoxie Sculpt if you want to shop around. That stuff is great for dots, bindings etc. and mixable with almost any coloring. Should be available at your local hobby store / online. Lots of info on that over @ TDPRI

You could drill the holes in the neck and just fill them in instead of making dots and gluing them in.
Throw some glitter in there and level it with CA / epoxy! Go wild! :w00t: :w00t:
"If someone duetted with a Bald Eagle, they could rule the Country charts from here to eternity." ~shadowplay

User avatar
Amon 7.L
PAT. # 2.972.923
PAT. # 2.972.923
Posts: 743
Joined: Sun Aug 28, 2011 5:45 am

Re: MAYA - A baby Jaguar-shaped Duosonic

Post by Amon 7.L » Wed May 29, 2019 10:21 am

Steadyriot. wrote:
Wed May 29, 2019 2:11 am
Bummer on the dots!
Crayons are cool but I bet they won't really stick (unless you melt them into the holes! Hmm...) because they are wax. They'd wear down fast too because of that.

You could try some Apoxie Sculpt if you want to shop around. That stuff is great for dots, bindings etc. and mixable with almost any coloring. Should be available at your local hobby store / online. Lots of info on that over @ TDPRI

You could drill the holes in the neck and just fill them in instead of making dots and gluing them in.
Throw some glitter in there and level it with CA / epoxy! Go wild! :w00t: :w00t:
You've got a good point about crayons, being them wax they surely wear down pretty fast... Good call, you just saved me the hassle of test'em out.

I'm gonna do some research on the Apoxie Sculpt, the TDPRI suggestion is pretty much welcome, thanks alot!

RE_ drilling the hole in the neck and just filling them is what I just did with the baking soda powder and the superglue, problem is the dots don't end up perfectly round and they crack :fp:

A few hours I was ronzing around the parts bin and found a metal rod that was exactly the perfect diameter for the job, I tried to cut it to make dots out of it but the main problem that is to hard to sand to the 9.5" as it's needed in the fretboard. Even with a 60 grit sandpaper the rod wasn't getting any sanding.

If you guys have any suggestion, don't be shy, this is a space where all brainfarts are welcome!


P.S.:
If someone with wiring knowledge has a second, could check this schematic out and see if it's correct? Thanks a lot :)
http://www.offsetguitars.com/forums/vie ... 0#p1565510

User avatar
Amon 7.L
PAT. # 2.972.923
PAT. # 2.972.923
Posts: 743
Joined: Sun Aug 28, 2011 5:45 am

Re: MAYA - A baby Jaguar-shaped Duosonic

Post by Amon 7.L » Mon Aug 26, 2019 11:15 am

Long time since the last update as I was still waiting for the paint to fully cure but, after months and months of waiting, when it finally looked like it was done, the outcome was that a lot of the paint has sunken quite a lot revealing the vertical seams. :fp:

It was the last nail on the coffin.
I could tolerate those galaxy-shaped sand-thrus as character, but all of those seams (if you haven't read the entire thread, the guitar is made out of 15 pieces of wood sandwiched between two layers of MDF :whistle: ) were a little too much, hence: scoffing back to square one until it's all levelled and re-spray the whole thing.

Before:
Image
Image

Afterwards:
Image
Image
Image

Let's see how it goes this time around.

User avatar
will
PAT. # 2.972.923
PAT. # 2.972.923
Posts: 1113
Joined: Sat Oct 20, 2012 3:36 pm
Contact:

Re: MAYA - A baby Jaguar-shaped Duosonic

Post by will » Mon Aug 26, 2019 9:34 pm

Rgand wrote:
Tue May 14, 2019 2:17 pm
When you drill the string through holes, only go halfway through. Then set up a piece of MDF with a pin in it the same size as the holes. Center that in your drill press (hopefully you have one) and clamp it down. Then set the body on that on each of the string through holes so you can drill them from the other side. Everything will line up nicely that way. Do that for both the through holes (1/8") and the ferrule holes (5/16"). I use a couple paper towels to protect the top of the body from minor scratches when I slip it onto the pin.
Such a nice solution! - thanks for sharing.

Post Reply