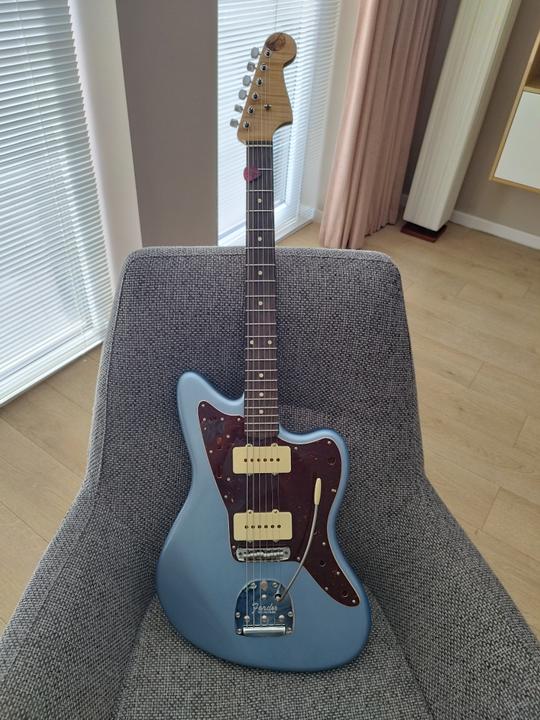
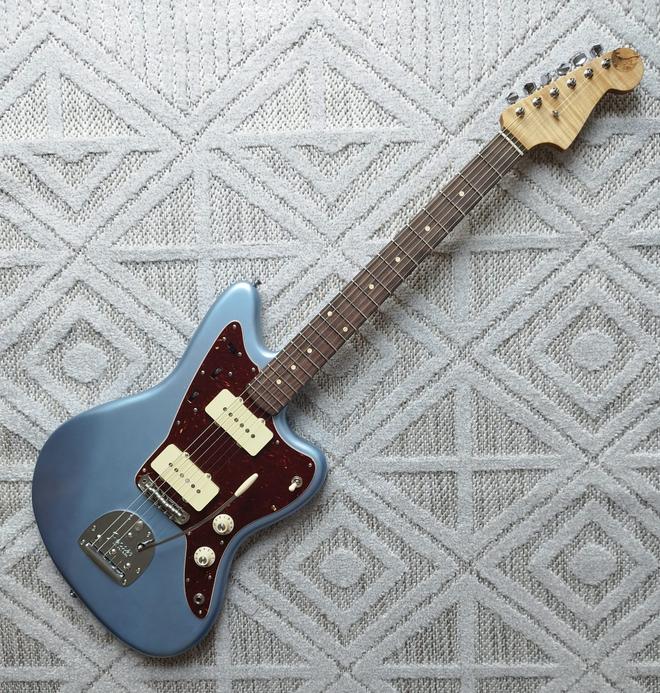
Home-made Jazzmaster... or Surfmaster.

Talk about modding or building your own guitar from scratch.
User avatar
DrippyReverbTremolo
PAT. # 2.972.923
PAT. # 2.972.923
Posts: 139
Joined: Mon Sep 18, 2023 12:39 pm

Home-made Jazzmaster... or Surfmaster.

Post by DrippyReverbTremolo » Thu Sep 21, 2023 9:35 am

I've been getting into the Jazzmaster after buying a Squier JM 40th Anniv. which I really like. Always wanted to try my hand at building an electric guitar. Purchased a set of templates, wood and parts. The city where I live has a fully loaded woodshop (machines and hand tools) where you pay a nominal fee & can ask the staff for help or advice. Very cool.

So here we go.

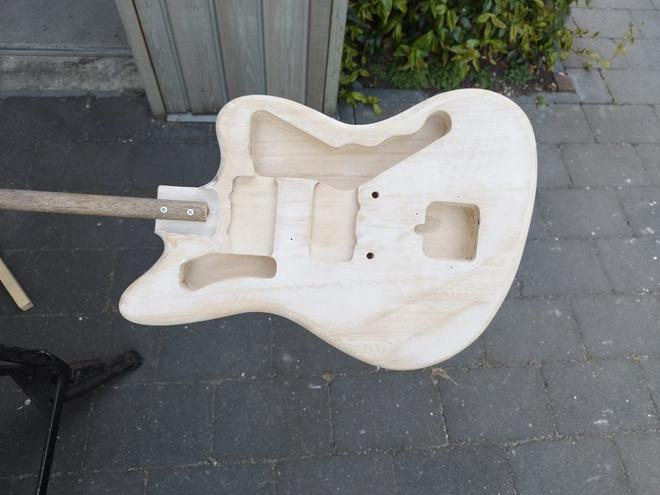
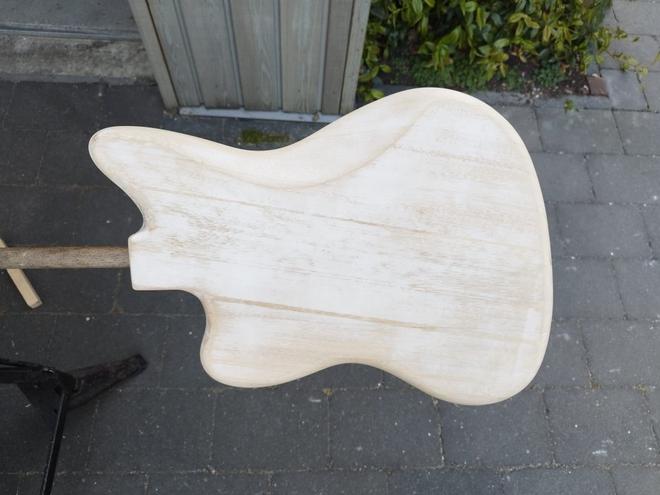
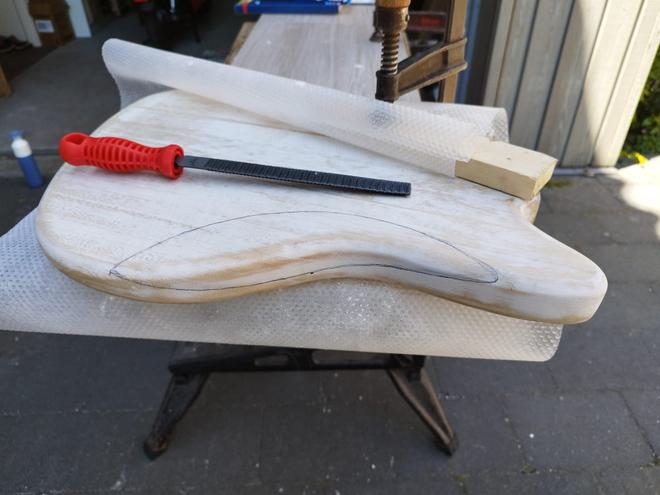
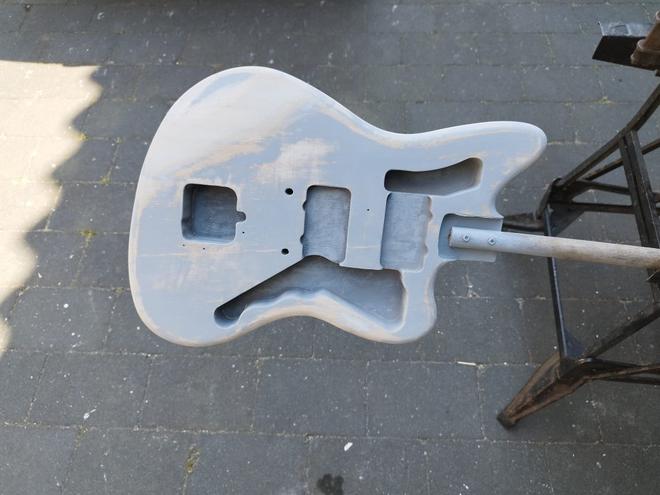
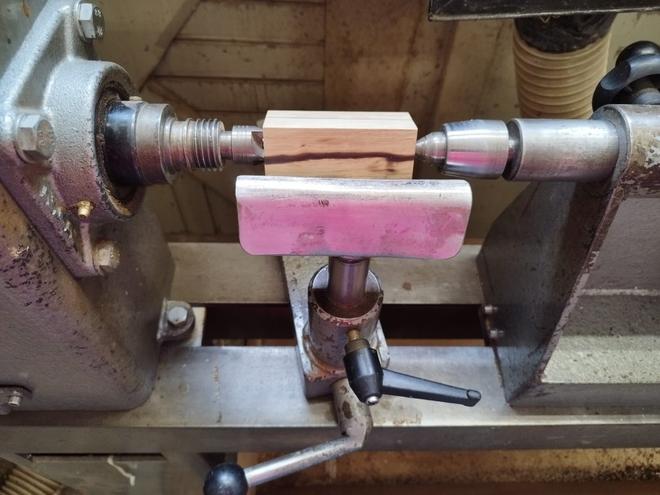
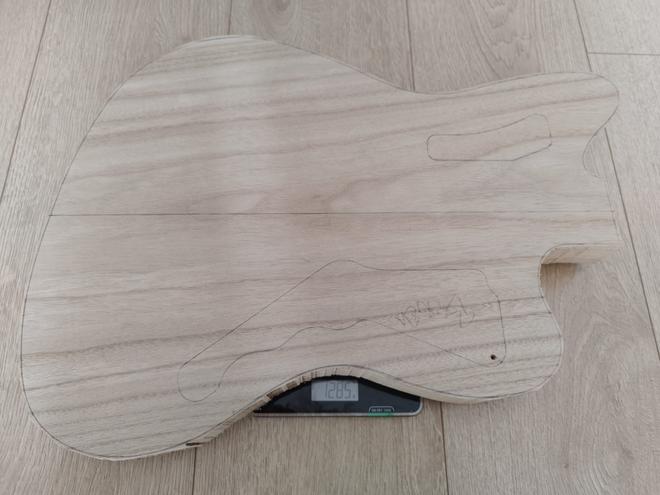
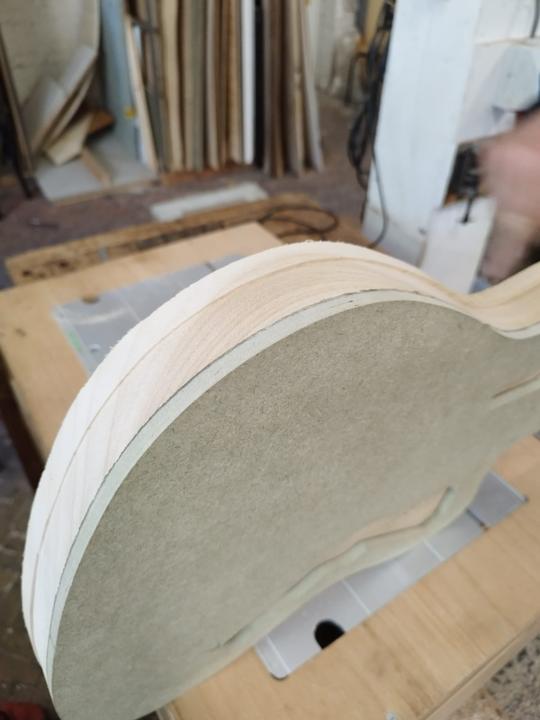
Purchased a piece torrified Paulownia online from Germany. It supposedly sounds somewhere in between Ash and Alder. It's very light: the rough cut body was 1,28 Kg or 2,9 Lbs. Downside: it's very soft. It dents if you look at it funny.
Image

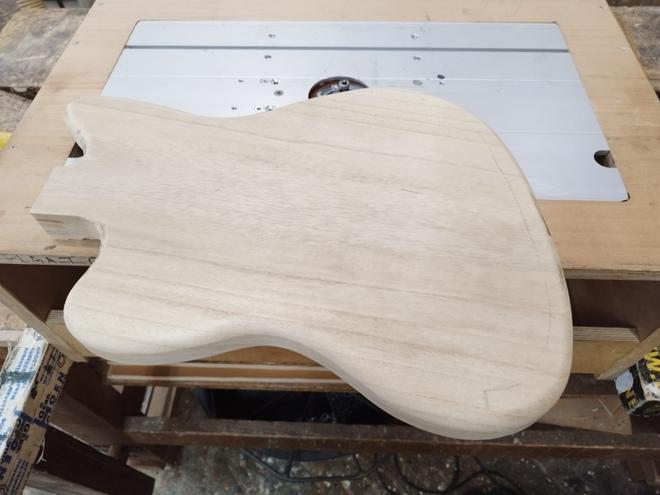
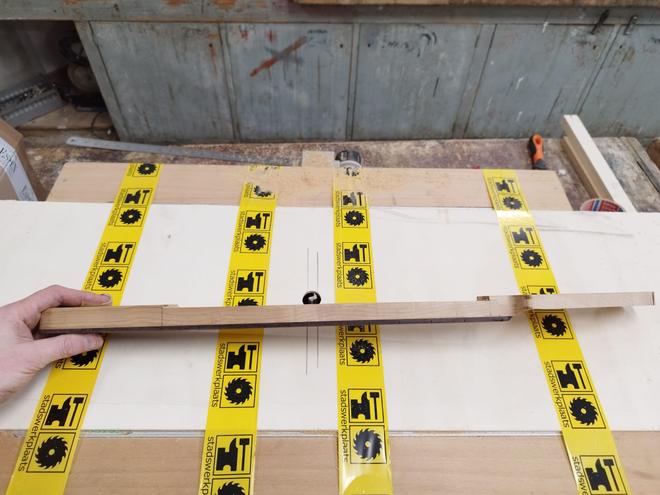
Rough cut with a table saw.
Image

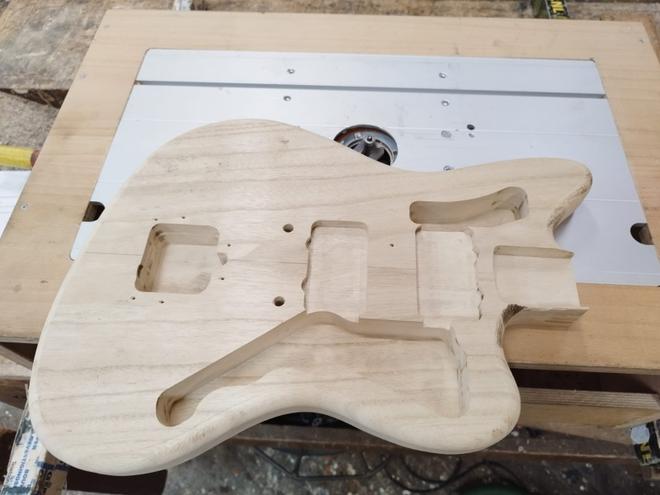
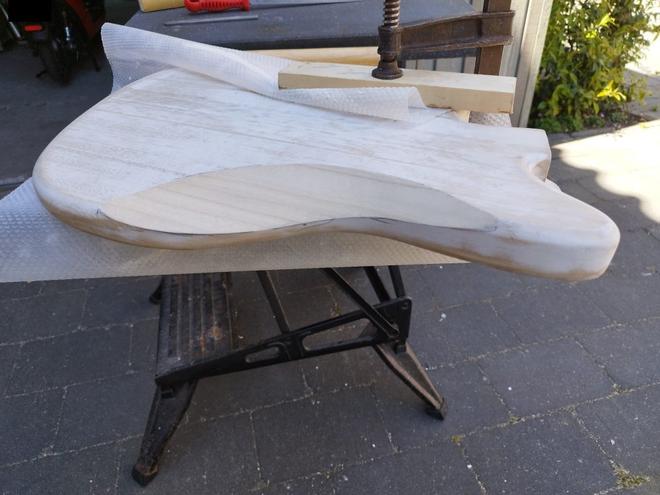
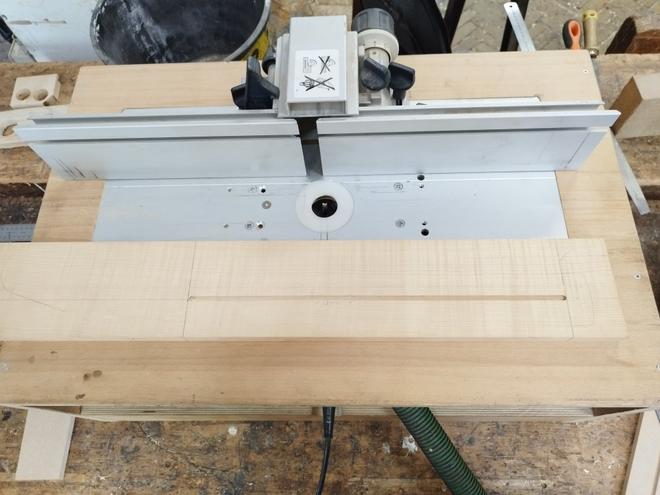
Over to the router table.
Image
Image

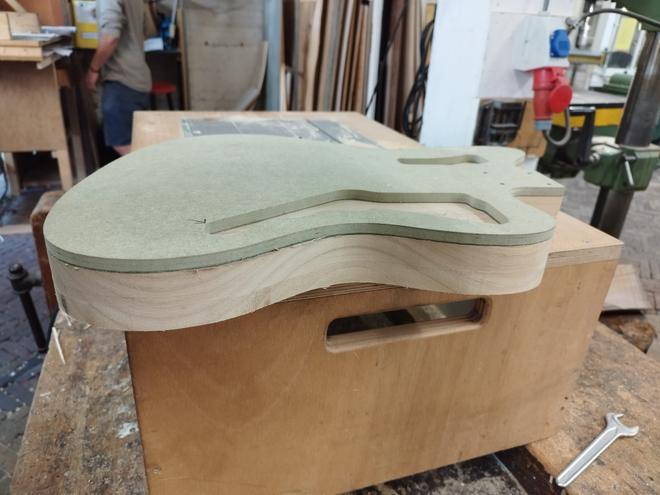
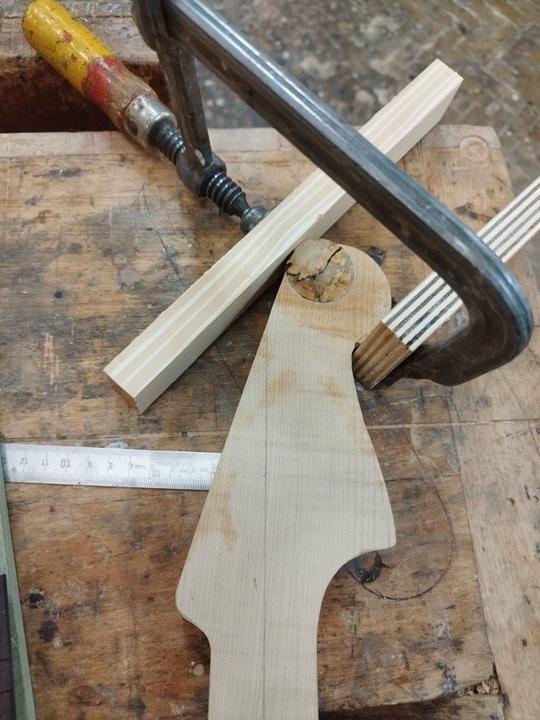
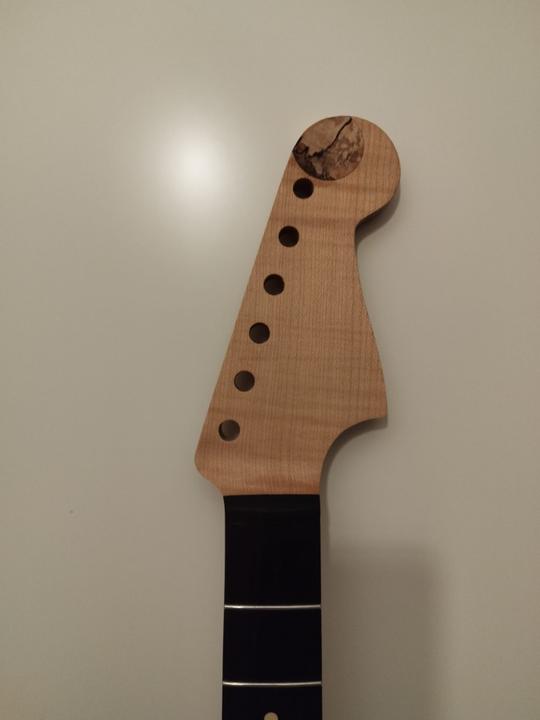
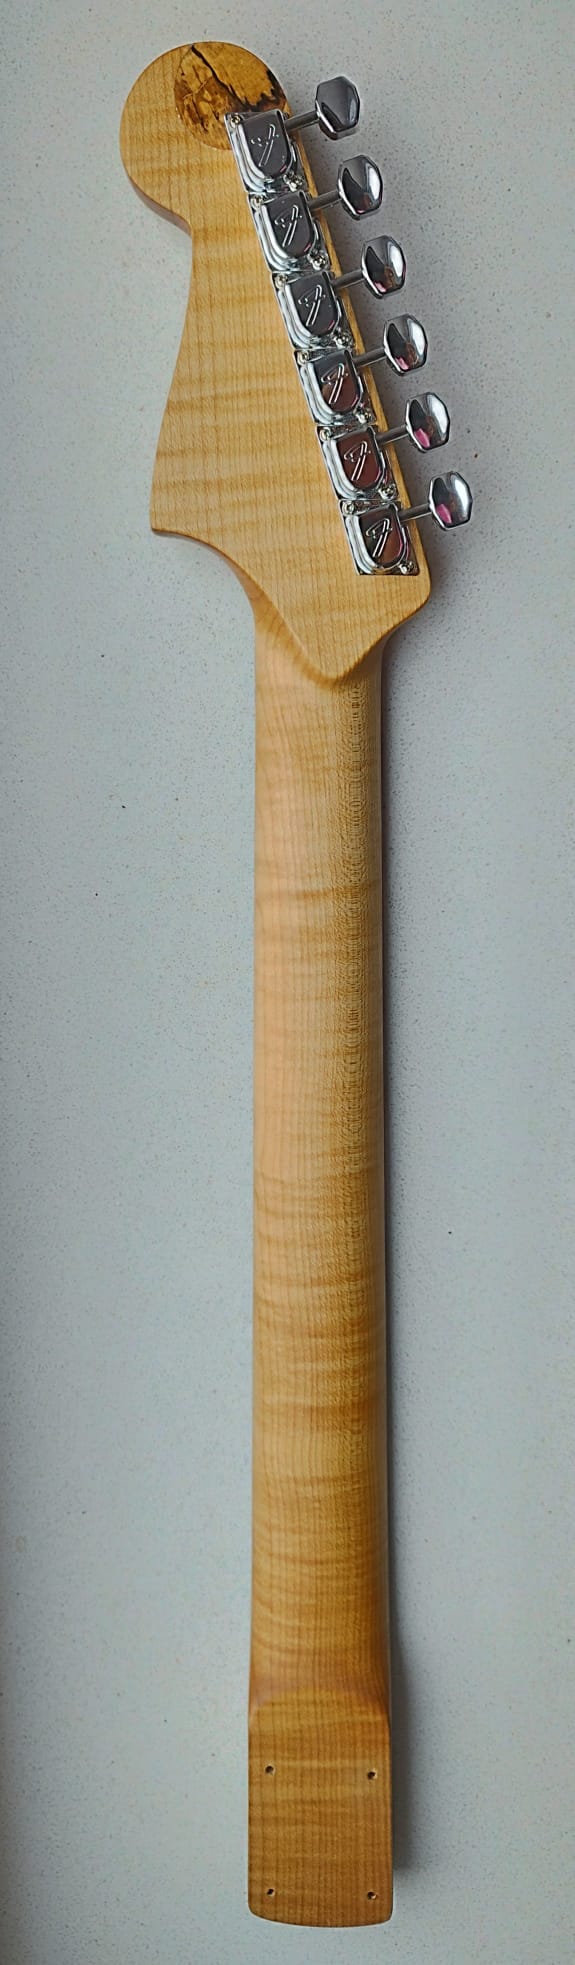
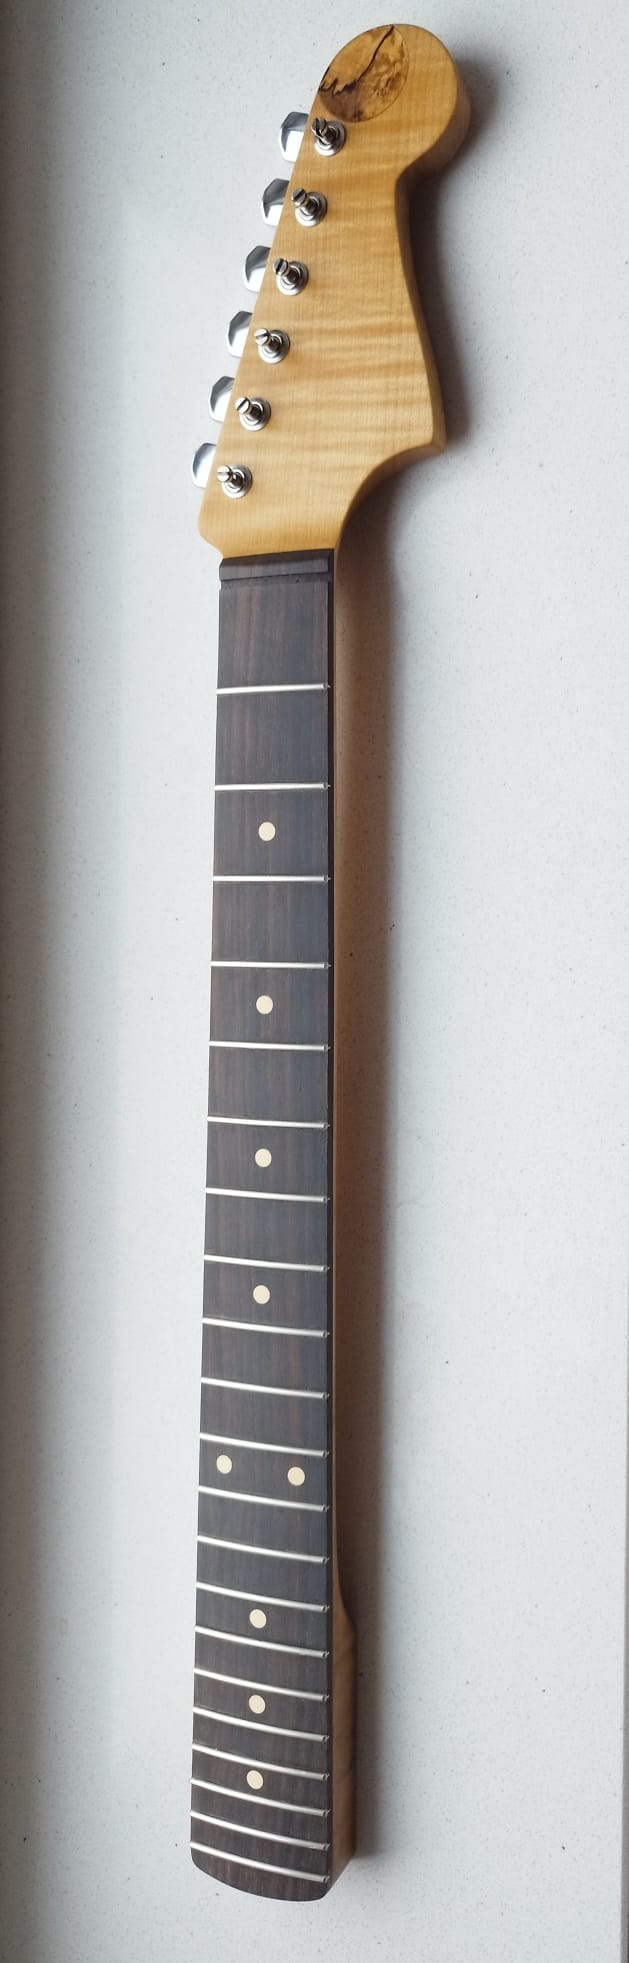
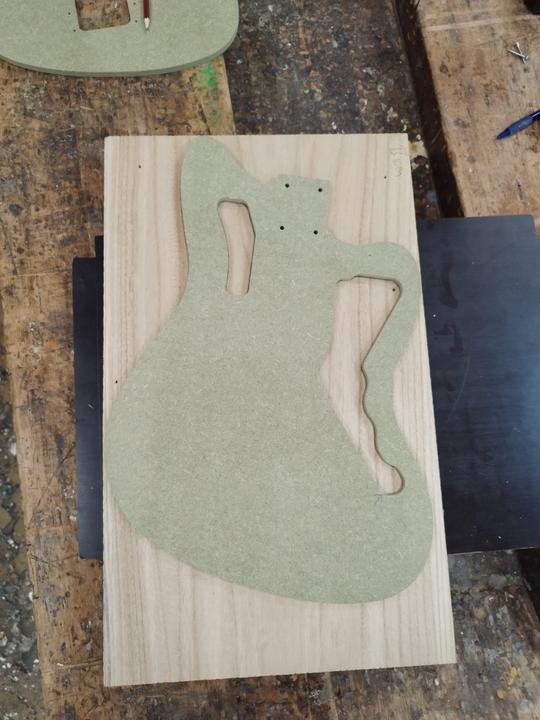
Purchased the full set of templates from Guitar and Bass Build (UK). JAZZMASTER GUITAR TEMPLATES The templates for the body are nice. Seems correct. The template for the neck fits into the neck pocket beautifully.

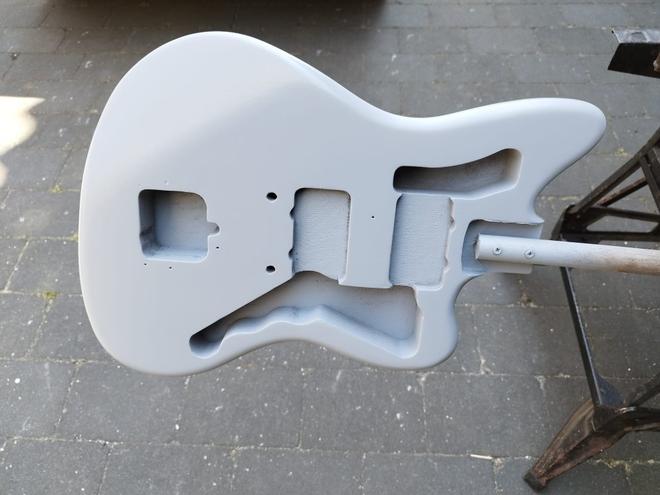
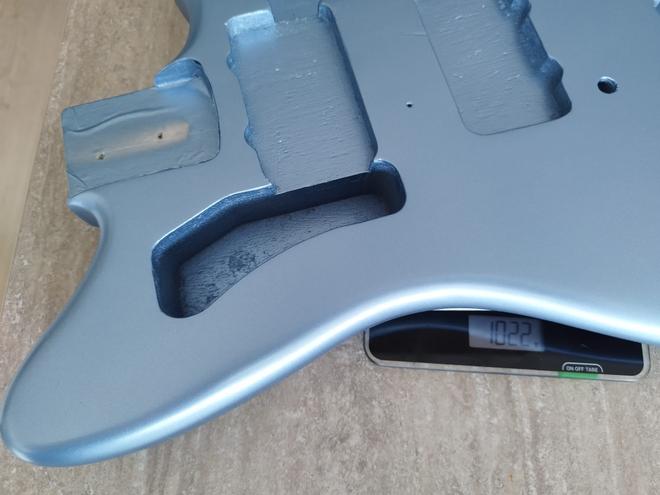
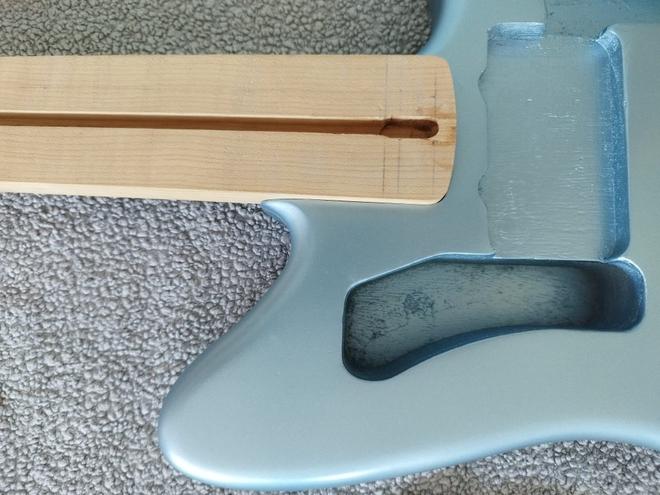
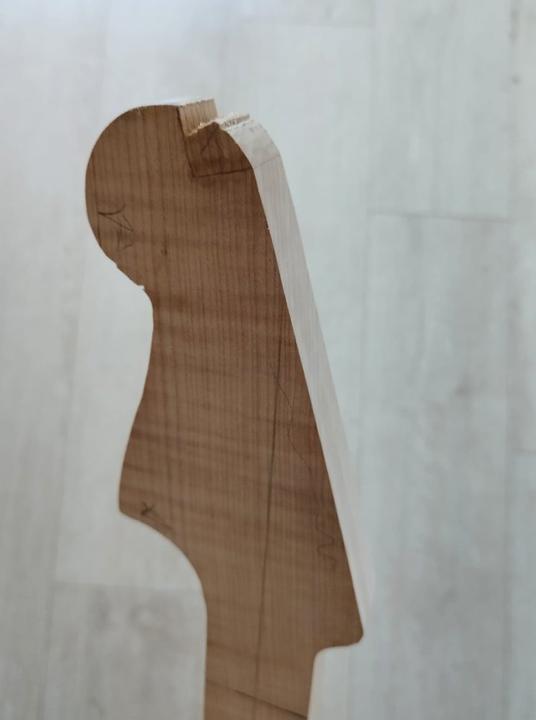
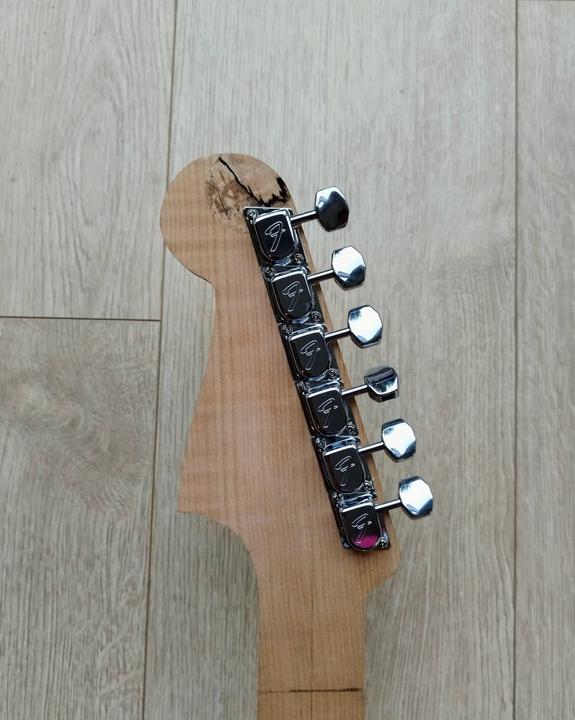
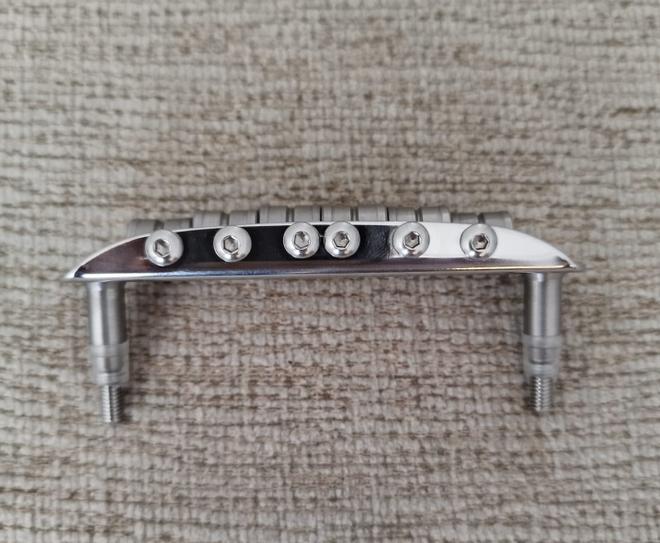
But I cannot recommend it. It's advertised "Full set of 100% accurate 9 mm MDF Templates to build your own Jazzmaster. [...] All templates made in our UK workshop from our accurate drawings from original instruments". However the neck has a Strat sized headstock, not a JM sized headstock. AFAIK JM have always had a bigger headstock. Contacted the seller, he stuck to the story of it being correct. It also seems that the tuner holes are not in the standard Fender position & the pickup routes are undersized (the four semi-circles sticking out of the plastic pickup covers won't fit. The route for the tremolo (pardon - vibrato) is in the right spot and the screw holes are correct... but it's undersized. A Fender AVRI trem won't fit, neither will a Squier trem.

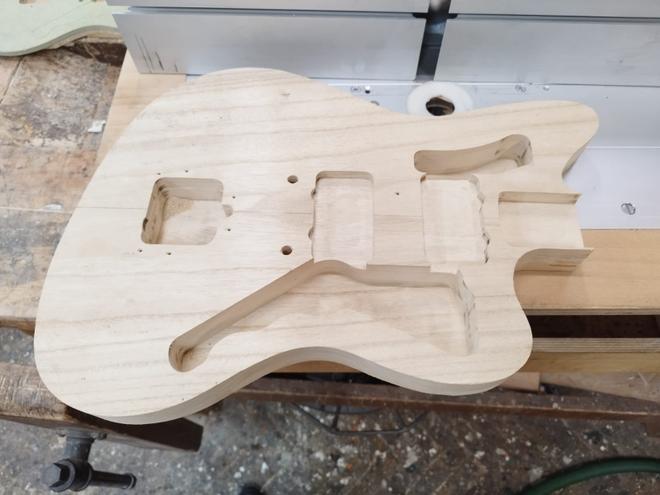
I used specs from this forum to route the body. Measurements are from a late 60s JM:
Body thickness - 1 5/8" 1.625in × 25.4 = 41.275mm
Thimble hole depth - 1 3/16" 1.1875in × 25.4 = 30.1625mm
Trem cavity - 1 3/8" 1.375in × 25.4 = 34.925mm
Rhythm cavity – 1" 25,4mm
Alt. Rhythm cavity – 1 3/16" 1.1875in × 25.4 = 30.1625mm
Lead cavity - 1 3/8 1.375in × 25.4 = 34.925mm
Pickup cavities – 3/8" 0.375in × 25.4 = 9.525mm
Neck pocket – 9/16" 0.5625in × 25.4 = 14.2875mm
Roundover radius is 7/16" 0.4375in × 25.4 = 11.1125mm
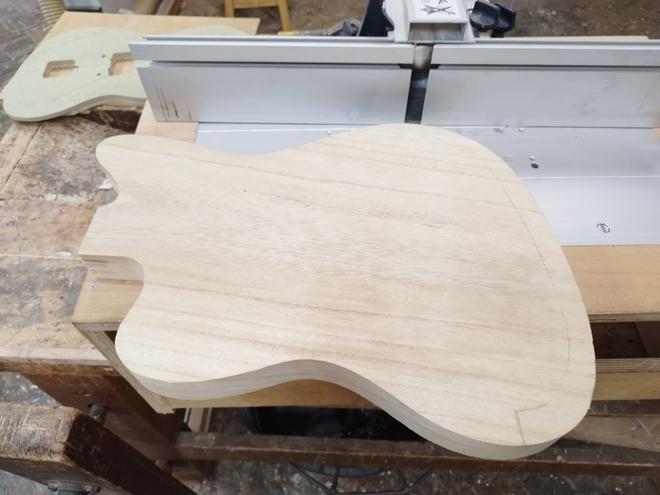
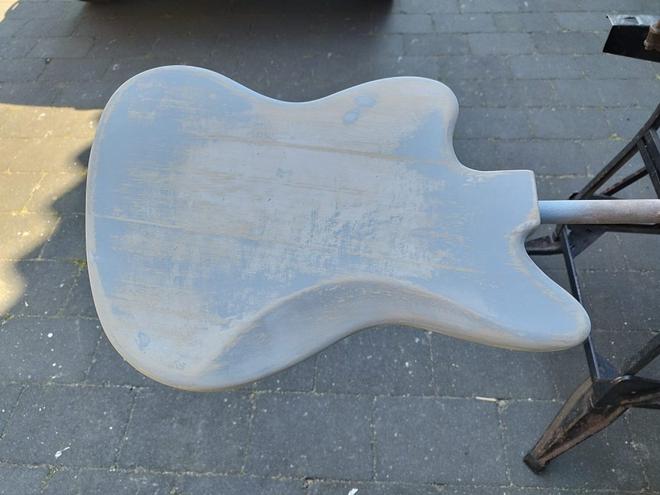
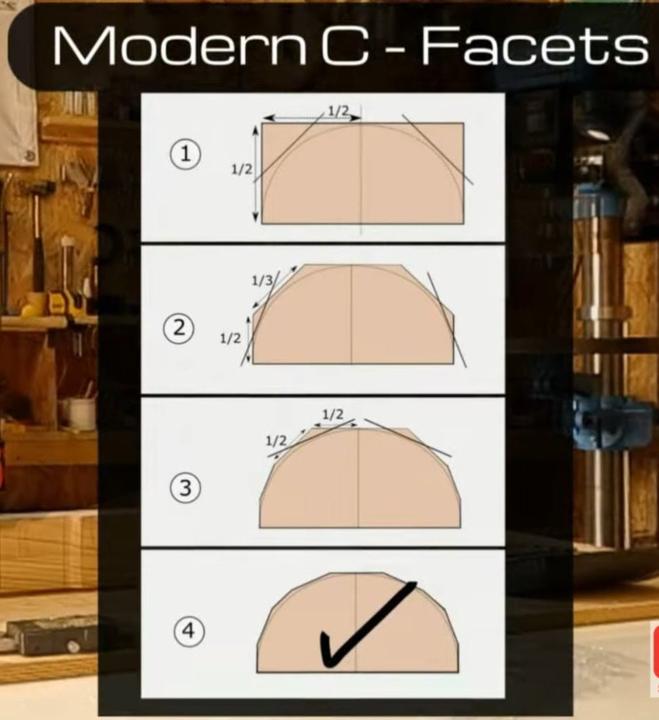
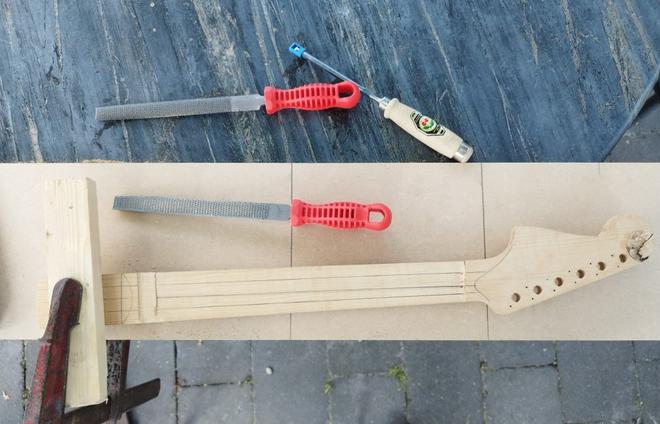
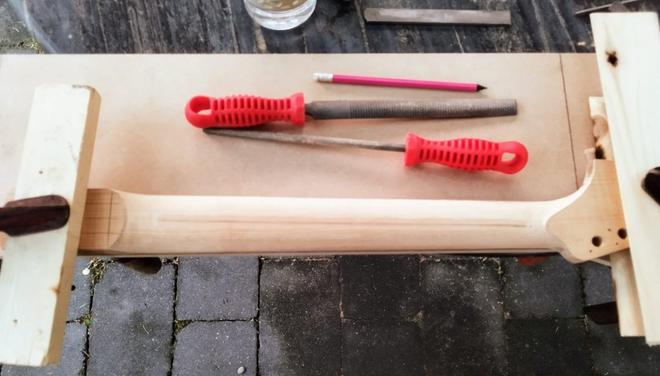
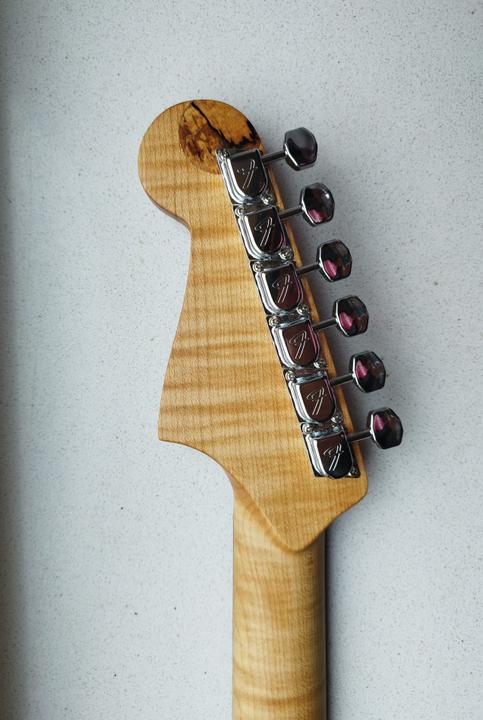
Image
Image

Round-over:
Image
Image

User avatar
DrippyReverbTremolo
PAT. # 2.972.923
PAT. # 2.972.923
Posts: 139
Joined: Mon Sep 18, 2023 12:39 pm

Re: Home-made Jazzmaster... or Surfmaster.

Post by DrippyReverbTremolo » Thu Sep 21, 2023 9:47 am

After that the first round of wood filler and sanding. This is where the softness of the wood really starts to be a drawback. One wrong move and you're filling/sanding again. Sigh.
Image
Image

I really enjoyed doing the body contours. Just a few pencil lines, a rasp and sand paper.
Image
Image

Then another round of wood filler & sanding, followed by a thick coat of rattle can automotive primer. Sanded it down again:
Image
Image
Image

First color coat is on. It's a bit streaky. Did a second coat once I was certain everything lines up properly. Weight is 1Kg or 2.2 Lbs.
Image
Image

User avatar
Embenny
PAT. # 2.972.923
PAT. # 2.972.923
Posts: 10363
Joined: Tue May 24, 2016 5:07 am

Re: Home-made Jazzmaster... or Surfmaster.

Post by Embenny » Thu Sep 21, 2023 9:55 am

Amazing work! That's going to look awesome, and the weight will be delightful.

Paulownia is amazingly light, but the softness can be a liability as you're discovering.

I hope this isn't coming too late given that you're on to painting - but one tip I've heard from people who have worked with it is to drill out all the spots you'll be installing screws, and plug the holes with hardwood dowel like maple. There's a good chance that, after the first time or two removing the pickguard, you'll have some stripped holes.

Shouldn't be too late to do that now if the dowels are small enough to avoid poking beyond the pickguard.

I also would probably aim for a very thick clear coat once the colour is as even as you want it to be - the finish will be the primary defense against dings, since the wood is so soft. My 20 year-old basswood Jaguar has amazingly few dings because the finish is so thick and hard.
The artist formerly known as mbene085.

User avatar
DrippyReverbTremolo
PAT. # 2.972.923
PAT. # 2.972.923
Posts: 139
Joined: Mon Sep 18, 2023 12:39 pm

Re: Home-made Jazzmaster... or Surfmaster.

Post by DrippyReverbTremolo » Thu Sep 21, 2023 10:01 am

Started on the neck. Bought a slab of European maple, torrified and with flame. I ordered it online from a German supplier, Tonholz. Ordered the wood for the body online from another German supplier, Espen.

Used a router table to route a slot for the double action trussrod. Such a change, working with this hard and heavy wood.
Image
Image

I want a JM headstock not a Strat headstock. So I made a template from the neck template that came with the set and stuck a piece of paper on it with the JM outline and tuner positions. Center lines, center lines. Rough cut:
Image

And after many minutes of carefully routing the neck it fits nicely. After taking this photo I removed spray primer from the neck pocket to make it fit perfectly. Really happy with it.
Image

While carefully finish routing the headstock, the router caught the grain and tore out a big chunk. :squint: I cut out a square hole and glued in a new piece. The same thing then happened again. :fp: Torrified wood seems to be more brittle...
Image

My wife thought I should 'own it' and make feature of it. There was a round clamp mark (circle) on the front of the headstock that looked kinda cool. So I went with that.
Image

My wood shop coach turned a piece of spalted hornbeam he had left from making pool cues.
Image

Later that morning I used a cut off saw to dimension the head stock. Also made the headstock a bit smaller, it looked too chunky / CBS era. Then I drilled the holes for the tuners - going by the printed template I mentioned before.

I want a JM headstock not a Strat headstock. So I made a template from the neck template that came with the set and stuck a piece of paper on it with the JM outline and tuner positions. Center lines, center lines...! If you google 'all Fender headstocks pdf' you'll find a comprehensive set of headstock templates. Part of a bigger set of templates, made by members of TDPRI.com or offsetguitars.com Then I drilled the holes for the tuners - going by the printed template. A new set Fender 70s chrome tuners fit perfectly! Very happy about that.
Image
Image

User avatar
DrippyReverbTremolo
PAT. # 2.972.923
PAT. # 2.972.923
Posts: 139
Joined: Mon Sep 18, 2023 12:39 pm

Re: Home-made Jazzmaster... or Surfmaster.

Post by DrippyReverbTremolo » Thu Sep 21, 2023 10:06 am

Embenny wrote:
Thu Sep 21, 2023 9:55 am
Amazing work! That's going to look awesome, and the weight will be delightful.

Paulownia is amazingly light, but the softness can be a liability as you're discovering.

I hope this isn't coming too late given that you're on to painting - but one tip I've heard from people who have worked with it is to drill out all the spots you'll be installing screws, and plug the holes with hardwood dowel like maple. There's a good chance that, after the first time or two removing the pickguard, you'll have some stripped holes.

Shouldn't be too late to do that now if the dowels are small enough to avoid poking beyond the pickguard.

I also would probably aim for a very thick clear coat once the colour is as even as you want it to be - the finish will be the primary defense against dings, since the wood is so soft. My 20 year-old basswood Jaguar has amazingly few dings because the finish is so thick and hard.
Thank you for the compliments and those words of advice. I finished the guitar last week, so this report is catching up to me enjoying it. I flooded all screw holes with thin CA glue, that works quite well. I finished the body with 2K lacquer but it still dents easily. Thinking I might ask my friend for a favour, he works at body shop. Will definitely keep the color - love it.

User avatar
DrippyReverbTremolo
PAT. # 2.972.923
PAT. # 2.972.923
Posts: 139
Joined: Mon Sep 18, 2023 12:39 pm

Re: Home-made Jazzmaster... or Surfmaster.

Post by DrippyReverbTremolo » Thu Sep 21, 2023 10:25 am

Work progresses as I glued on the fretboard (7.25 radius, pre-slotted rosewood), installed dots and installed the frets (Jescar .055 / .090).
Image

Shaped the headstock with a spindle sander.
Image
Image
Image

Preparing to shape the back of the neck. Getting the transition to the heel and headstock right seems quite difficult.
Image

I shaped the neck using the drawing lines / facet method. Works great. You can fine tune what you want by changing the lines. I made it asymmetric by moving the centre line up a bit at the 1st fret. It's a big C (22mm 1st fret to 24mm 12th fret) that ends in a D, by changing the lines on either side at the fist step.
Image
Image
Image

It came out well. After doing these steps I reworked the neck over the course a few days, feeling the neck removing wood here and there. Now onto fret level, crown and polish.
YouTube vid: https://www.youtube.com/watch?v=jSa8DyqyW_M

User avatar
BoringPostcards
PAT. # 2.972.923
PAT. # 2.972.923
Posts: 7110
Joined: Tue Jun 02, 2009 8:50 am
Location: Newfoundland

Re: Home-made Jazzmaster... or Surfmaster.

Post by BoringPostcards » Thu Sep 21, 2023 11:27 am

Great work!
Det er mig der holder traeerne sammen.

shigginpit
PAT. # 2.972.923
PAT. # 2.972.923
Posts: 150
Joined: Tue Aug 22, 2023 7:30 pm
Location: California

Re: Home-made Jazzmaster... or Surfmaster.

Post by shigginpit » Fri Sep 22, 2023 10:29 pm

Nice to see the project pics of the guitar from your intro thread documented from the beginning, very cool.
offset since 1994.

User avatar
MayTheFuzzBeWithYou
PAT. # 2.972.923
PAT. # 2.972.923
Posts: 2434
Joined: Mon Jul 03, 2017 12:28 am
Location: Linz, Austria

Re: Home-made Jazzmaster... or Surfmaster.

Post by MayTheFuzzBeWithYou » Sat Sep 23, 2023 2:20 am

Nice work! It‘s beautiful and encouraging to see a full building process!

I also thought about getting some things of Deutsches Tonholz (they also have templates…even for a 25,5“ Jaguar) - but currently I‘m waiting on a quote from them on a Thinline Jag Body (otherwise I‘ll get it from Saylor).

User avatar
DrippyReverbTremolo
PAT. # 2.972.923
PAT. # 2.972.923
Posts: 139
Joined: Mon Sep 18, 2023 12:39 pm

Re: Home-made Jazzmaster... or Surfmaster.

Post by DrippyReverbTremolo » Sat Sep 23, 2023 7:50 am

Thanks fellas.

I put four coats of boiled linseed oil on the neck. Feels silky smooth. And chunky. It came out well.
Image
Image
Image

Parts were arriving in the weeks I was spending my free time at the wood shop. From the UK comes this Home of Tone wiring harness. James was great to deal with and this Jazzmaster wiring harness is beautifully made. 1MEG Audio taper (volume & tone) / .033uF (Traditional Spec alongside 1MEG pots) / With Treble Bleed.
Image
Image

The electrics fitted beautifully on my second hand AVRI pickguard. I used copper tape to shield the cavities and pickguard. I only had to solder the 2x2 pickup leads and the ground wire. The Home of Tone website lists many many wiring harnesses (and diagrams) - check them out please and give them your business.
Image

And from Croatia comes Q Pickups. I chose these after watching a comparison vid on YT. Set of 58-61 Jazzmaster Vintage Correct pickups.
Image
Image
Image
Last edited by DrippyReverbTremolo on Sun Sep 24, 2023 2:32 am, edited 1 time in total.

User avatar
DrippyReverbTremolo
PAT. # 2.972.923
PAT. # 2.972.923
Posts: 139
Joined: Mon Sep 18, 2023 12:39 pm

Re: Home-made Jazzmaster... or Surfmaster.

Post by DrippyReverbTremolo » Sat Sep 23, 2023 8:00 am

After shooting the body with 2k clear I sanded and polished it. Feels like a thin, hard finish. I did f@uck up the back and sides by putting way to much lacquer on after not noticing I had adjusted the amount a flow from the cap. Sucks but at least it's not the front. I'll get it repainted by a body shop next year or so.

Anyway I then levelled, crowned and polished the frets. Put the neck on the body and strung it up for the first time. It needed a 1 degree shim for a properly set up Staytrem bridge - by which I mean as high as I can get it without strings touching the edge of the bridge. Action is nice and low with an almost straight neck. I was surprised the neck needed to be adjusted into a slight upbow, using 11-52. Also surprised that the same set of strings feels slinky on this guitar while feeling chunky on my Squier Jazzmaster.

Tuning stability is good (thank God). Acoustically it sounds like a semi-hollow to my ears. At first - before getting the neck at a proper angle - it sounded rather meh. It sort of came alive in the process of getting set up. Perhaps the downward force of the strings on the bridge really matters most to the Jazzmaster and Jaguar design.
Image

Upon installing my new Staytrem bridge I encountered the grounding issue of the strings and bridge suddenly having no ground. Scratched my head & took out my multimeter. The two threaded bridge studs weren't conductive to electricity (the other parts were). I contacted John at Staytrem because I couldn't imagine this was by design, from the perspective of functionality (ground wire attached to treble bridge thimble) and safety.

He emailed me back after an hour or so (service!). He mentioned I highlighted an issue that he hadn't encountered before but on inspection of other bridges this is happening on some but not all of them. He investigated further and the issue was most likely caused by a small amount of oil residue from the manufacturing process inside the bridge post.

John told me to try gripping the plastic part on the end of the posts with pliers and turn very slightly, as this seems to solve the issue by bringing the threaded stud into full contact with the post. So I gave both posts 1/8 of a turn. John was right - that fixed it! He stressed he will be taking steps to make sure this does not happen in future. I'm mentioning it in this thread for the few others the may come across this same issue.

Give Staytrem / John your business. I like the Staytrem bridge for its quality of design and execution. Stainless steel. Solid, no rattles. It comes in 9.5 and 7.25 radius. It has a string spacing of 5.2 instead of the standard Fender 5.5/5.6 (so the strings won't get easily pulled over the edge of the fretboard). The hex scews that adjust the saddles are off-set for easy access. Fender now uses Staytrem on selected models.
Image
Image
Last edited by DrippyReverbTremolo on Sun Sep 24, 2023 2:34 am, edited 1 time in total.

User avatar
DrippyReverbTremolo
PAT. # 2.972.923
PAT. # 2.972.923
Posts: 139
Joined: Mon Sep 18, 2023 12:39 pm

Re: Home-made Jazzmaster... or Surfmaster.

Post by DrippyReverbTremolo » Sat Sep 23, 2023 8:17 am

The guitar is as good as finished (waiting on a headstock decal). It weighs in at 2.8 Kg or 6.2 lbs - almost half the weight of my 1981 LP Custom. I've often read that heavy guitars have more sustain than light guitars do. This one has similar sustain to my LPC - so that bit of common knowledge is out the window (fight me in the comments).

More importantly I love the chunky, asymmetric neck. I may or may not take a bit off the shoulder (bass side) between the 1st and 3d fret. But will first play it for a while. Neck is almost dead straight, action is low, tuning stability is good.

Acoustically it sounds like a semi-hollow to my ears. Amplified it rings out beautifully. Hard to explain, but if my Squier Jazzmaster were 2D this one would be 3D. The set of 58-61 Jazzmaster Vintage Correct pickups from Q Pickups are nicely balanced and very sensitive to pick attack. Also very happy I choose the fairly standard spec Home of Tone full wiring harness, with 1MEG Audio taper for volume and tone (and treble bleed cap). Lots of different tones by turning the knobs. 1MEG is not too bright at all (tone pot at 6 or 7). The Q-pickups are really sensitive to pick attack. Feeling somewhat confronted by my technique but am refusing to use a compression pedal.

My conclusion is to use quality parts where they really matter. I used Fender Jazzmaster aged white pickup covers (005-4442-049) but refuse to pay almost $50 for the 2 matching Fender knobs. These are $15 and match perfectly: https://www.customworldguitarparts.com/ ... s-cts.html A cheapo Boston switch tip matched perfectly.
Image
Image

So there's only one more thing to do: install the headstock decal. I ordered one from Rothko and Frost (based in the UK) that's a play on the 70s Jazzmaster decal. I used my surname instead of Fender, in the subscript I changed 'tremolo' to 'vibrato' (because logic demands it) and changed PAT APPLIED to PAT DENIED. I received my R&F decal and it looks like a quality item. However, the decal isn't as I ordered it. What should read 'with synchronized floating vibrato' reads 'with synchronized floating'. Well these things can happen. I contacted them, they promised to send a new decal. Will probably take two weeks or so, what with the UK no longer being part of the EU. Customs etc.

A month later I could finally finish the headstock as the second set of decals arrived - as ordered. The big letters look like gold leaf but the photo doesn't show it. Went on smoothly. Sprayed 6 or 7 coats of clear laquer, wet sanded and polished. Put two thin (always thin) coats of TruOil on the rest of the neck, great stuff. Will put some extra layers on in the future.
Image

Here are two YouTube vids for a sound sample. Can't get the videos to show but the two links work.
https://www.youtube.com/watch?v=LYBBxQSZ-ho
https://www.youtube.com/watch?v=dwILxigJjVs

User avatar
DrippyReverbTremolo
PAT. # 2.972.923
PAT. # 2.972.923
Posts: 139
Joined: Mon Sep 18, 2023 12:39 pm

Re: Home-made Jazzmaster... or Surfmaster.

Post by DrippyReverbTremolo » Sun Sep 24, 2023 2:36 am

Broken photo links now fixed.

User avatar
N0_Camping4U
PAT. # 2.972.923
PAT. # 2.972.923
Posts: 1685
Joined: Thu Oct 03, 2013 1:59 pm
Location: Houston Texas

Re: Home-made Jazzmaster... or Surfmaster.

Post by N0_Camping4U » Sun Sep 24, 2023 5:49 am

I love it. How many refins have you done? This is a solid finish. I even like the 'mistake' on the headstock, I think it looks like a moon. Glad you owned it because that is so sick! Are you in America? I wonder if I have a woodshop like you do somewhere.
"I've been waiting for you, Obi-Wan. We meet again, at last. The circle is now complete. When I left you, I was but the learner, now I am the master."

User avatar
DrippyReverbTremolo
PAT. # 2.972.923
PAT. # 2.972.923
Posts: 139
Joined: Mon Sep 18, 2023 12:39 pm

Re: Home-made Jazzmaster... or Surfmaster.

Post by DrippyReverbTremolo » Sun Sep 24, 2023 6:23 am

N0_Camping4U wrote:
Sun Sep 24, 2023 5:49 am
I love it. How many refins have you done? This is a solid finish. I even like the 'mistake' on the headstock, I think it looks like a moon. Glad you owned it because that is so sick! Are you in America? I wonder if I have a woodshop like you do somewhere.
Thank you! It's my first guitar build. But I have experience in home DIY. Also owned (partly restored / maintained) a classic car for 12 years. Rattle can finishes are part of that. Really am stil kicking myself for f@cking it up at the last minute. With all the curing time and off gassing time involved I'd rather have a body shop do it next time.

I'm in The Netherlands. The wood shop is pretty great. But I suspect that a planer, router table and drill press will get you 80% there.

Post Reply