I need to grain fill the walnut stripes on my build. I'm only able to get clear nitro in spray cans in Canada so I have to do my colours with stain. I have water based grain filler that I dyed black for another project. I'd like to use that but I'm wondering if the black will dye the maple. I have some laminated scraps so I will have to test everything obviously. Maybe I'll need to mask the maple, grain fill, sand it all down and do a wash coat of thinned shellac? I also want to start with water based walnut stain on the maple, then sand this down to enhance the flame and continue with alcohol based amber. Gonna be complicated...
First Scratch Build: Maple Walnut neck through-RD
-
ForcedFire

- PAT. # 2.972.923

- Posts: 276
- Joined: Fri May 06, 2011 6:59 am
Re: First Scratch Build: Maple Walnut neck through-RD
Getting a bit ahead of myself...
I need to grain fill the walnut stripes on my build. I'm only able to get clear nitro in spray cans in Canada so I have to do my colours with stain. I have water based grain filler that I dyed black for another project. I'd like to use that but I'm wondering if the black will dye the maple. I have some laminated scraps so I will have to test everything obviously. Maybe I'll need to mask the maple, grain fill, sand it all down and do a wash coat of thinned shellac? I also want to start with water based walnut stain on the maple, then sand this down to enhance the flame and continue with alcohol based amber. Gonna be complicated...
I need to grain fill the walnut stripes on my build. I'm only able to get clear nitro in spray cans in Canada so I have to do my colours with stain. I have water based grain filler that I dyed black for another project. I'd like to use that but I'm wondering if the black will dye the maple. I have some laminated scraps so I will have to test everything obviously. Maybe I'll need to mask the maple, grain fill, sand it all down and do a wash coat of thinned shellac? I also want to start with water based walnut stain on the maple, then sand this down to enhance the flame and continue with alcohol based amber. Gonna be complicated...
-
the older brother
- PAT. # 2.972.923
- Posts: 10693
- Joined: Wed Aug 29, 2007 12:12 pm
- Location: Gothenburg, Sweden.
- Contact:
Re: First Scratch Build: Maple Walnut neck through-RD
I used this:
http://www.stewmac.com/shop/Finishing_s ... iller.html
and it turned out pretty OK, even though it was my first time I used it. I used the mahogany coloured version and it sanded right off the dense maple and just stuck in the mahogany open grains. I have spotted some places where it didn't filled quite as much as I intended to though, but hopefully I get the clear to cover that.
Someone knows where I can find the nearest woodchipper to throw my pieces of junk into?
-
ForcedFire
- PAT. # 2.972.923
- Posts: 276
- Joined: Fri May 06, 2011 6:59 am
Re: First Scratch Build: Maple Walnut neck through-RD
Ah, I just watched the video. I'm pretty sure what I have is very similar. I bought it from LMI though and tinted it to a charcoal colour. I used it WAY thicker than he does in the video. I'll have to try thinning it more and using a brush. It was BRUTAL to sand off the way I did it. I left way too much on when I let it dry.the older brother wrote:I used this:
http://www.stewmac.com/shop/Finishing_s ... iller.html
and it turned out pretty OK, even though it was my first time I used it. I used the mahogany coloured version and it sanded right off the dense maple and just stuck in the mahogany open grains. I have spotted some places where it didn't filled quite as much as I intended to though, but hopefully I get the clear to cover that.
-
the older brother
- PAT. # 2.972.923
- Posts: 10693
- Joined: Wed Aug 29, 2007 12:12 pm
- Location: Gothenburg, Sweden.
- Contact:
Re: First Scratch Build: Maple Walnut neck through-RD
The Timbermate is really easy sanded actually.
Someone knows where I can find the nearest woodchipper to throw my pieces of junk into?
-
ForcedFire
- PAT. # 2.972.923
- Posts: 276
- Joined: Fri May 06, 2011 6:59 am
Re: First Scratch Build: Maple Walnut neck through-RD
Maybe I sand like a little girlthe older brother wrote:The Timbermate is really easy sanded actually.
-
the older brother
- PAT. # 2.972.923
- Posts: 10693
- Joined: Wed Aug 29, 2007 12:12 pm
- Location: Gothenburg, Sweden.
- Contact:
Re: First Scratch Build: Maple Walnut neck through-RD
Someone knows where I can find the nearest woodchipper to throw my pieces of junk into?
-
ForcedFire
- PAT. # 2.972.923
- Posts: 276
- Joined: Fri May 06, 2011 6:59 am
Re: First Scratch Build: Maple Walnut neck through-RD
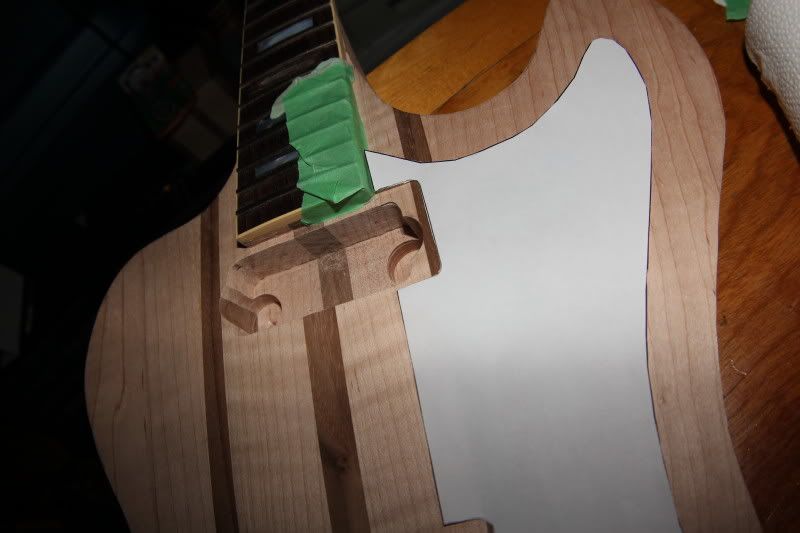
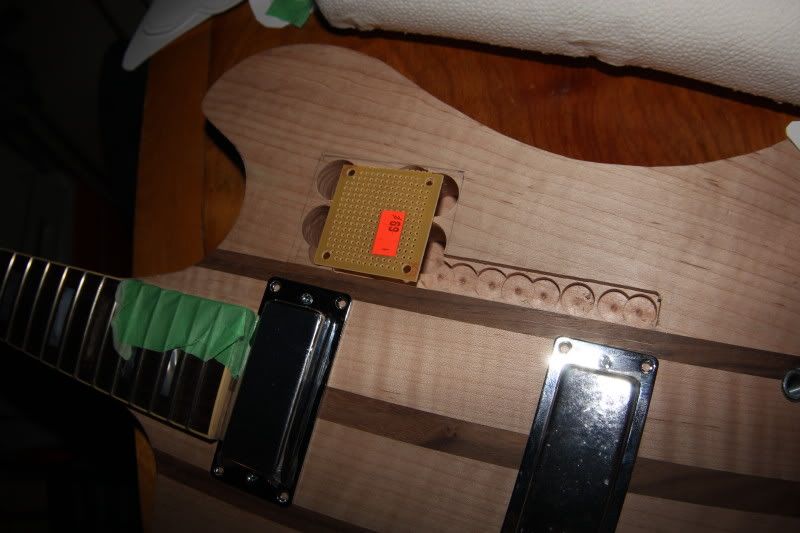
The pickup routes came out pretty good. They won't win any awards for looks since I did them with the dremel but not too bad. She's going to dress up nice for the party
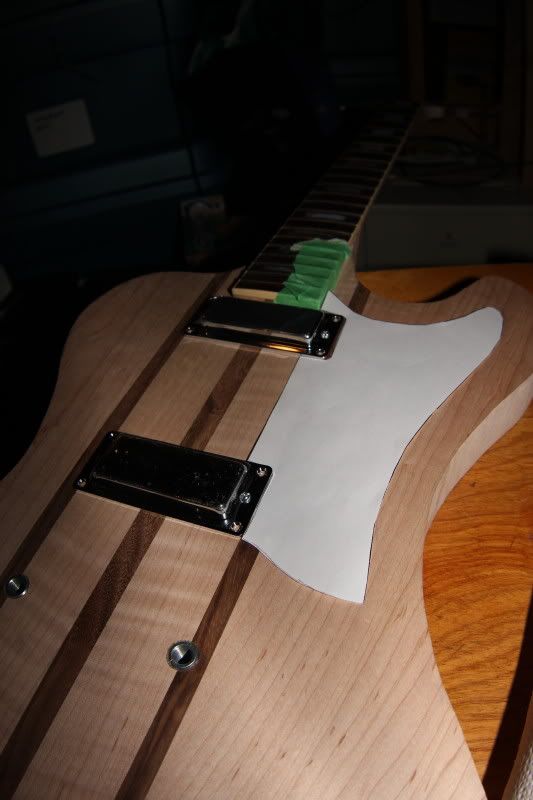
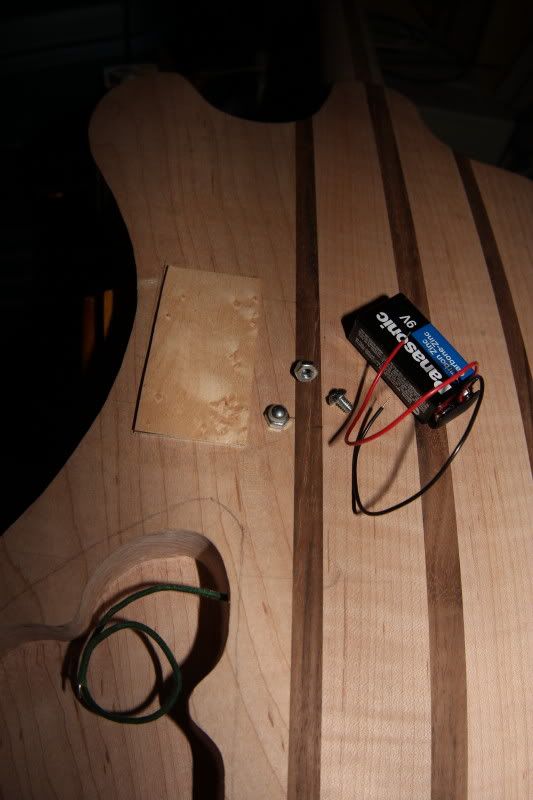
Well I held out as long as I could. I decided to do active electronics. Maybe a clean boost or a fuzz. Whatever I choose, it'll be easy to swap circuits if I ever want to. There will be a rocker switch, thumbwheel pot and LED in the pickguard near the horn.
Here's the battery compartment:
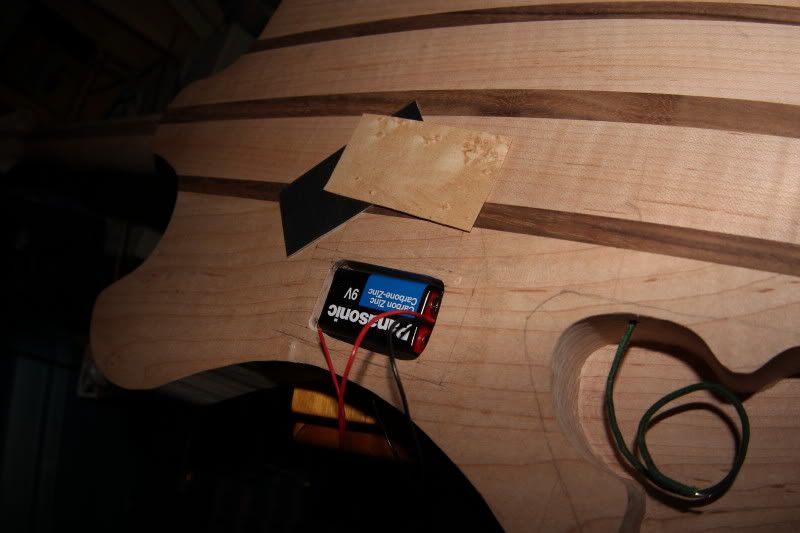
I'm going to embed some acorn nuts so I can use machine screws to cover the battery:
I hogged out under the pickguard for the circuit. I'll route it later:
Well I held out as long as I could. I decided to do active electronics. Maybe a clean boost or a fuzz. Whatever I choose, it'll be easy to swap circuits if I ever want to. There will be a rocker switch, thumbwheel pot and LED in the pickguard near the horn.
Here's the battery compartment:
I'm going to embed some acorn nuts so I can use machine screws to cover the battery:
I hogged out under the pickguard for the circuit. I'll route it later:
-
thepastrecedes

- PAT. # 2.972.923
- Posts: 1832
- Joined: Sun Mar 07, 2010 2:25 am
Re: First Scratch Build: Maple Walnut neck through-RD
Personally I would use some brass inserts instead of trying to embed the acorn nuts. For the inserts all you need to do is drill a hole and install them, there would be no need for trying to make a hexagonal hole for the nuts.ForcedFire wrote:I'm going to embed some acorn nuts so I can use machine screws to cover the battery

Game Of T0NZ
-
ForcedFire
- PAT. # 2.972.923
- Posts: 276
- Joined: Fri May 06, 2011 6:59 am
Re: First Scratch Build: Maple Walnut neck through-RD
Yeah, that's exactly what I want. Where do I get those?thepastrecedes wrote:Personally I would use some brass inserts instead of trying to embed the acorn nuts. For the inserts all you need to do is drill a hole and install them, there would be no need for trying to make a hexagonal hole for the nuts.ForcedFire wrote:I'm going to embed some acorn nuts so I can use machine screws to cover the battery
-
thepastrecedes
- PAT. # 2.972.923
- Posts: 1832
- Joined: Sun Mar 07, 2010 2:25 am
Re: First Scratch Build: Maple Walnut neck through-RD
I haven't used them personally but some one at TDPRI used them for one of their builds for the pickgaurd and neck.ForcedFire wrote:Yeah, that's exactly what I want. Where do I get those?
You may be able to find them in your local hardware store, just ask for 'threaded inserts'
or try ebay, I would of given you a direct link to some but there's so many sizes I didn't know what you wanted. I assume your in the US so I used there version:
http://shop.ebay.com/i.html?_nkw=thread ... m270.l1313" onclick="window.open(this.href);return false;
Game Of T0NZ
-
ForcedFire
- PAT. # 2.972.923
- Posts: 276
- Joined: Fri May 06, 2011 6:59 am
Re: First Scratch Build: Maple Walnut neck through-RD
thepastrecedes wrote:I haven't used them personally but some one at TDPRI used them for one of their builds for the pickgaurd and neck.ForcedFire wrote:Yeah, that's exactly what I want. Where do I get those?
You may be able to find them in your local hardware store, just ask for 'threaded inserts'
or try ebay, I would of given you a direct link to some but there's so many sizes I didn't know what you wanted. I assume your in the US so I used there version:
http://shop.ebay.com/i.html?_nkw=thread ... m270.l1313" onclick="window.open(this.href);return false;
Sorry, I just found some online. I just came on to edit my hasty post
Thanks for the suggestion!
-
ForcedFire
- PAT. # 2.972.923
- Posts: 276
- Joined: Fri May 06, 2011 6:59 am
Re: First Scratch Build: Maple Walnut neck through-RD
Ah, cool. Lee Valley is a local store, they have screw in inserts: http://www.leevalley.com/en/hardware/pa ... 41311&ap=1" onclick="window.open(this.href);return false; .
Originally my thought was to epoxy some 3/4" Chicago screw extensions that you can get at Home Depot. These are round posts with a threaded insert on the end. Then I found the acorn nuts in my collection and thought that would work alright.
Originally my thought was to epoxy some 3/4" Chicago screw extensions that you can get at Home Depot. These are round posts with a threaded insert on the end. Then I found the acorn nuts in my collection and thought that would work alright.
-
thepastrecedes
- PAT. # 2.972.923
- Posts: 1832
- Joined: Sun Mar 07, 2010 2:25 am
Re: First Scratch Build: Maple Walnut neck through-RD
I'm eventually getting round to experimenting with these on my acoustic build I was planing to make a standard dovetail joint then use these but 10mm ones for the neck joint. hope it works
Game Of T0NZ
-
antisymmetric
- PAT. # 2.972.923
- Posts: 3605
- Joined: Mon Apr 26, 2010 11:32 pm
- Location: New Zealand
Re: First Scratch Build: Maple Walnut neck through-RD
This is a great build, awesome work, despite the problems with your first fingerboard (you should have seen mine! 
 ) Brilliant idea punching out those side dots too.
Just my $0.02.
Re those switches- maybe it's too late now if that circuit's going in, but the switches can always be mounted further back behind the surface, they don't need to stick out far to be usable. They can be mounted to a plate behind the pickguard, and backspaced even further with washers, if you like, with just the tops of the switches showing, and no mounting screws visible (WAY better looking IMO). The same works for mini-toggles, it's what I do- just some tiny slots with the tips of the switches showing, no nuts visible. Still easy to use, but harder to hit by accident. Much cleaner look, plus with mini-toggles, you can get 2,3,4(+?) pole.ForcedFire wrote:
Just my $0.02.
Watching the corners turn corners
-
ForcedFire
- PAT. # 2.972.923
- Posts: 276
- Joined: Fri May 06, 2011 6:59 am
Re: First Scratch Build: Maple Walnut neck through-RD
Nice tip. It should be possible to inset the switch (I'm only going to have 1 now) and go without mounting screws.