Re: 62 Jazzmaster Project
-
paescu

- PAT. # 2.972.923

- Posts: 197
- Joined: Thu Mar 05, 2009 1:41 am
Re: 62 Jazzmaster Project (Gettin' Closer)
nice... good looking neck. interested to hear how you'll like, i'm really thinking about ordering a neck from them with ebony fingerboard as well...
-
wilco

- PAT. # 2.972.923
- Posts: 122
- Joined: Tue Apr 07, 2009 4:10 am
- Location: UK - Southampton
Re: 62 Jazzmaster Project (Gettin' Closer)
Lovin that pickguard, seriously thinking of leaving the tort on my white JM now 
-
dug
- PAT. # 2.972.923
- Posts: 8307
- Joined: Sat Apr 26, 2008 3:24 pm
- Location: Tennessee
- Contact:
Re: 62 Jazzmaster Project (Gettin' Closer)
Look'n good!
-
nonemoreblack
- PAT. # 2.972.923
- Posts: 188
- Joined: Sat Jul 07, 2007 7:58 pm
- Location: oshawa, canada
Re: 62 Jazzmaster Project (Gettin' Closer)
Time to wrap this thing up.
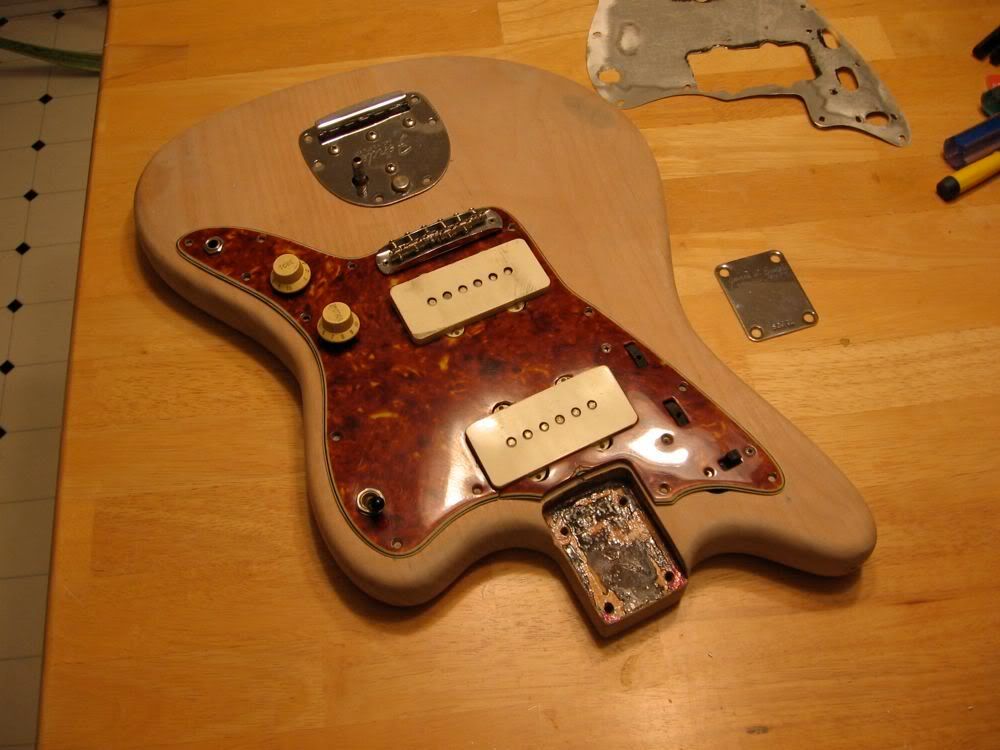
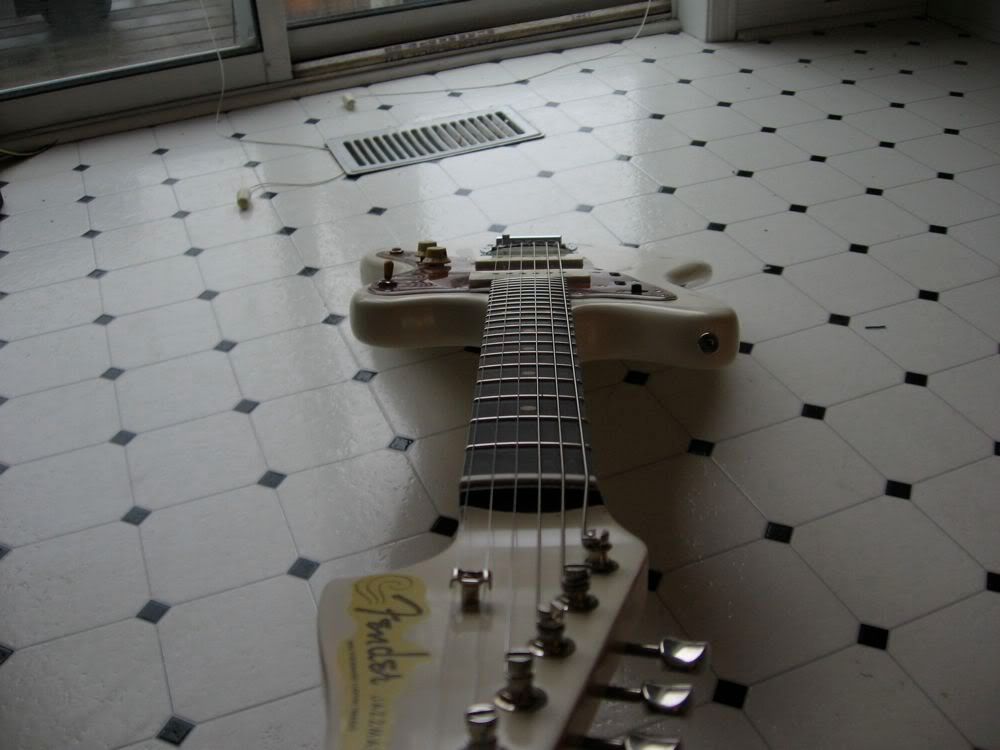
The neck ready for finishing
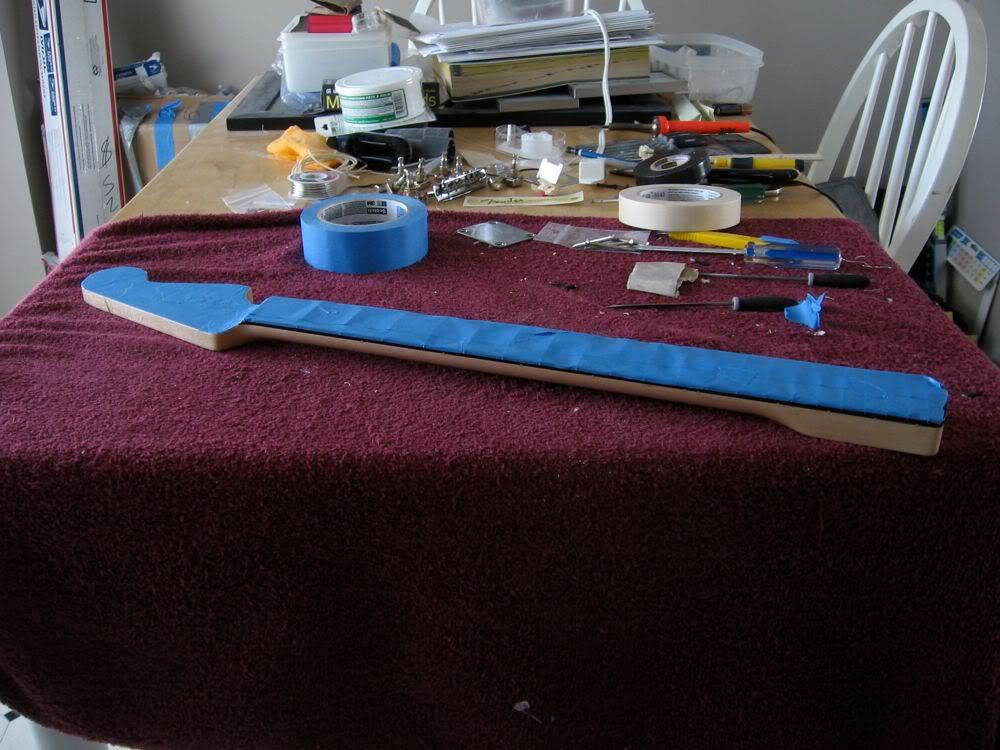
I misted a couple of coats of clear to seal the wood then just used a standard home depot stain to tint the back.
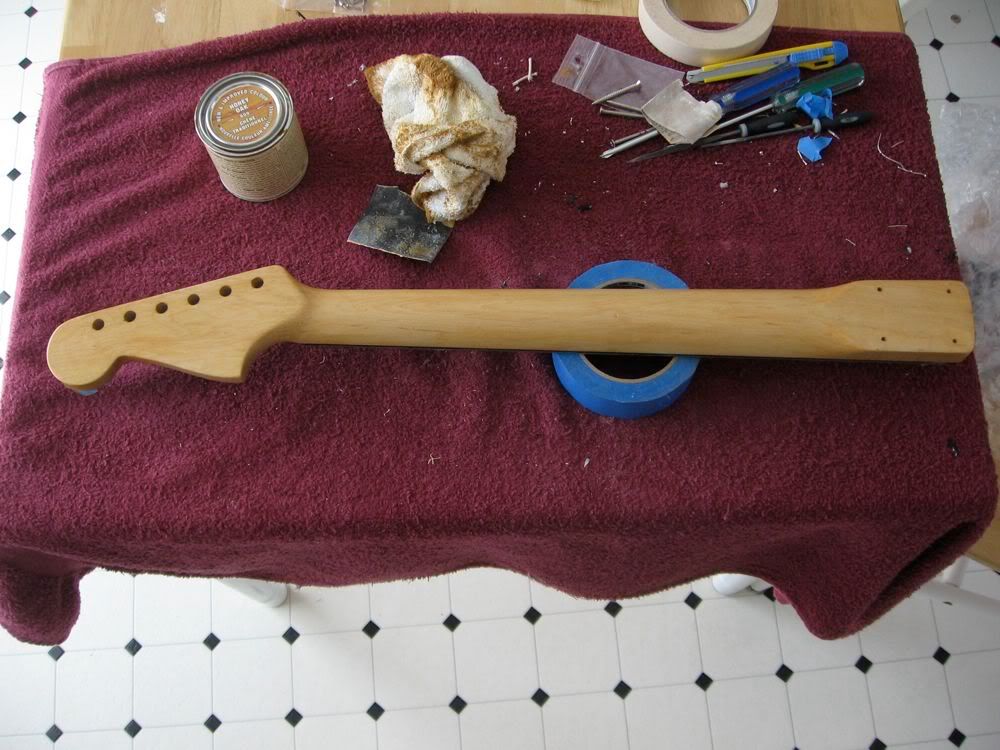
Here's how it looked after a couple more coats of clear.
Musikraft slab boards run straight across the headstock but I thought I'd try to give it that convex look of an original fender, wasn't too successful as you'll see later.
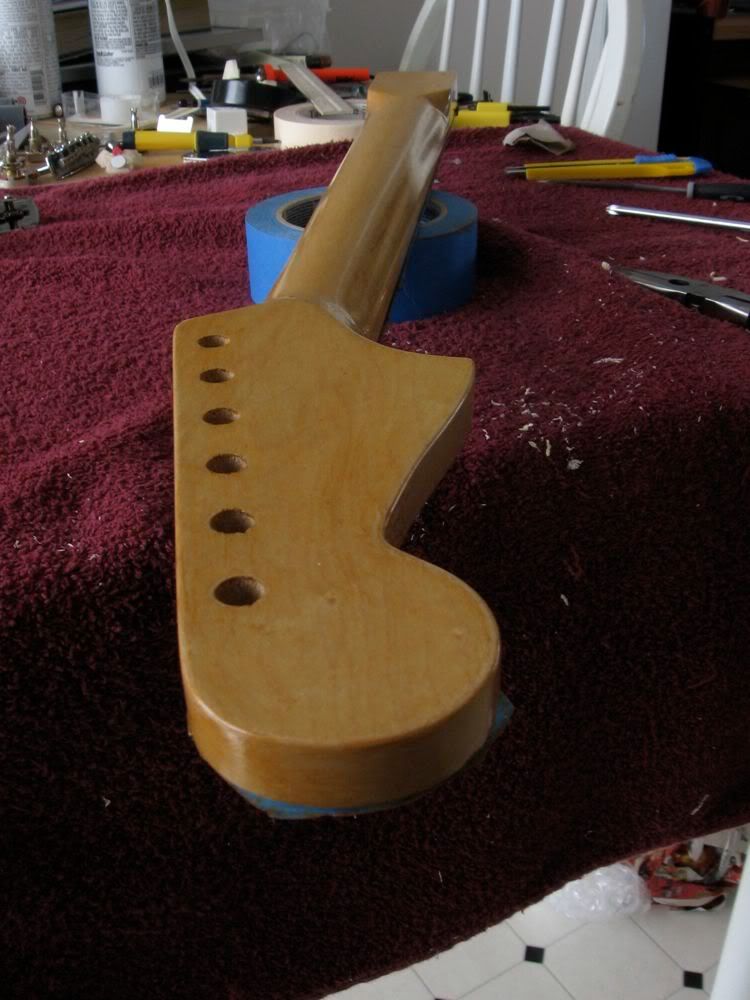
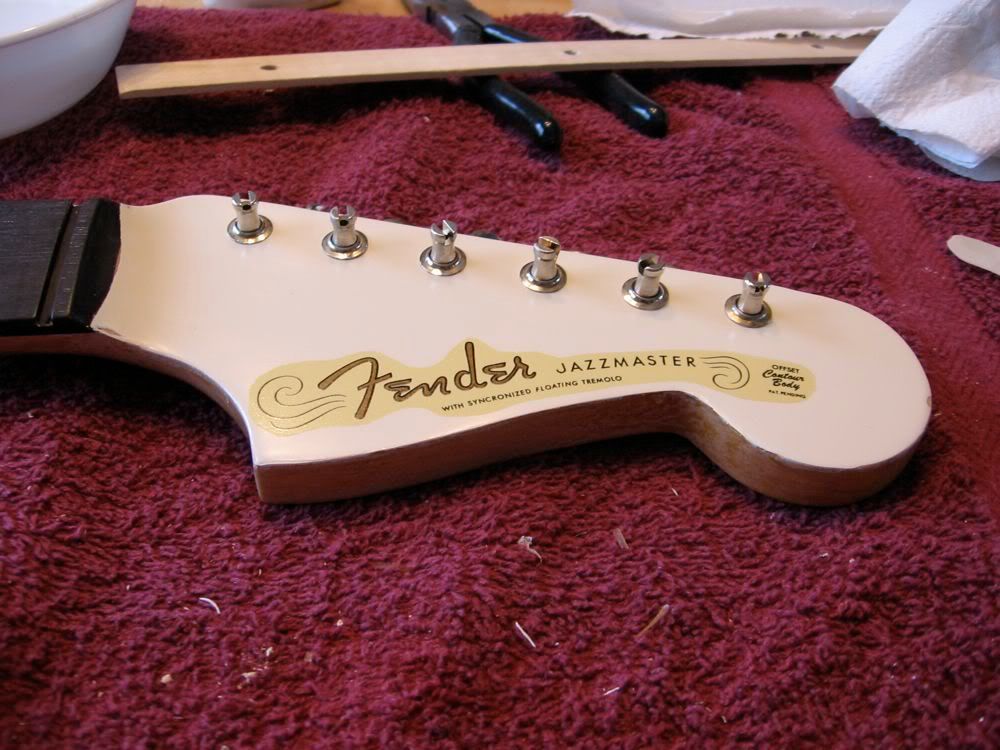
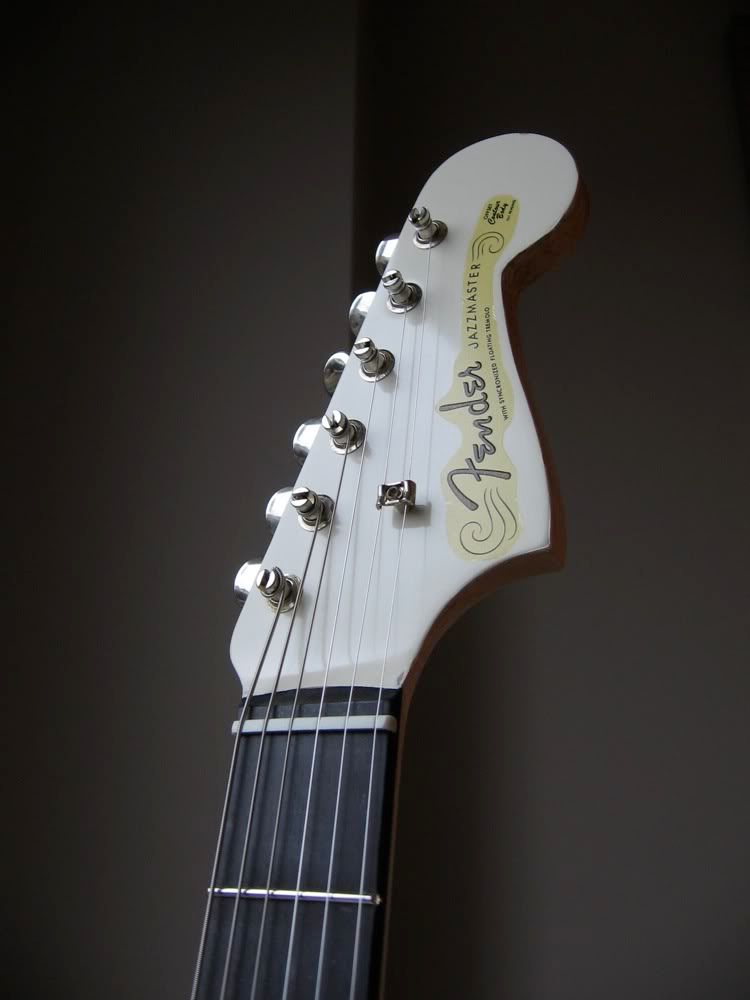
Headstock painted
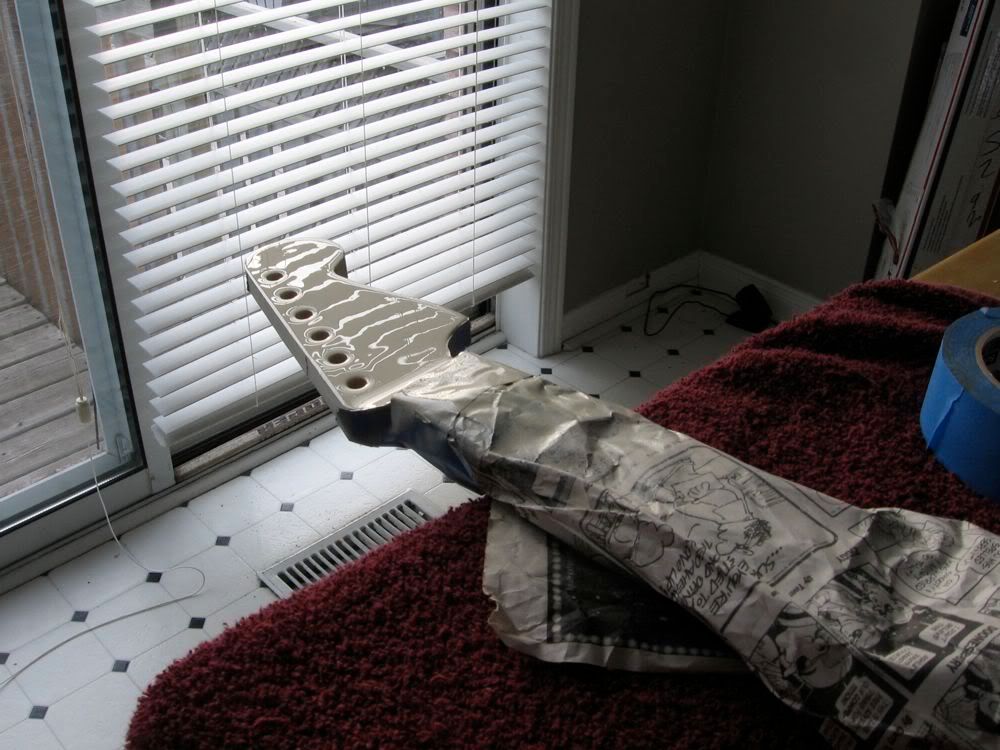
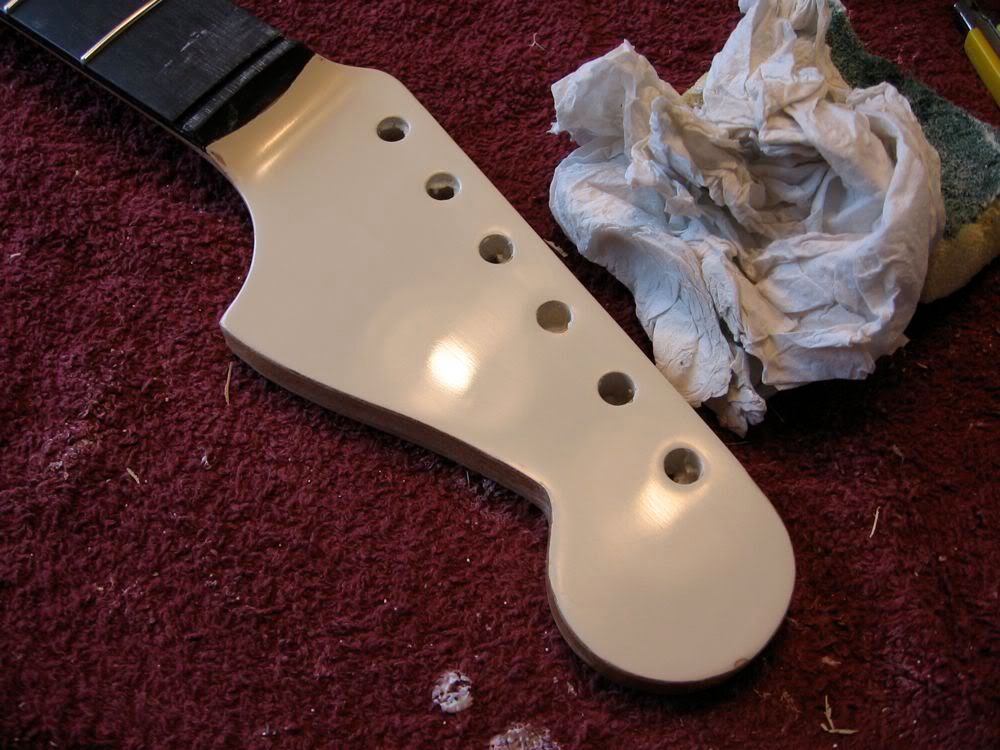
Wetsanding

Sanded and polished. I kind of oversanded at the end of the neck and also at the end of the fretboard. It didn't look too bad and at this point I just wanted to finish up so I let it be. It's fake M@J@ anyway!!!
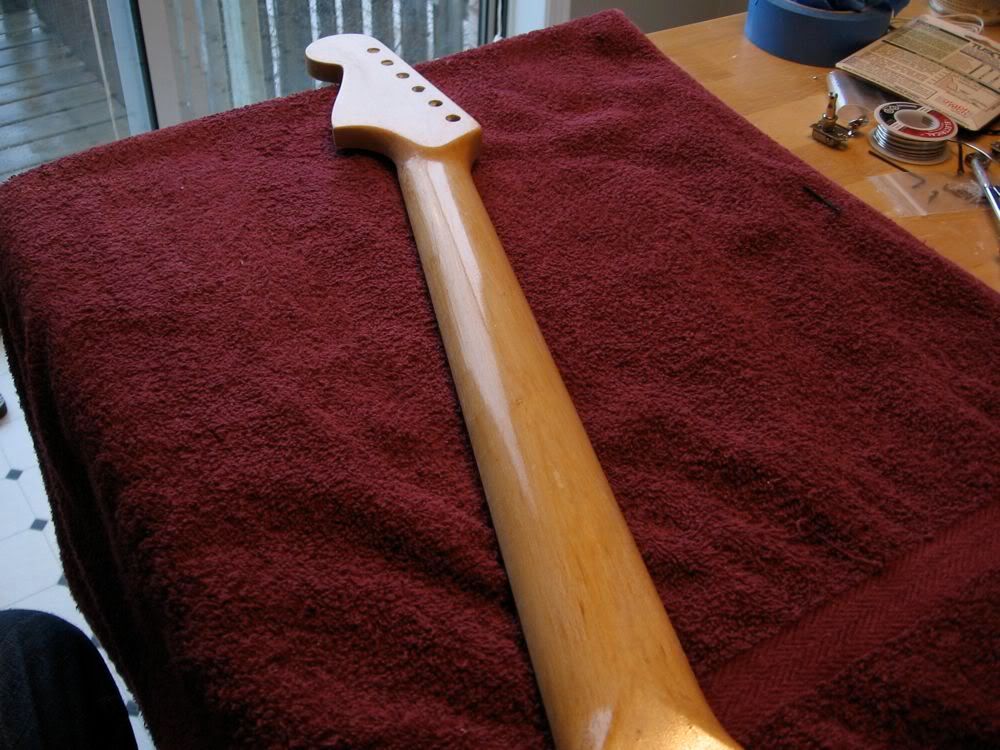
The neck polished. I used Rustoleum lacquer (acrylic I assume) and it feels great, I'd definitely use it again.
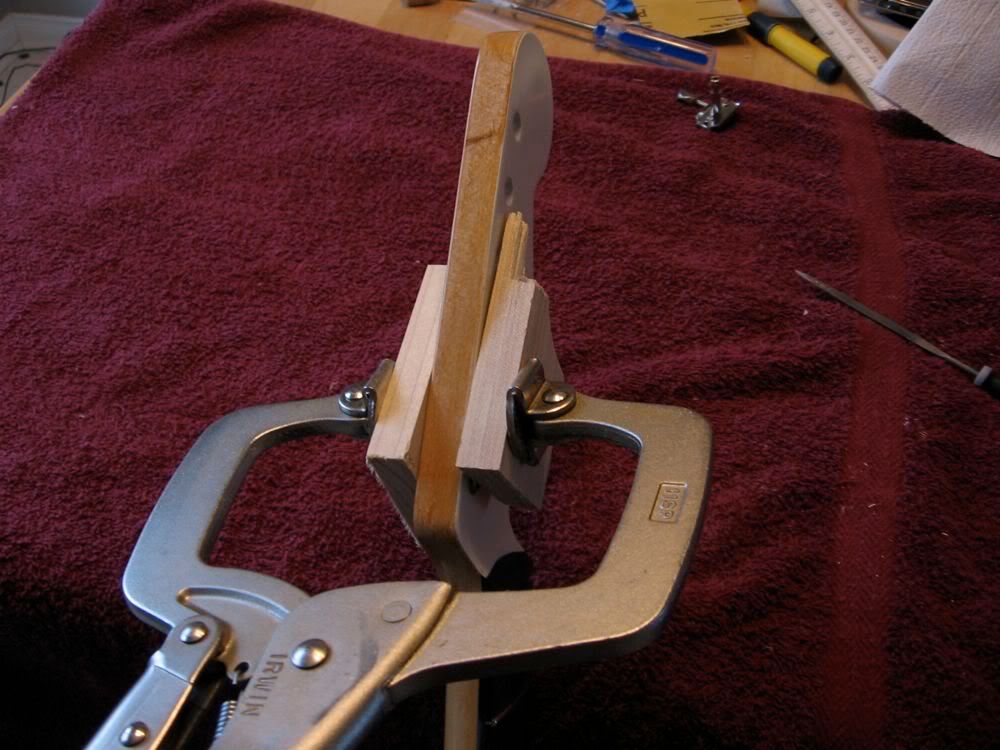
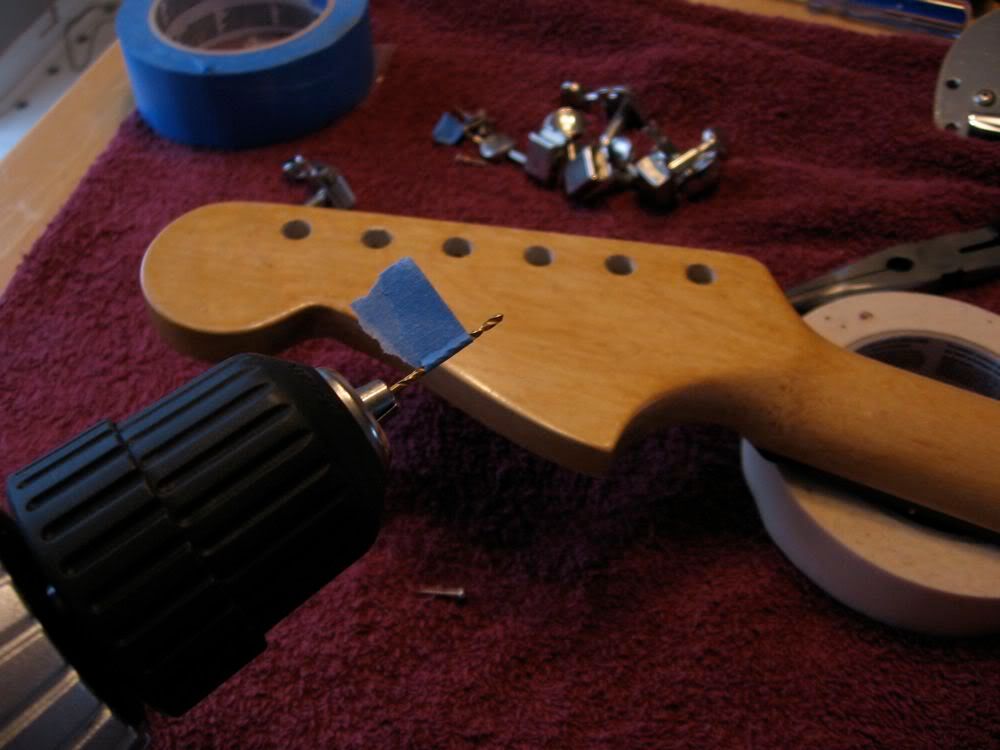
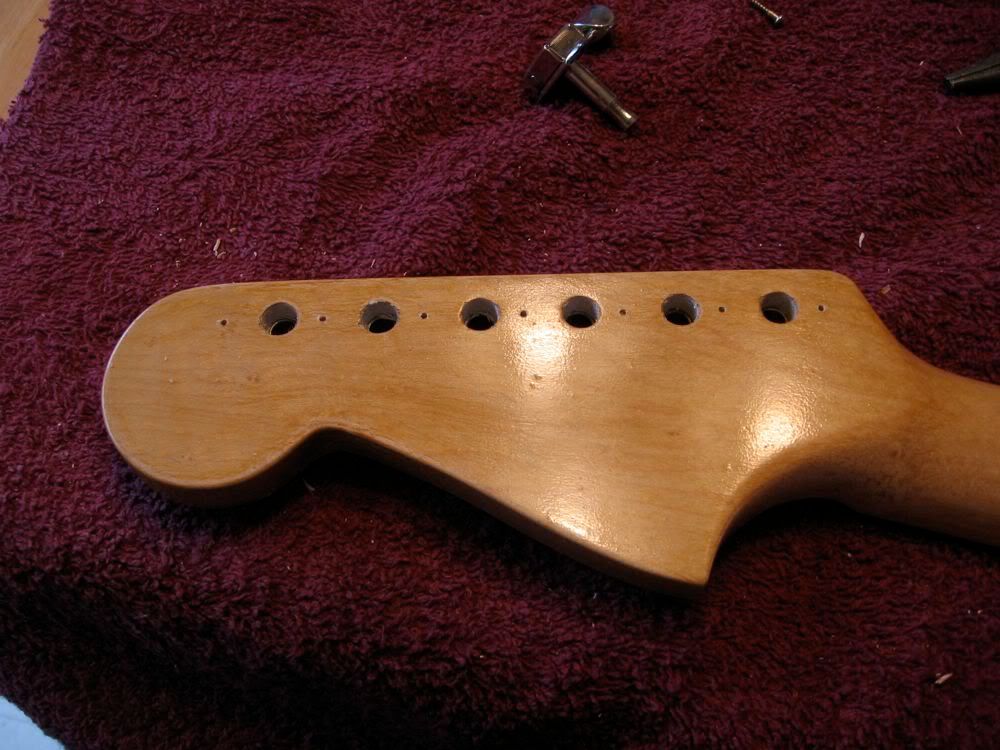
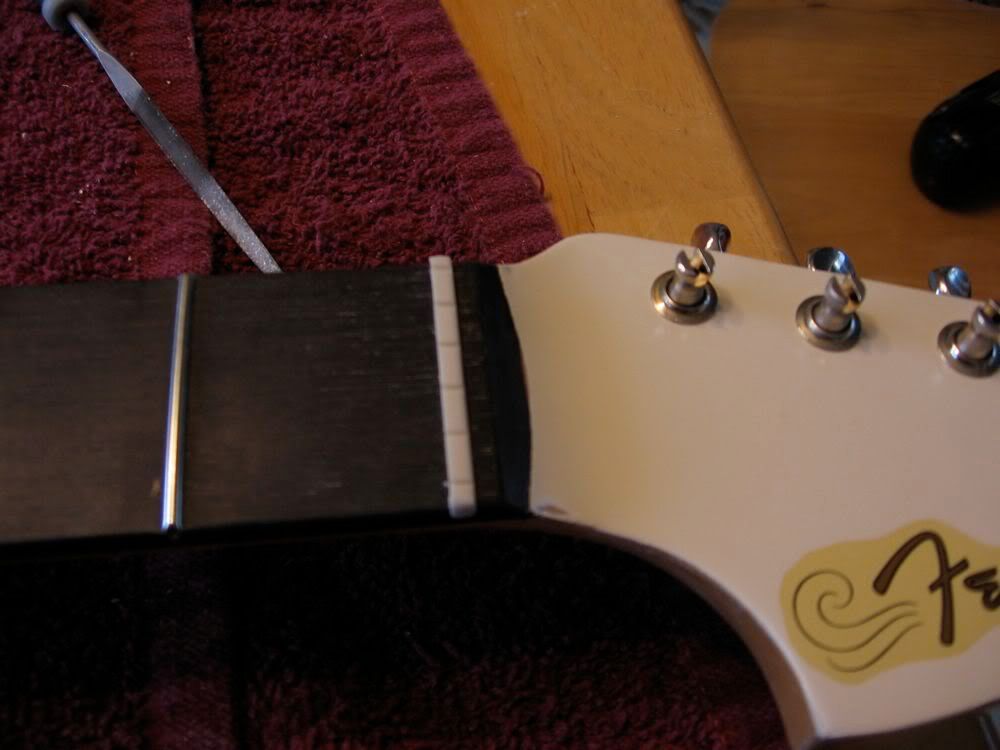
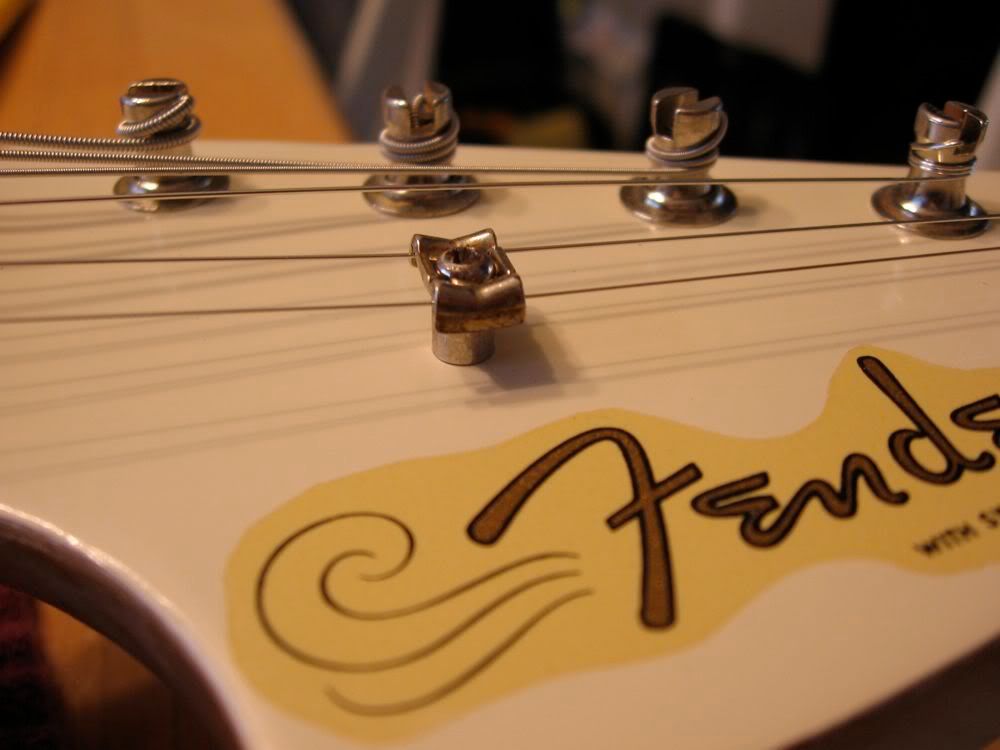
I used the clamp method (which I learned here) for popping in the tuner ferrules and it worked like a charm
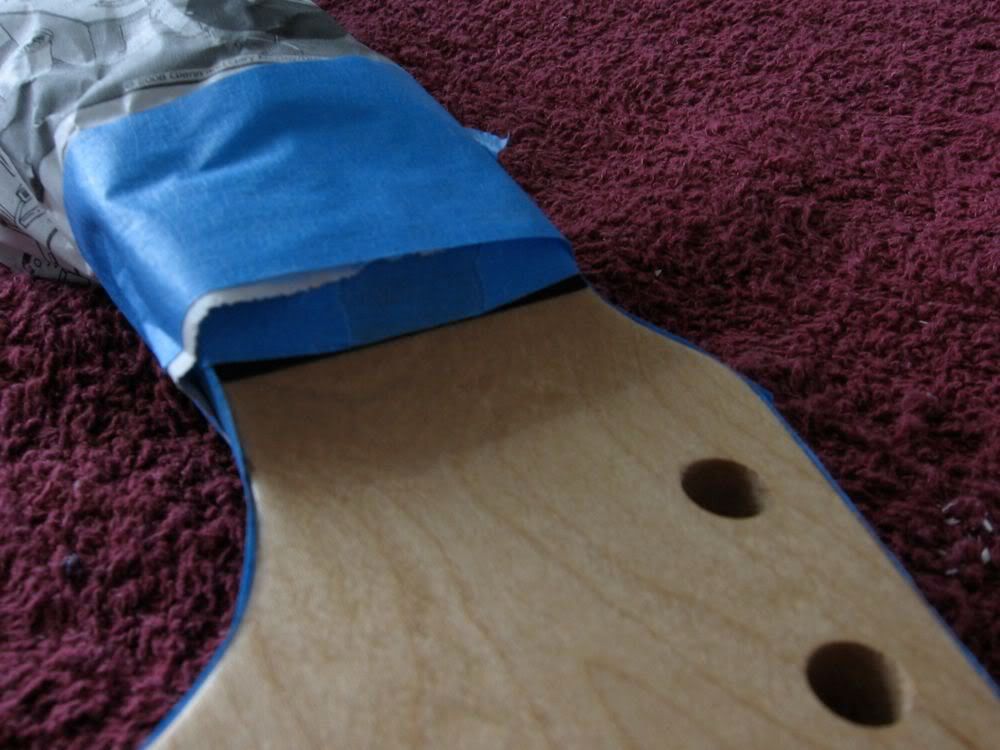
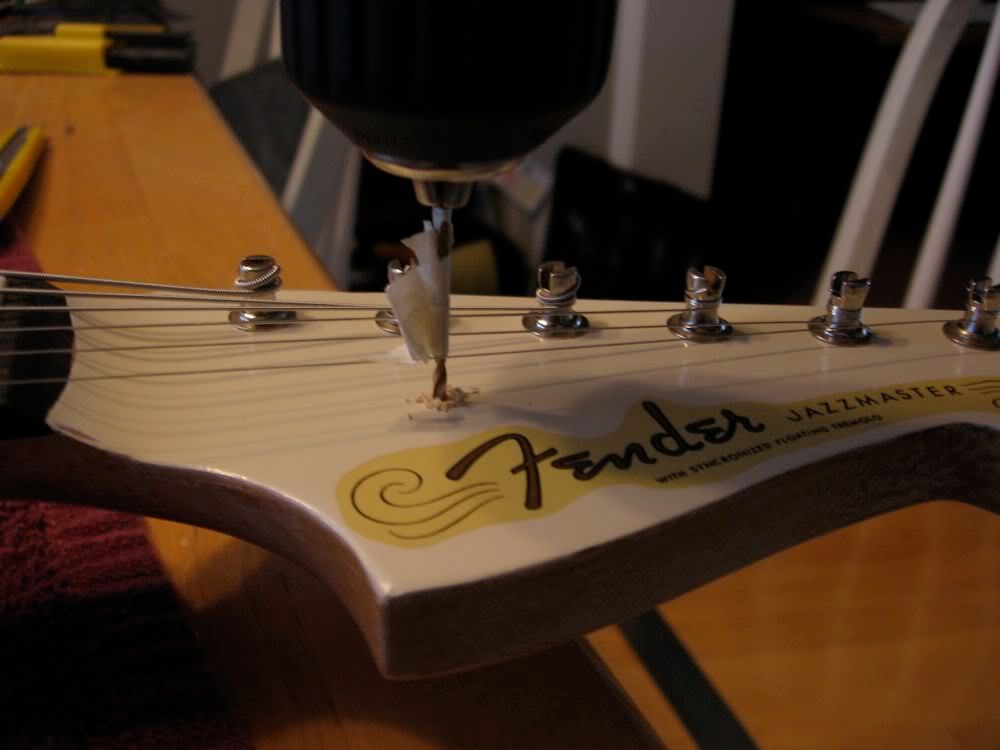
Drilling tuner screw holes. This little piece of tape stopped me from drilling right through the headstock
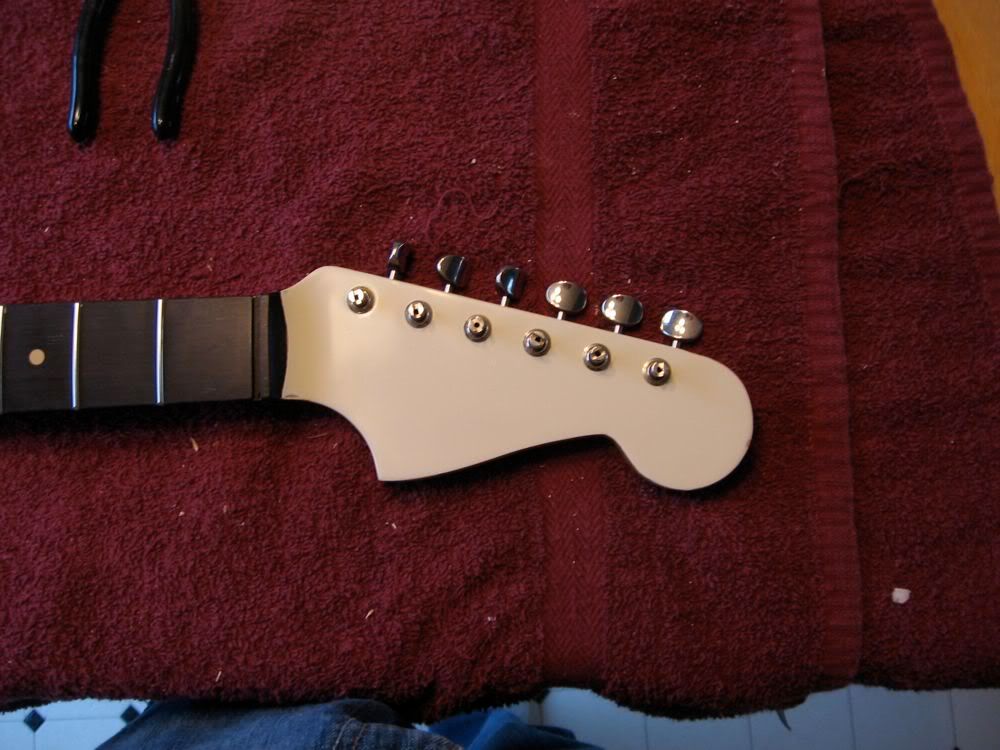
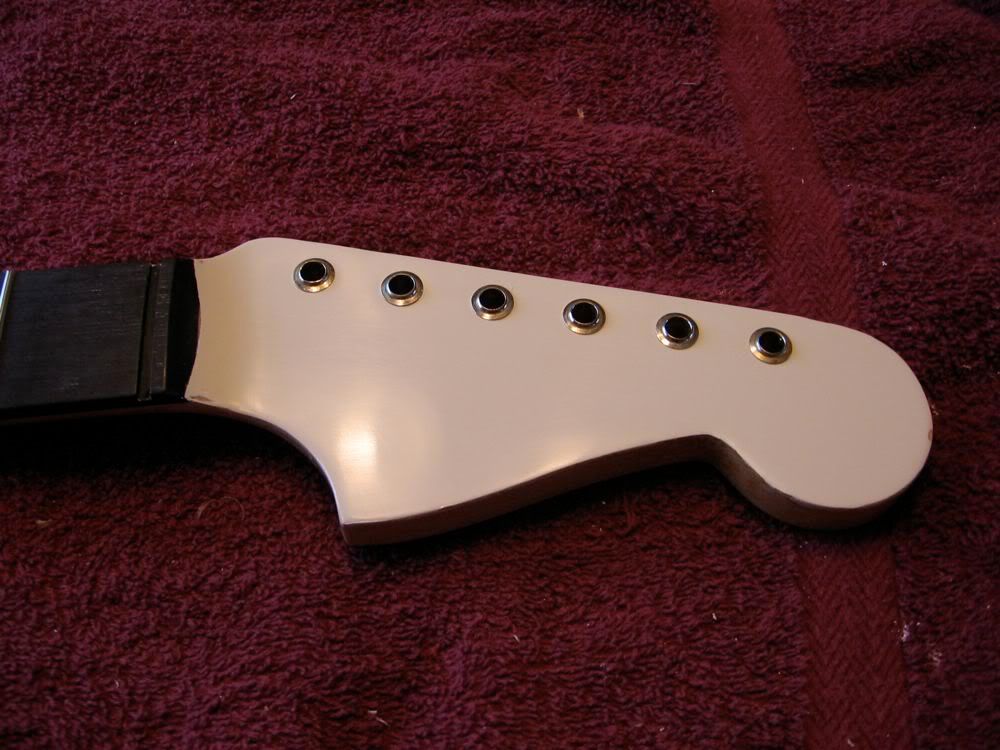
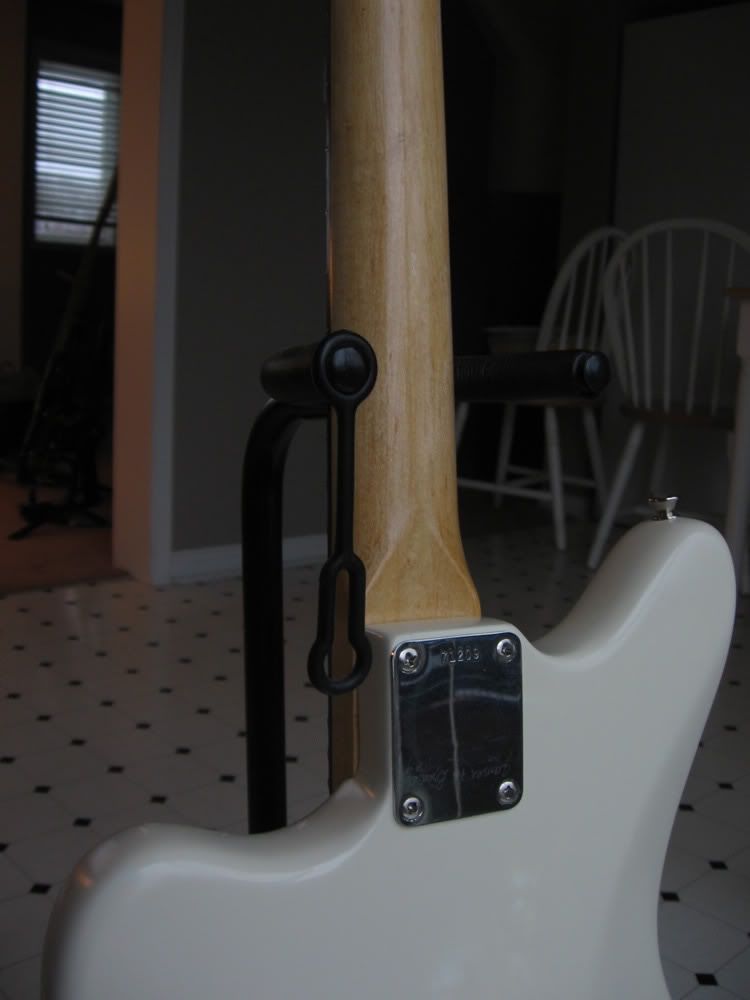
A decal from FenderBob, these really are amazing quality. I had also cleaned up the the excess white paint on the sides of the headstock but forgot to take a finished picture.
Pre-slotted Tusq nut shaped and installed
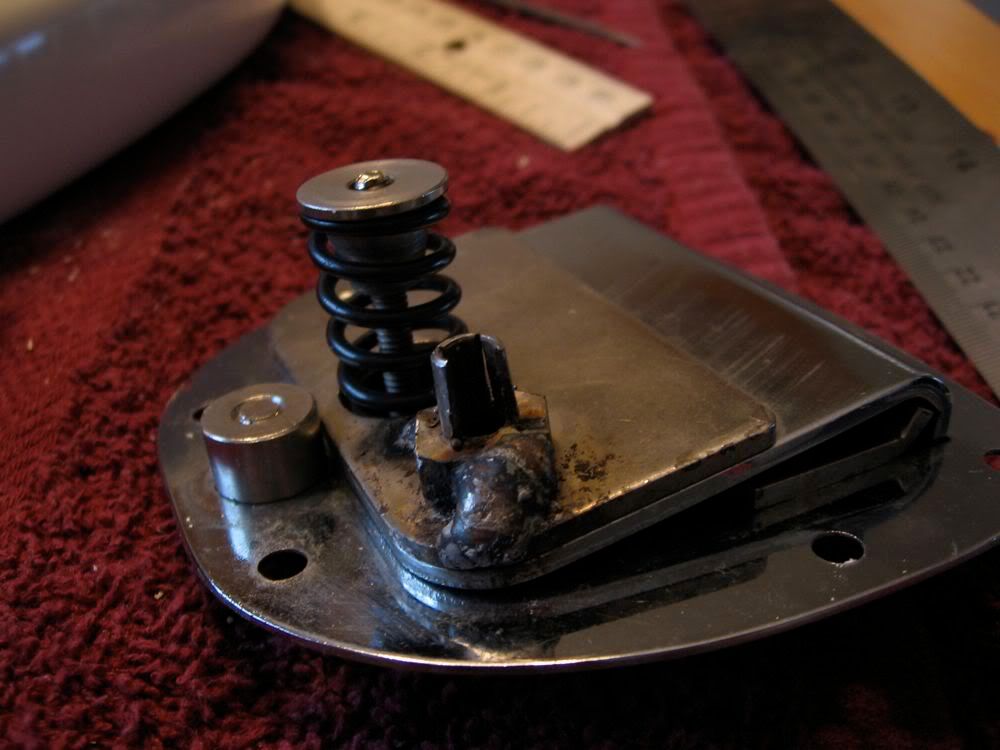
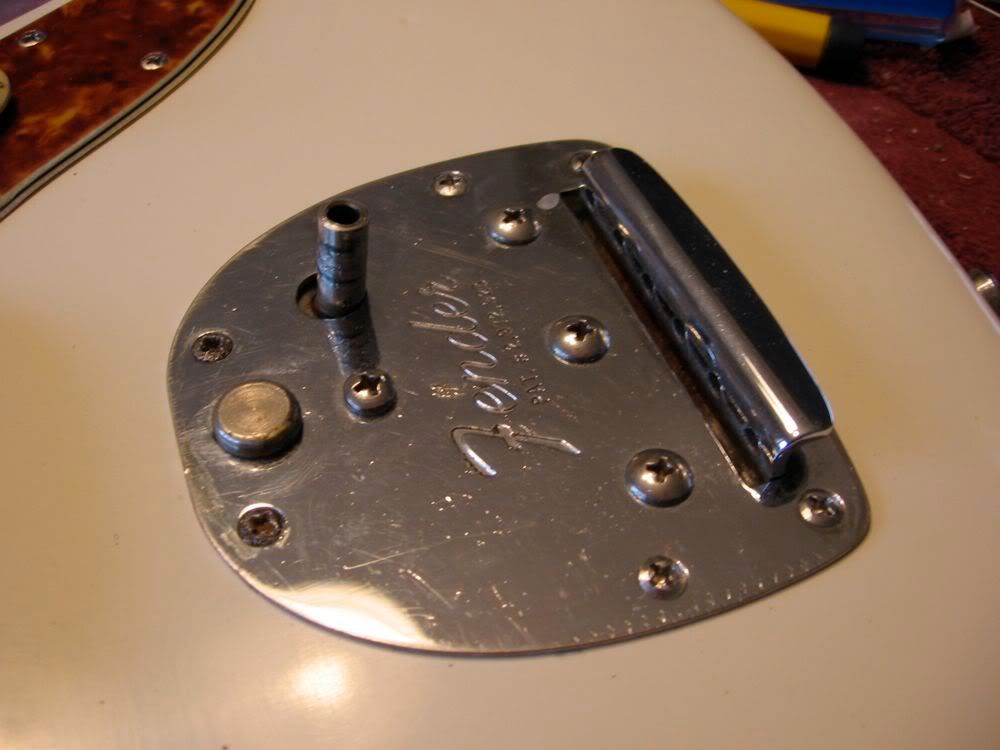
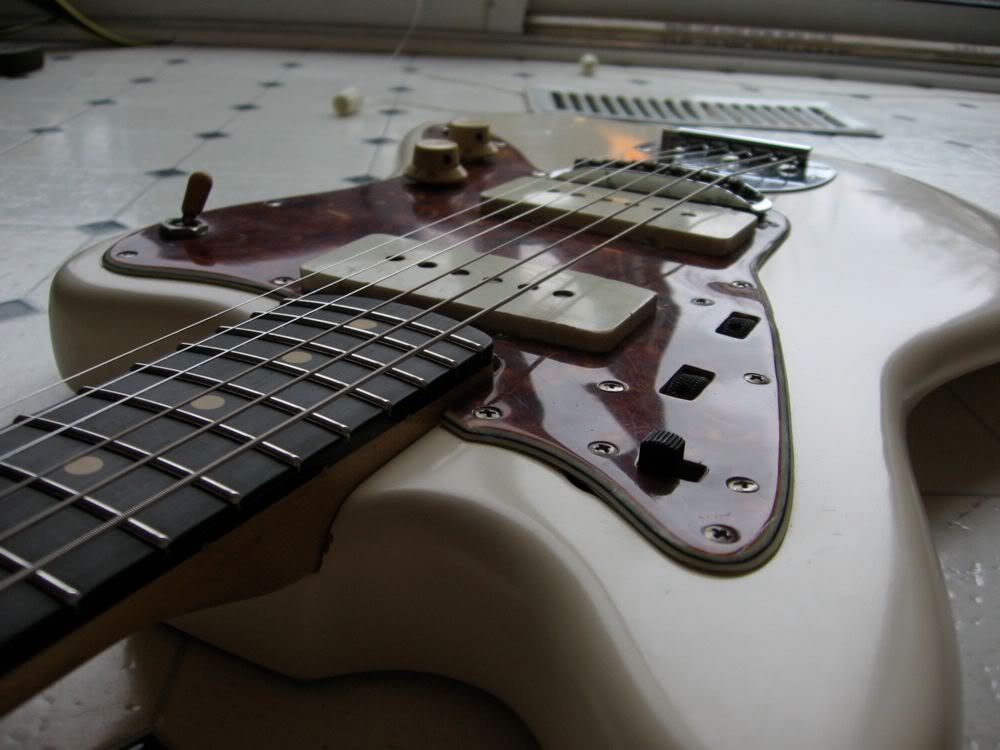
Once upon a time somebody tried to MacGuyver the trem together. It still works fine but I just hope that I never have to change the collet
I only had 3 trem screws so I figured I could easily find three more that were similar looking at a hardware store. But this being the land of the Robertson screw (a great invention by the way ) I couldn't seem to find any Phillips screws with a convex head that were the right size. So I found some with a flat top and just spent a couple of minutes with a file.
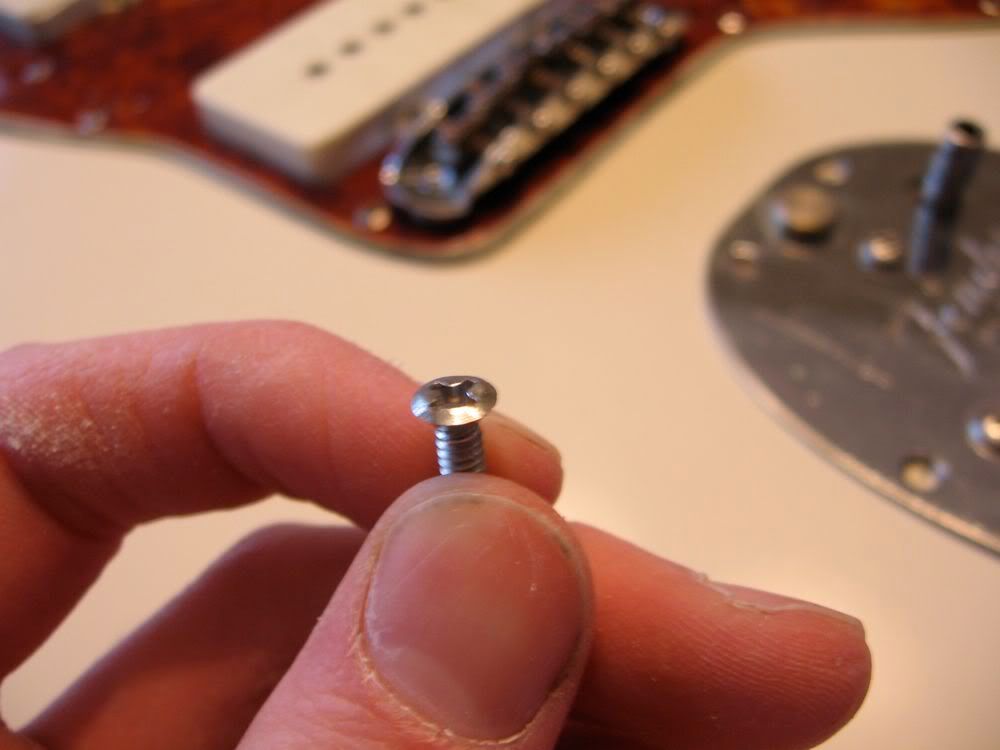
The new ones don't look too out of place
One final step.....
And this one's in the bag!
From this...
to this....
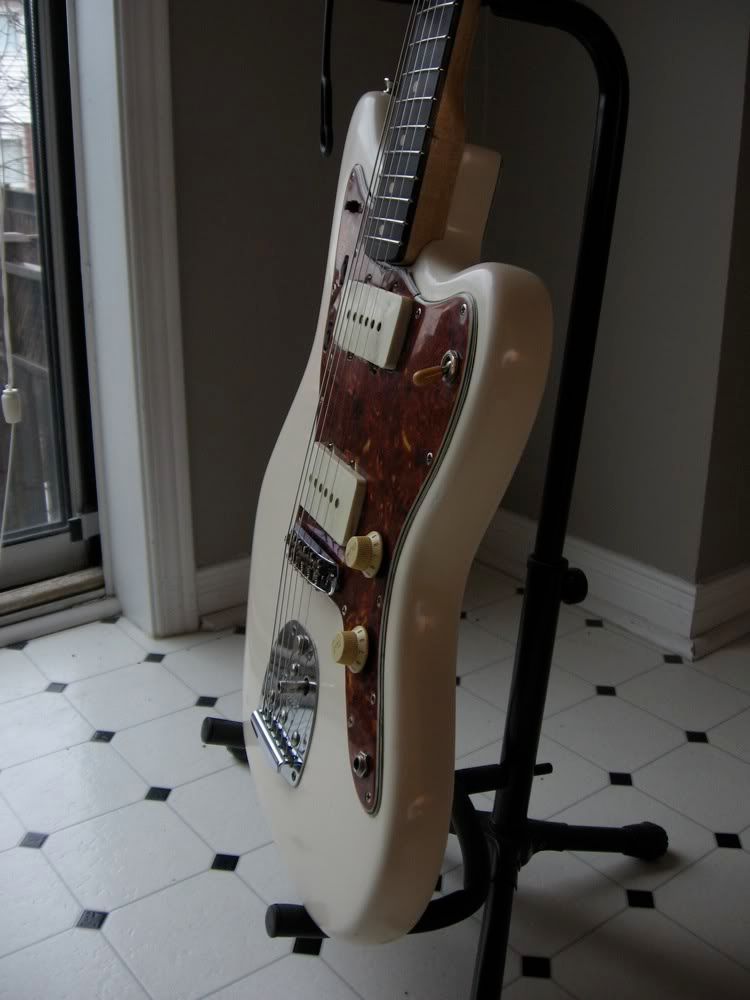
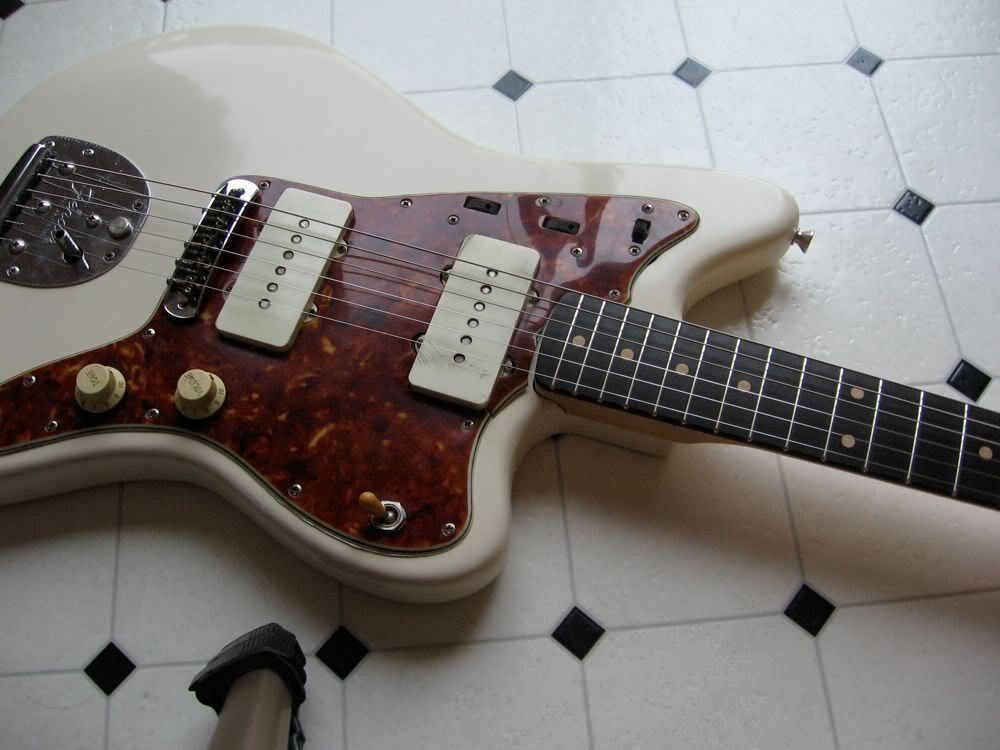
For a first timer I'm happy with the way things worked out. There are a few flaws in the finish, but nothing major so I can easily live with it. I still have to tweak the setup a bit, but this guitar is amazing. Such a rich sound that I'm actually liking way more than my jags right now. The Musikraft neck looks and plays great. I was expecting to maybe have to dress the frets slightly, but so far it seems perfect right out of the box. I'd definitely buy their necks again in the future. Thanks to all the people who've posted detailed Jazzmaster builds on this site. I stole alot of info from y'all since when I started I really had no idea what I was doing.
I'll post a bunch of finished pics since that's what everyone's here for anyway
The neck ready for finishing
I misted a couple of coats of clear to seal the wood then just used a standard home depot stain to tint the back.
Here's how it looked after a couple more coats of clear.
Musikraft slab boards run straight across the headstock but I thought I'd try to give it that convex look of an original fender, wasn't too successful as you'll see later.
Headstock painted
Wetsanding
Sanded and polished. I kind of oversanded at the end of the neck and also at the end of the fretboard. It didn't look too bad and at this point I just wanted to finish up so I let it be. It's fake M@J@ anyway!!!
The neck polished. I used Rustoleum lacquer (acrylic I assume) and it feels great, I'd definitely use it again.
I used the clamp method (which I learned here) for popping in the tuner ferrules and it worked like a charm
Drilling tuner screw holes. This little piece of tape stopped me from drilling right through the headstock
A decal from FenderBob, these really are amazing quality. I had also cleaned up the the excess white paint on the sides of the headstock but forgot to take a finished picture.
Pre-slotted Tusq nut shaped and installed
Once upon a time somebody tried to MacGuyver the trem together. It still works fine but I just hope that I never have to change the collet
I only had 3 trem screws so I figured I could easily find three more that were similar looking at a hardware store. But this being the land of the Robertson screw (a great invention by the way
The new ones don't look too out of place
One final step.....
And this one's in the bag!
From this...
to this....
For a first timer I'm happy with the way things worked out. There are a few flaws in the finish, but nothing major so I can easily live with it. I still have to tweak the setup a bit, but this guitar is amazing. Such a rich sound that I'm actually liking way more than my jags right now. The Musikraft neck looks and plays great. I was expecting to maybe have to dress the frets slightly, but so far it seems perfect right out of the box. I'd definitely buy their necks again in the future. Thanks to all the people who've posted detailed Jazzmaster builds on this site. I stole alot of info from y'all since when I started I really had no idea what I was doing.
I'll post a bunch of finished pics since that's what everyone's here for anyway
-
nonemoreblack
- PAT. # 2.972.923
- Posts: 188
- Joined: Sat Jul 07, 2007 7:58 pm
- Location: oshawa, canada
Re: 62 Jazzmaster Project (Gettin' Closer)
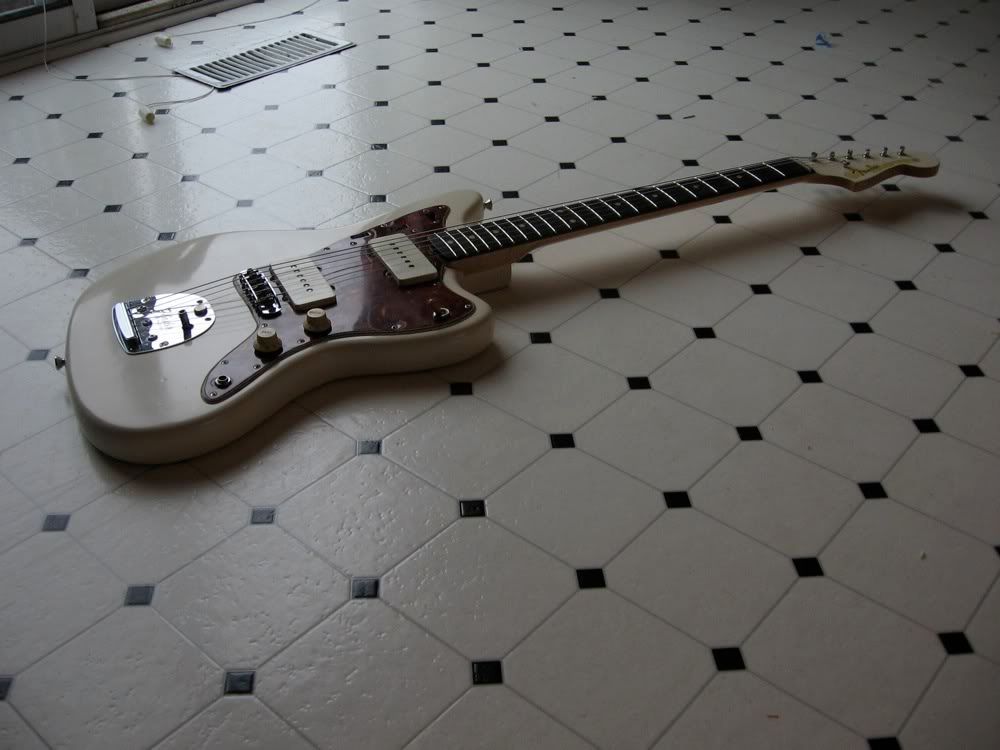
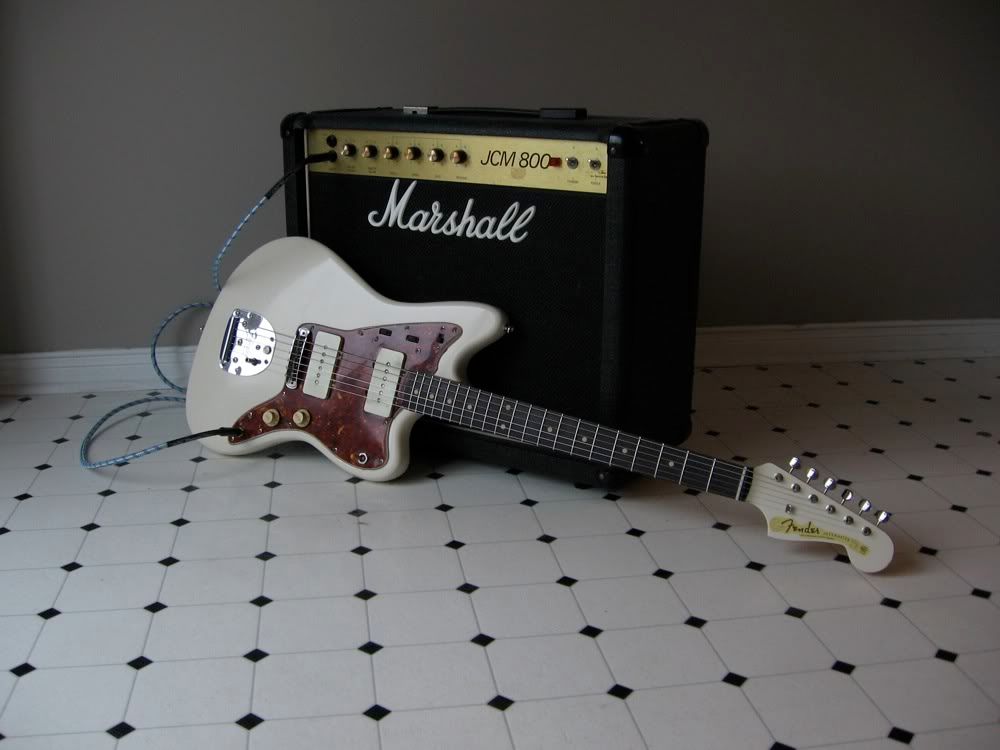
I think I'm officially a Jazzmaster convert now, I'm lovin' this thing.
The goods:
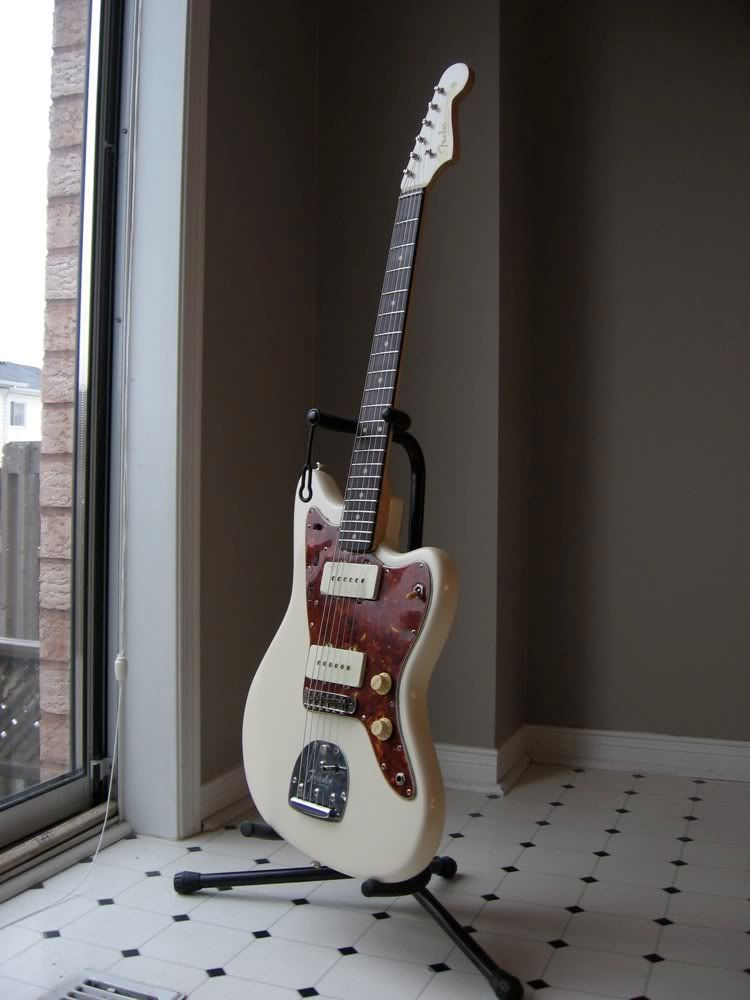
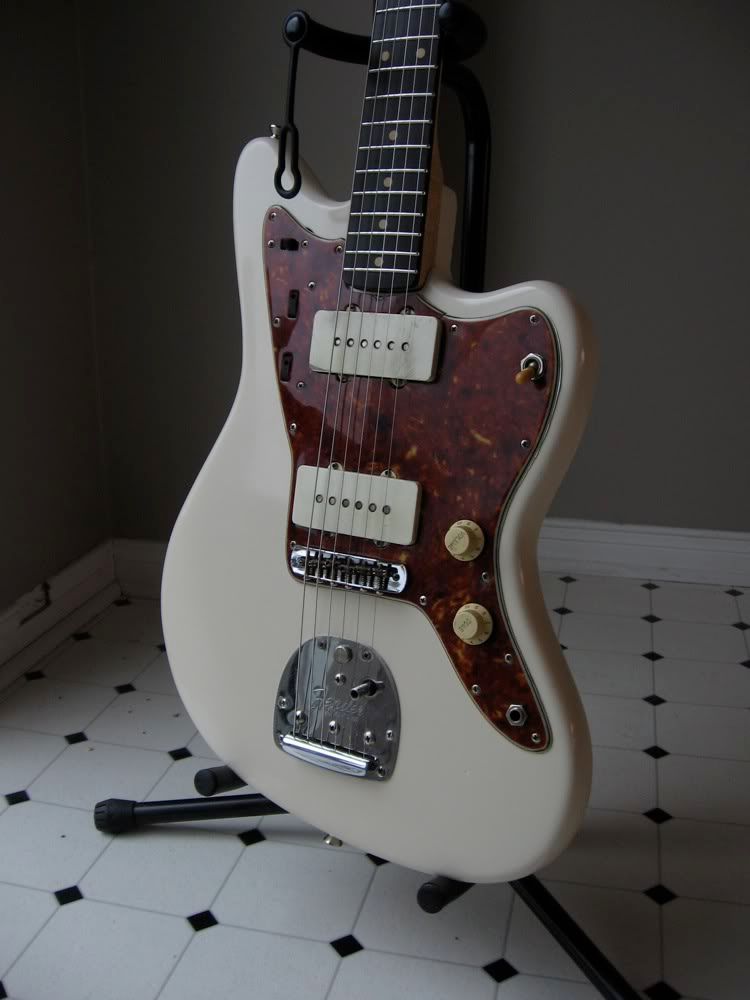
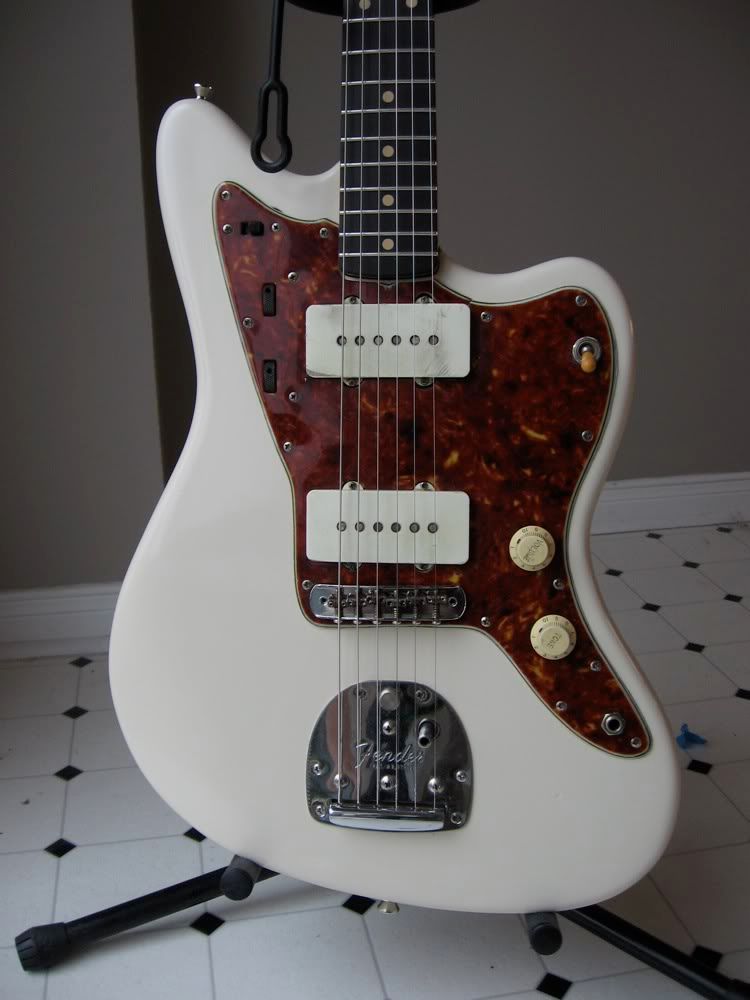
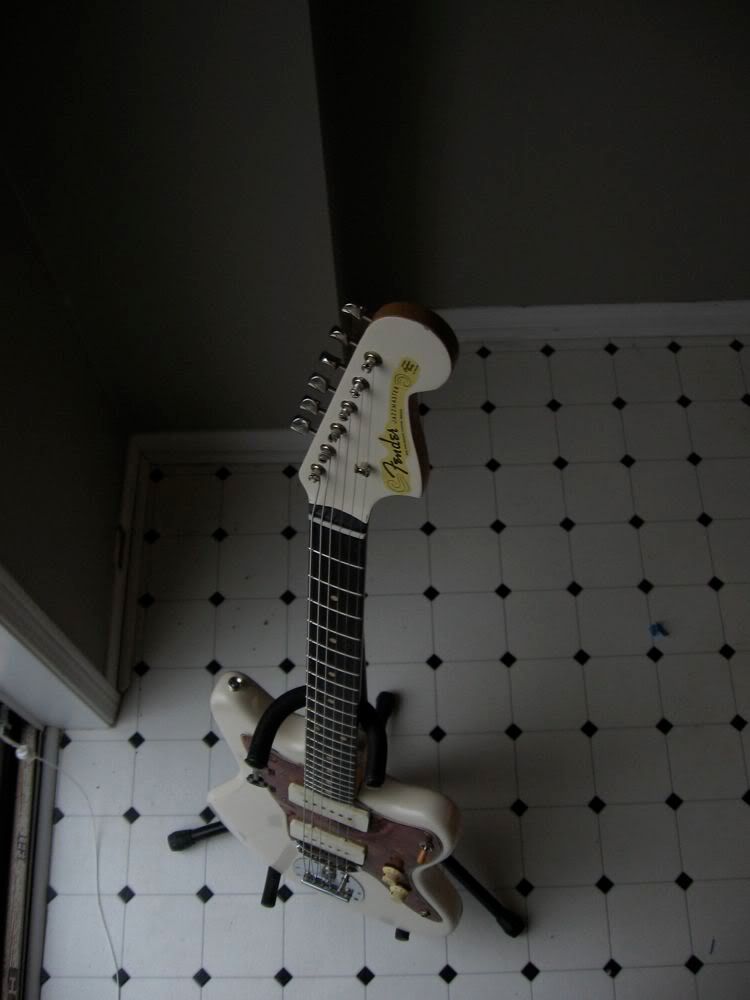
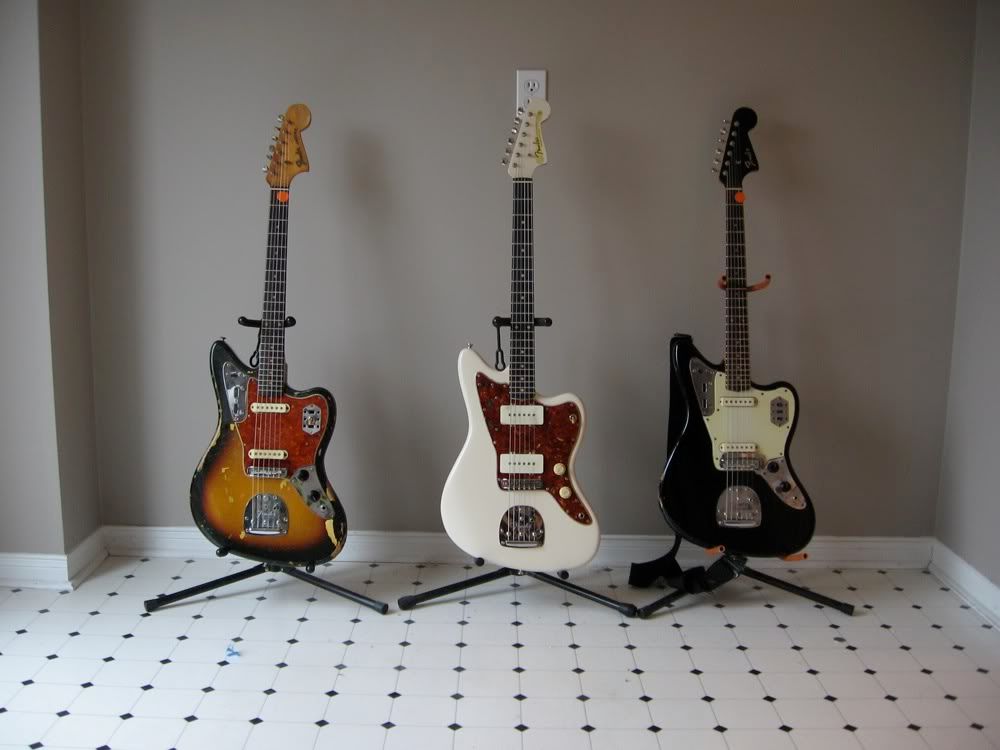
...and the money shot
The goods:
...and the money shot
-
mcjt

- PAT. # 2.972.923
- Posts: 4295
- Joined: Fri Dec 29, 2006 2:17 pm
- Location: Côte-St-Luc QC
-
ohm-men

- Expat

- Posts: 4342
- Joined: Tue Sep 26, 2006 5:01 am
- Location: Belgium
- Contact:
Re: 62 Jazzmaster Project (DONE!!!!)
Very nice! I like it a lot. Good work.
Could you shed some more light on the tinting procces for the neck? What was the stain exeactly? I really like the vintage honey amber colour of it.
+ the fact it looks very, very good.
Could you shed some more light on the tinting procces for the neck? What was the stain exeactly? I really like the vintage honey amber colour of it.
+ the fact it looks very, very good.
Proud "Young Router Jockey" And Rental service for "woodchippers"
-
nonemoreblack
- PAT. # 2.972.923
- Posts: 188
- Joined: Sat Jul 07, 2007 7:58 pm
- Location: oshawa, canada
Re: 62 Jazzmaster Project (DONE!!!!)
Thanks. First I just misted a couple coats of lacquer on the neck to keep the stain from soaking into the wood. The stain I used was 'Varathane' brand and the colour was honey oak, but it was just a typical hardware store wood stain. Then I'd just brush it on, let it sit for a few minutes and wipe it off with a rag. Each time I did this the neck would be tinted a little bit more, I just repeated this until it looked good to me, maybe 10-15 times or so. Then once the stain was dry I sprayed a few more coats of lacquer.ohm-men wrote: Very nice! I like it a lot. Good work.
Could you shed some more light on the tinting procces for the neck? What was the stain exeactly? I really like the vintage honey amber colour of it.
+ the fact it looks very, very good.
-
powerdroid

- PAT. # 2.972.923
- Posts: 246
- Joined: Tue Oct 21, 2008 3:43 am
Re: 62 Jazzmaster Project (DONE!!!!)
Beautiful! Great work you've done on it.
-
the older brother
- PAT. # 2.972.923
- Posts: 10693
- Joined: Wed Aug 29, 2007 12:12 pm
- Location: Gothenburg, Sweden.
- Contact:
Re: 62 Jazzmaster Project (DONE!!!!)
Great work!
The action seem a bit high - try a shim maybe?
The action seem a bit high - try a shim maybe?
Someone knows where I can find the nearest woodchipper to throw my pieces of junk into?
-
dragonjazz

- PAT. # 2.972.923
- Posts: 144
- Joined: Wed Dec 13, 2006 1:29 am
Re: 62 Jazzmaster Project (DONE!!!!)
I have a 63 being restored. Luthier told me the neck rake on the JM was tilted back by Leo to get that jazz guitar effect, hence the shim in the pocket.the older brother wrote: Great work!
The action seem a bit high - try a shim maybe?
-
nonemoreblack
- PAT. # 2.972.923
- Posts: 188
- Joined: Sat Jul 07, 2007 7:58 pm
- Location: oshawa, canada
Re: 62 Jazzmaster Project (DONE!!!!)
Yeah, the action's really high in those pics cause I had just put it all together so I could take some photos before I ran out of daylight. I did a full setup last night, shimmed the neck and tweaked the trussrod and now it's playing great, do I dare say like buttah?the older brother wrote: Great work!
The action seem a bit high - try a shim maybe?
-
Fiddy

- PAT. # 2.972.923
- Posts: 12687
- Joined: Thu Nov 29, 2007 11:38 am
- Location: Canada Dry
Re: 62 Jazzmaster Project (DONE!!!!)
Awesome work made in Canada. 
-
Stratelejazzuar
- PAT. # 2.972.923
- Posts: 6744
- Joined: Sun Jul 22, 2007 10:15 pm
- Location: K-W, Ontario, Canada
Re: 62 Jazzmaster Project (DONE!!!!)
+1tribi9 wrote: Awesome work made in Canada.
And i have to say SNAP! tort on oly white GAS!!!
-
shikantaza

- PAT. # 2.972.923
- Posts: 195
- Joined: Tue Jan 29, 2008 9:40 pm
- Location: Long Island, NY
Re: 62 Jazzmaster Project (DONE!!!!)
Totally freakin' awesome! Looks better than quote "re-issue" models, they got no mojo! Wanna trade?!?! 