Restoring a Lake Placid Blue '63 Bass VI
- Highnumbers
- PAT. # 2.972.923
- Posts: 666
- Joined: Sat Apr 25, 2009 1:21 am
- Location: Orange County, CA
Restoring a Lake Placid Blue '63 Bass VI
Migrating from the original thread in the marketplace section
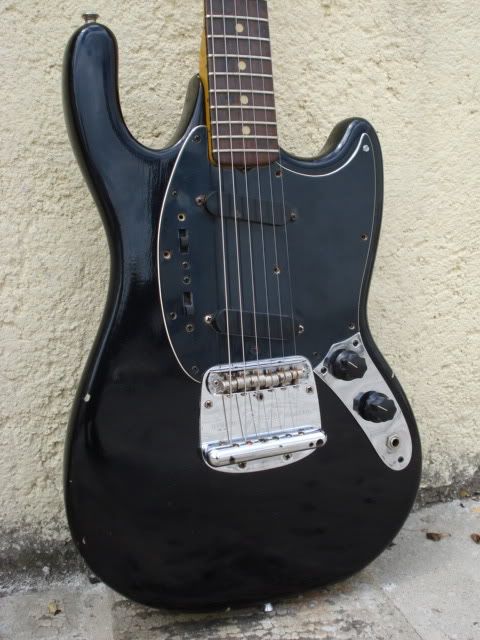
Recently, this sad-looking '63 Bass VI appeared on Facebook Marketplace in eastern Kentucky, and I had to have it. The body was reshaped more than 40 years ago (the seller's family had it since the late 70s in this exact condition, and it was being used as a four-string bass.
BUT the promising thing is that the guitar was otherwise original and complete except for a couple missing bridge saddles/screws. And it was originally Lake Placid Blue, including a totally intact neck withmatching headstock. It even had the original blonde '63 case, mint guard and all the parts in working shape.
As those who have followed along my recent "Jazzo-Sonic" '62 Jazzmaster restoration thread know, I don't shy away from a challenge and really enjoy bringing guitars back from the brink.
The plan is to trim the edge of the body, perfectly match a new slab of alder to join the body and patch everything up, then refinishing the body to match the headstock. Despite the butchery of this guitar, it's not as complex a restoration as it seems (it's even easier than the '62 JM doubleneck restoration was).
Subscribe if you want to get notifications, I'll update the thread as I make progress on the restoration.
BEFORE photos (as landed)
- MattK
- PAT. # 2.972.923
- Posts: 3882
- Joined: Sun Aug 10, 2008 9:51 pm
- Location: Hobart, Australia
Re: Restoring a Lake Placid Blue '63 Bass VI
Bring it on!!
- JSett
- PAT. # 2.972.923
- Posts: 9712
- Joined: Mon Jun 01, 2009 1:33 pm
- Location: Old Hampshire, Old England
Re: Restoring a Lake Placid Blue '63 Bass VI
Hot damn this is gonna be a good one! Subscribed!
Last edited by JSett on Mon Sep 25, 2023 7:33 pm, edited 1 time in total.
Silly Rabbit, don't you know scooped mids are for kids?
- Highnumbers
- PAT. # 2.972.923
- Posts: 666
- Joined: Sat Apr 25, 2009 1:21 am
- Location: Orange County, CA
Re: Restoring a Lake Placid Blue '63 Bass VI
Before I get too deep into thread updates, are there any OSGers who have an original 60s Bass VI that could provide some measurements for me?
I have a template provided by Faction Guitars but I believe that is based on a reissue and slightly larger than an original Fender VI.
- PorkyPrimeCut
- PAT. # 2.972.923
- Posts: 24540
- Joined: Tue Nov 28, 2006 7:46 am
- Location: Leipzig
- Contact:
Re: Restoring a Lake Placid Blue '63 Bass VI
I can't wait for this one to get started!!
*popcorn emoji*
*popcorn emoji*
You think you can't, you wish you could, I know you can, I wish you would. Slip inside this house as you pass by.
- smjenkins
- PAT. # 2.972.923
- Posts: 1579
- Joined: Fri Oct 08, 2010 5:45 am
- Location: The Emerald Fucking City
Re: Restoring a Lake Placid Blue '63 Bass VI
I have a '63 Bass VI but it's been refinished twice so some of the measurements might be a bit off. Happy to get you any info that I can though.
The VI in question is overviewed here: viewtopic.php?f=41&t=119946&p=1681825&h ... n#p1681825
- Highnumbers
- PAT. # 2.972.923
- Posts: 666
- Joined: Sat Apr 25, 2009 1:21 am
- Location: Orange County, CA
Re: Restoring a Lake Placid Blue '63 Bass VI
Sounds perfect! Thanks in advance, I'll send a DM.smjenkins wrote: ↑Mon Sep 25, 2023 2:34 pmI have a '63 Bass VI but it's been refinished twice so some of the measurements might be a bit off. Happy to get you any info that I can though.
The VI in question is overviewed here: viewtopic.php?f=41&t=119946&p=1681825&h ... n#p1681825
- F15hface
- PAT. # 2.972.923
- Posts: 693
- Joined: Thu Sep 11, 2014 7:41 am
- Location: UK
Re: Restoring a Lake Placid Blue '63 Bass VI
I kind of like the finish it reached you withsmjenkins wrote: ↑Mon Sep 25, 2023 2:34 pmI have a '63 Bass VI but it's been refinished twice so some of the measurements might be a bit off. Happy to get you any info that I can though.
The VI in question is overviewed here: viewtopic.php?f=41&t=119946&p=1681825&h ... n#p1681825
Like if the burst thickness were a little more even...
- Highnumbers
- PAT. # 2.972.923
- Posts: 666
- Joined: Sat Apr 25, 2009 1:21 am
- Location: Orange County, CA
Re: Restoring a Lake Placid Blue '63 Bass VI
Alright -- let's dig in.
First step disassembly and inspection. Everything checked out fine and worked, so I just bagged up the parts. You can see the LPB peeking through in the cavities here.
Since there's even more going on with the pickguard on a Bass VI than a Jaguar, I made a polycarbonate backing board with recesses to fit the three pickups and also included the switch plate and bridge thimbles to keep everything from shrinking while I'm doing the restoration work.
Oddly, there is evidence that this thing was played left handed at some point (extra strap button in the lower control horn) and it might have had another neck on it for a short while because there are four additional holes drilled through the body for a different neckplate (no extra holes in the neck). More weirdness...
Also, round of applause for the most phallic looking guitar appendage possible.
- Highnumbers
- PAT. # 2.972.923
- Posts: 666
- Joined: Sat Apr 25, 2009 1:21 am
- Location: Orange County, CA
Re: Restoring a Lake Placid Blue '63 Bass VI
Getting that horrible varnish paint/stain off the guitar with chemical paint stripper
The guitar had clearly been painted bright green at one point, over the cavities (except they must have kept the pickup shielding, upper control plate and lower switch plate on since it's still intact LPB underneath there. Ultimately I need to decide if I'm trying to save the LPB under the pickguard and control plates (inside the cavity will be taped off, but I mean on the body surface.
The neck pocket cleaned up, but it'll probably get refinished once I plug the extra four holes. Note there is also a small cutaway added to access the truss rod. I'll be repairing this later.
Also, I weighed the body so I can weigh it again after the repair and determine how much of the body was replaced.
- MattK
- PAT. # 2.972.923
- Posts: 3882
- Joined: Sun Aug 10, 2008 9:51 pm
- Location: Hobart, Australia
Re: Restoring a Lake Placid Blue '63 Bass VI
Highnumbers wrote: ↑Mon Sep 25, 2023 3:59 pmAlso, round of applause for the most phallic looking guitar appendage possible.
- Highnumbers
- PAT. # 2.972.923
- Posts: 666
- Joined: Sat Apr 25, 2009 1:21 am
- Location: Orange County, CA
Re: Restoring a Lake Placid Blue '63 Bass VI
Making a template to restore the body shape is by far the most difficult and critical part of this restoration.
Instead of doing a series of straight cuts and hoping to match all those angles up properly, I opted to trace the damaged area and make a set of positive/negative complimentary curve templates. This would flush trim the damaged area and mate it with a fresh slab of alder that can be reshaped.
Basically, turning this guitar into a jigsaw puzzle!
The person who modified this body cut it pretty far up the side, recontouring the edge on top of the belly contour. Unfortunately the only way to fix that is to make the template long enough to patch a new edge on there. It's all smooth curves to allow the router bit a clean cut.
Getting a perfect match jigsaw puzzle is easier said than done. This might bore everyone who isn't into the technical details, but basically it involves tracing the shape you need onto a Master template, then using that to cut through a sheet of material with a flush trim bit to create a positive & negative cutting template. However when you do that, the two pieces are not a perfect match because you're missing material that is the width of the cutting router bit (1/4" or 3/8" or 1/2" depending on the bit). So you have to gain that material back by spacing the "negative" template back the same amount as the missing material, and use an oversize router bearing. You following all this?
The result is a perfectly matching positive/negative cutting template that can be used to trim the body and the replacement alder slab.
Here is where I am on the project to this very moment. Next step is gluing the alder slab section to the body using West Marine systems epoxy and then re-shaping the body.
- tequila_in_teacups
- PAT. # 2.972.923
- Posts: 331
- Joined: Tue Apr 21, 2020 1:23 am
- Location: Aotearoa me Te Waipounamu New Zealand
Re: Restoring a Lake Placid Blue '63 Bass VI
This is excellent.
- HNB
- PAT. # 2.972.923
- Posts: 13805
- Joined: Tue May 10, 2011 7:55 am
- Location: Puyallup, Washington
- Contact:
Re: Restoring a Lake Placid Blue '63 Bass VI
Great progress! Nice to see this thing put some weight on.
Christopher
Lilith Guitars
Lilith Guitars
- Embenny
- PAT. # 2.972.923
- Posts: 10363
- Joined: Tue May 24, 2016 5:07 am
Re: Restoring a Lake Placid Blue '63 Bass VI
Wonderful to see this grave injustice being set right! Great work so far.
The artist formerly known as mbene085.