Butterscotch VM Jazzmaster Project
Posted: Sun Jan 20, 2013 11:58 pm
A post that I read in this forum Inspired me to purchase a used Squier Vintage Modified Jazzmaster and do a little "modifying" myself. I want to play surf so ill replace the hardtail with a Tremolo. Found one on GC's website used and had it shipped. Had all sorts of problems. I was going to Get a refund but I LOVE the color. I explained the situation to the local GC manager and he was cool, So he gave it to me for $170.
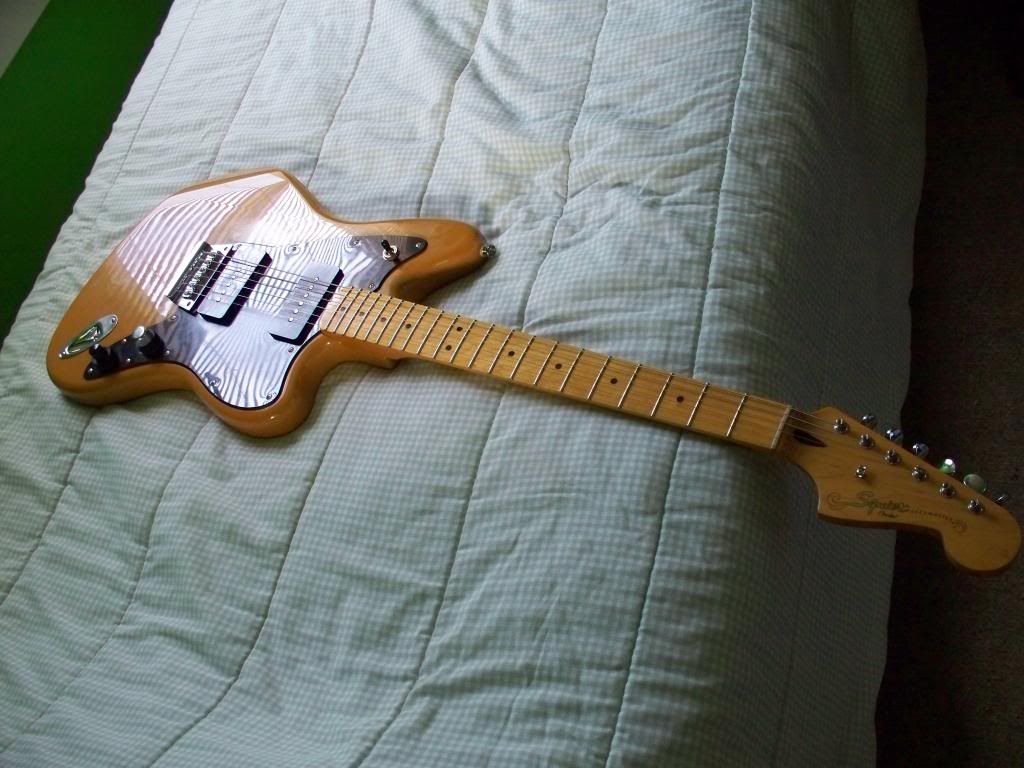
Here's the victim. A Butterscotch Blonde Squier Jazzy.
Laundry List of Problems
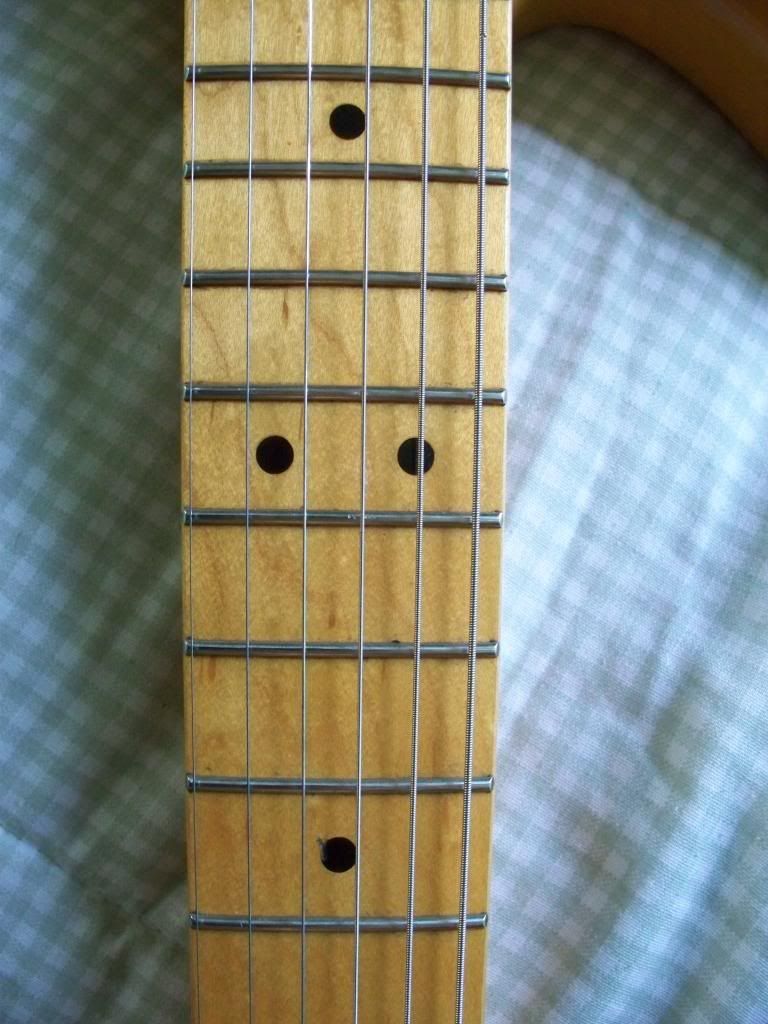
1. High 20th Fret causing buzz on low E
2. Missing one concentric volume knob
3. Gouge in 8th Fret that caught when bending the High E up.
4. Hardtail piece off-center causing the high E to slip of board frequently
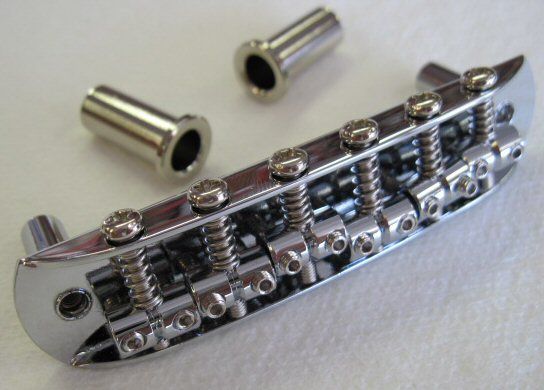
5. NO TREMOLO!
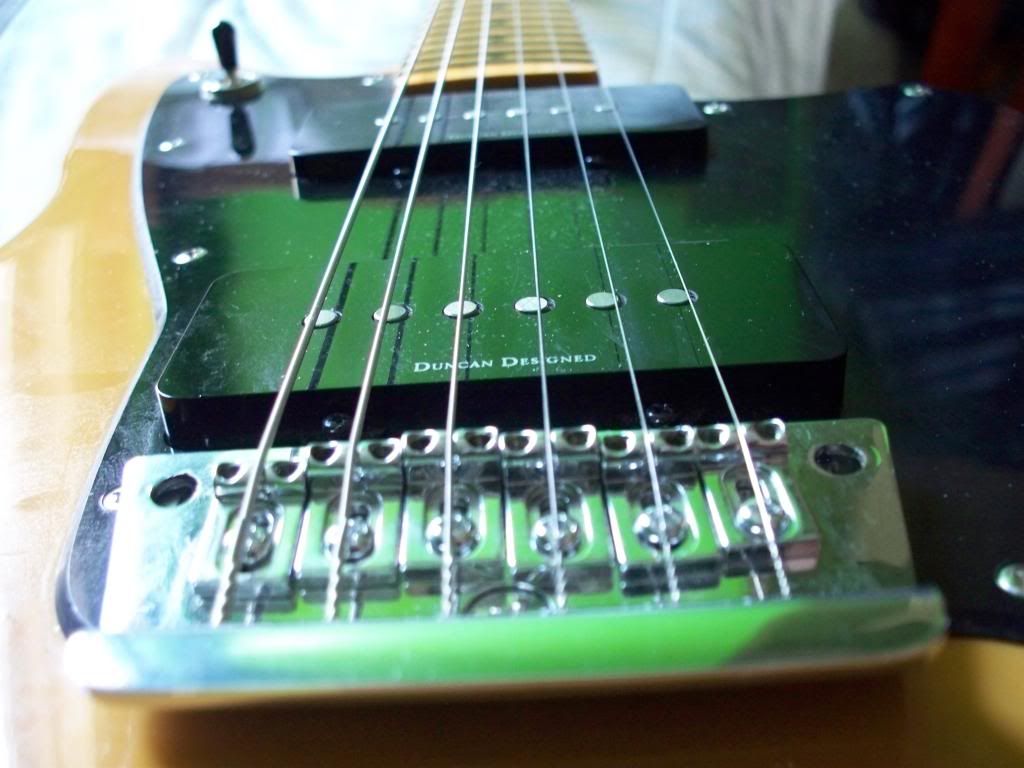
GRRRR!! I HATE THIS Bridge!!!
This is one Battered Jazzy. I guess the previous owner dropped it several times and abused it and eventually got rid of it instead of opting for repair.
Other than the aforementioned problems, the neck feels great and I love the Pups.
I'm a big fan of Surf Music modern bands (El Ray, Daikaiju, MOAM, Bambi Molesters) and some Traditional so I just had to have one.

On to the REPAIRS
I ordered a cheap eBay replacement Concentric tone and volume knob. The Tone knob was too narrow to fit the post, but I only wanted the Volume anyway. Looks Janky, but a quick fix for now.
Next up are the Fret Repairs.
Complete Newb at this, so be go easy on me OK.
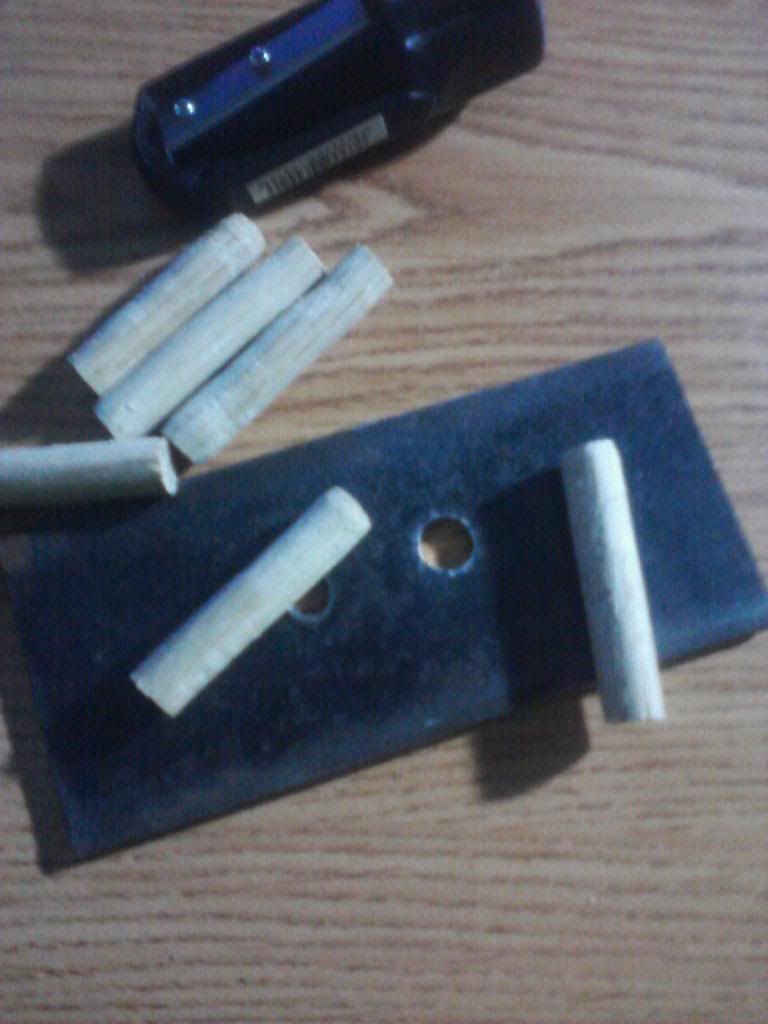
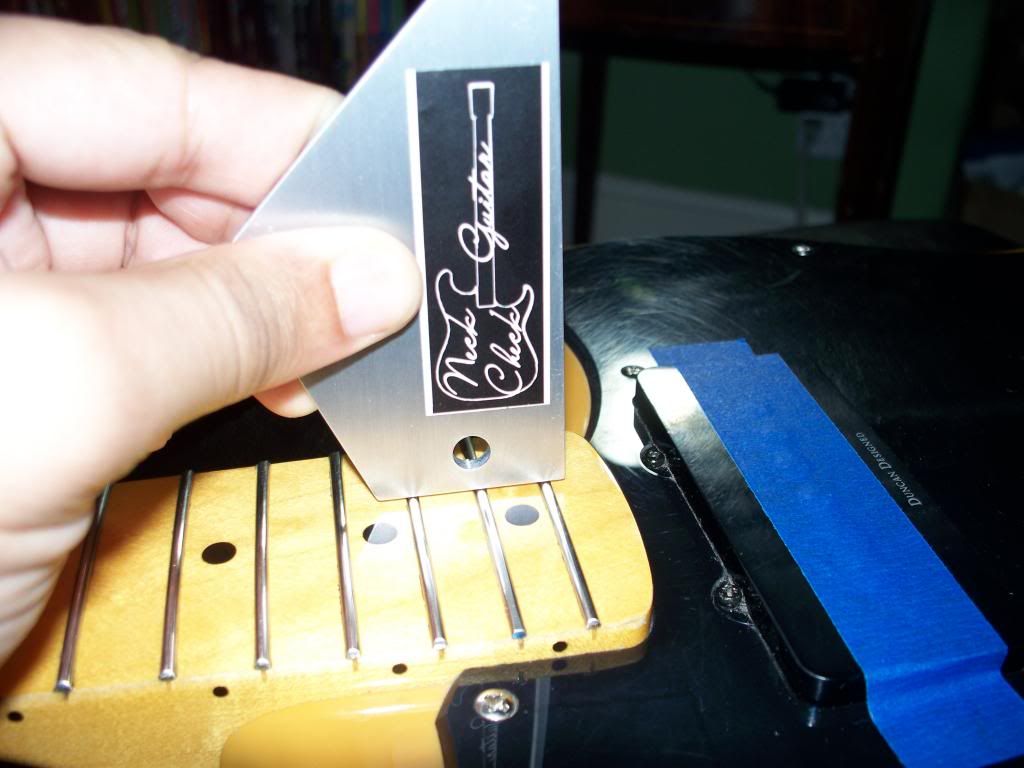
First things first. Make sure your neck is flat and straight as possible. I used a product called "neck check" off eBay. Its an aluminum machined straight edge with notches cut out to check both the board as well as the Fret straightness. Also support the neck so it wont bend while sanding. I just used a rolled up pair of jeans near the head stock since I would be working near the body end of the neck.

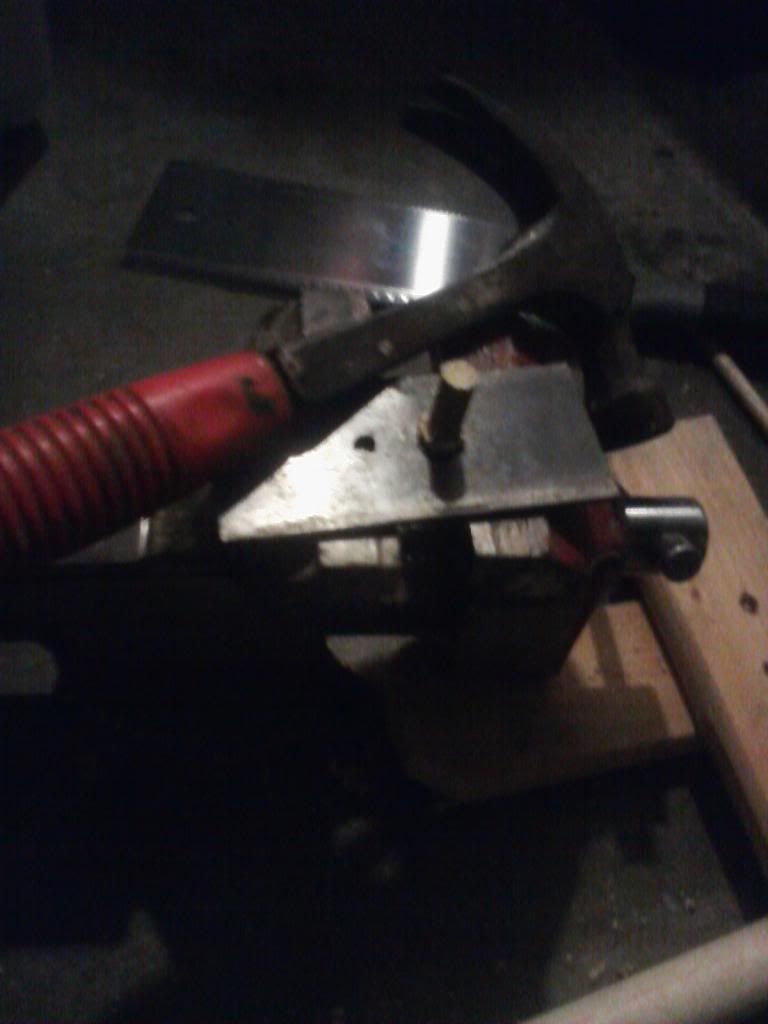
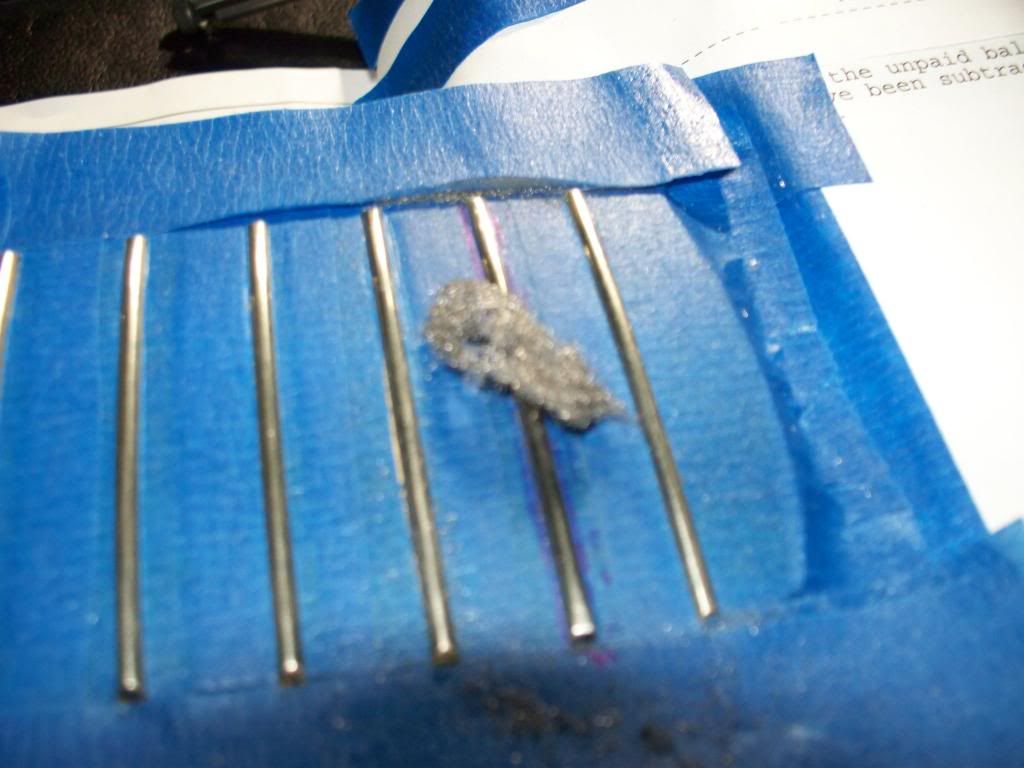
I used silver solder to fill the gouge in 8th fret. Just a Dab will do ya. Clean the fret first. I used rubbing alcohol because that's all I had on hand.

Then I sanded the solder down with various grits of sandpaper 400. 600. 1200 grit. I got a little overzealous and took off more material than I wanted. But I don't think it turned out too bad, it feels a lot smoother and hopefully wont catch the string when bending. Ill only know if it worked after restringing.
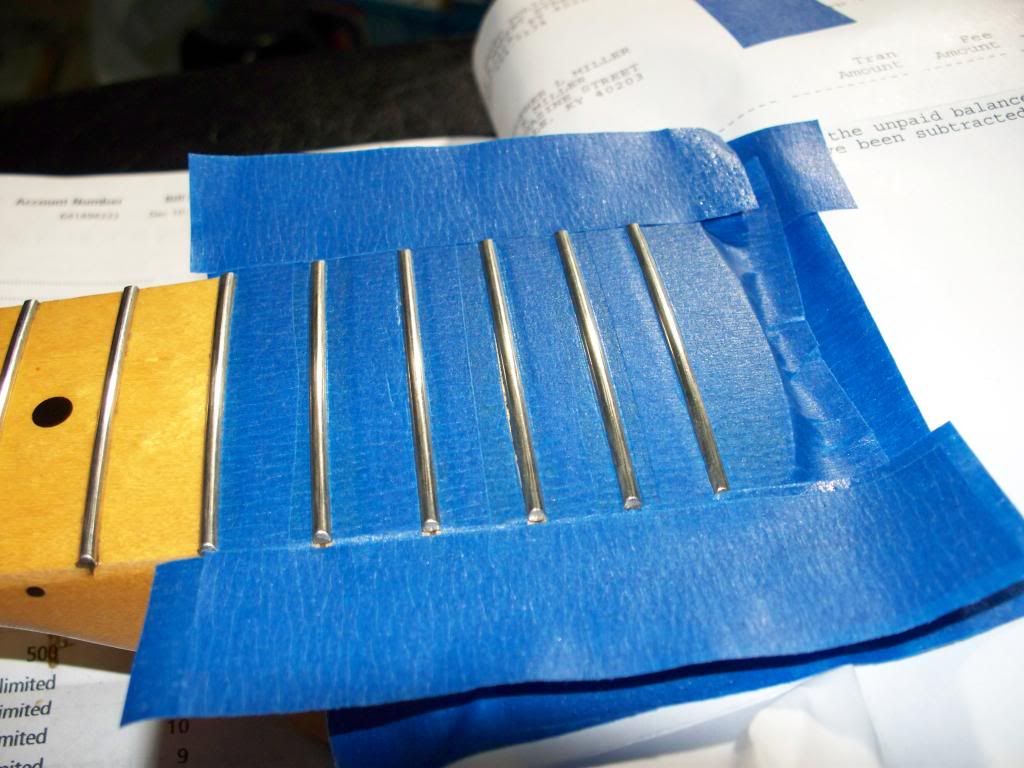
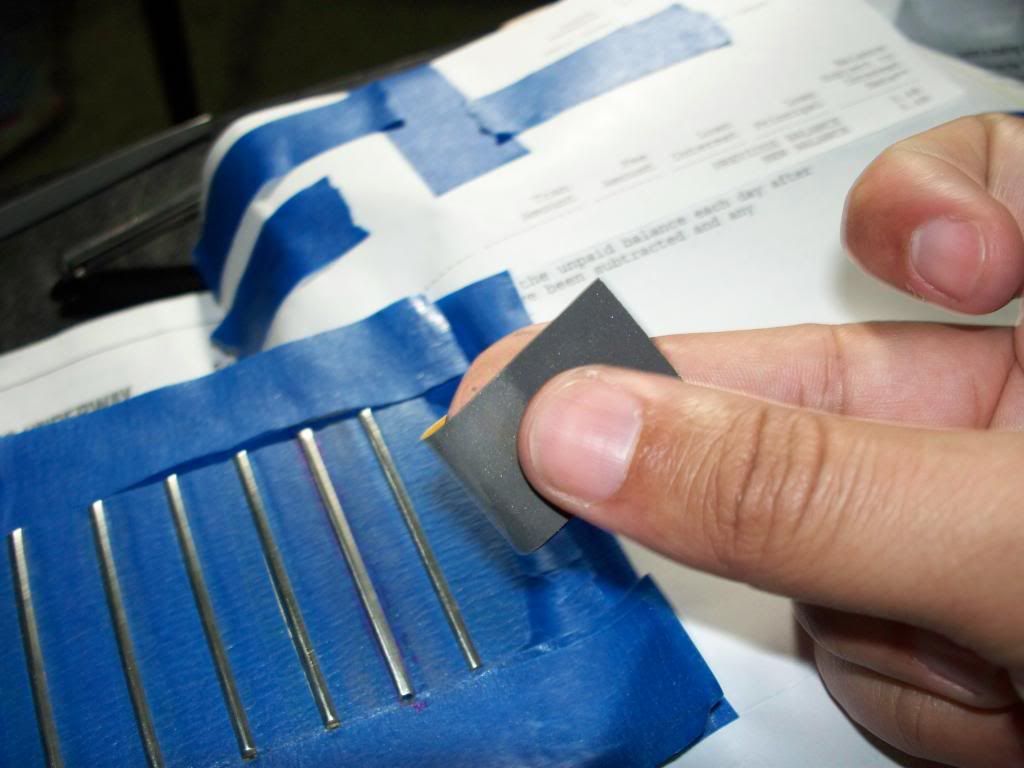
The 20th Fret is High and Causes Terrible buzzing on the low E. Taped up and ready for sanding.

I read somewhere that you can use marble as a flat planed surface, good enough to use as a fingerboard leveler. So I had an employee a Lowes cut up a Marble Threshold in various lengths and slapped some double-sided tape on it. I put a strip of Sandpaper near the top of one end and covered the other parts of tape with cut up notecards the same thickness of the sandpaper. That way I can focus on the problem fret while not effecting the others.
(did I mention that I was Cheap ) I'm trying to fight Stew-mac's tyrannical control of the guitar repair business.

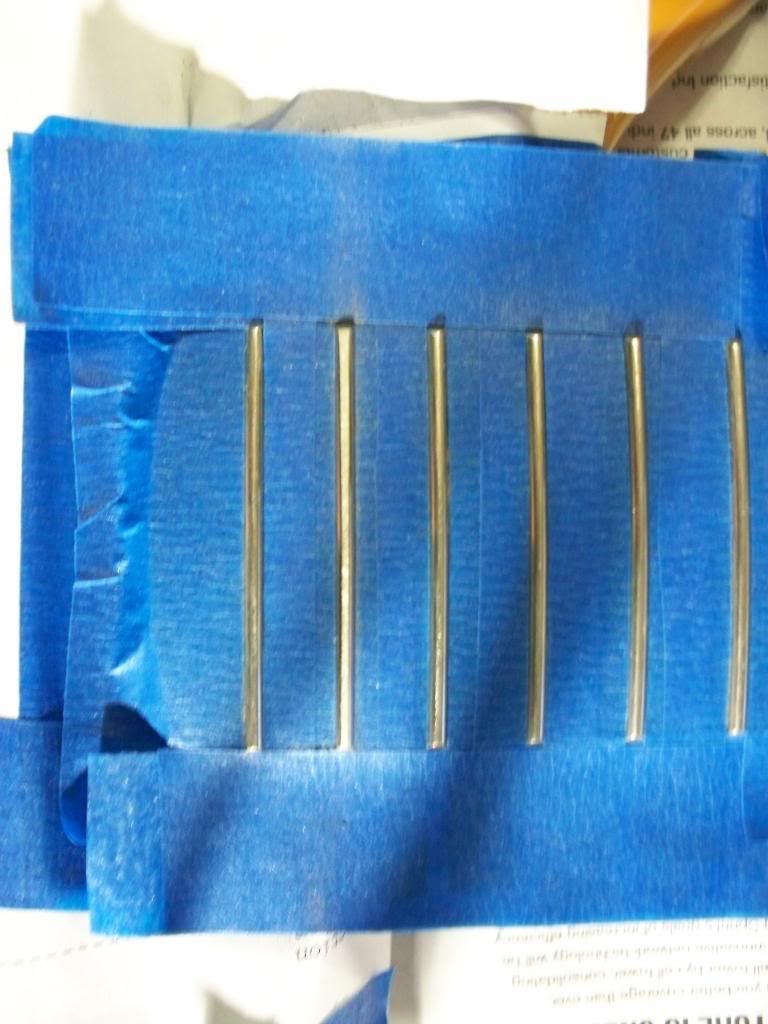
Sand a little check with a fret rocker, keep doing until the fret is just shy of being level.
Nice level top, time for Recrowning.
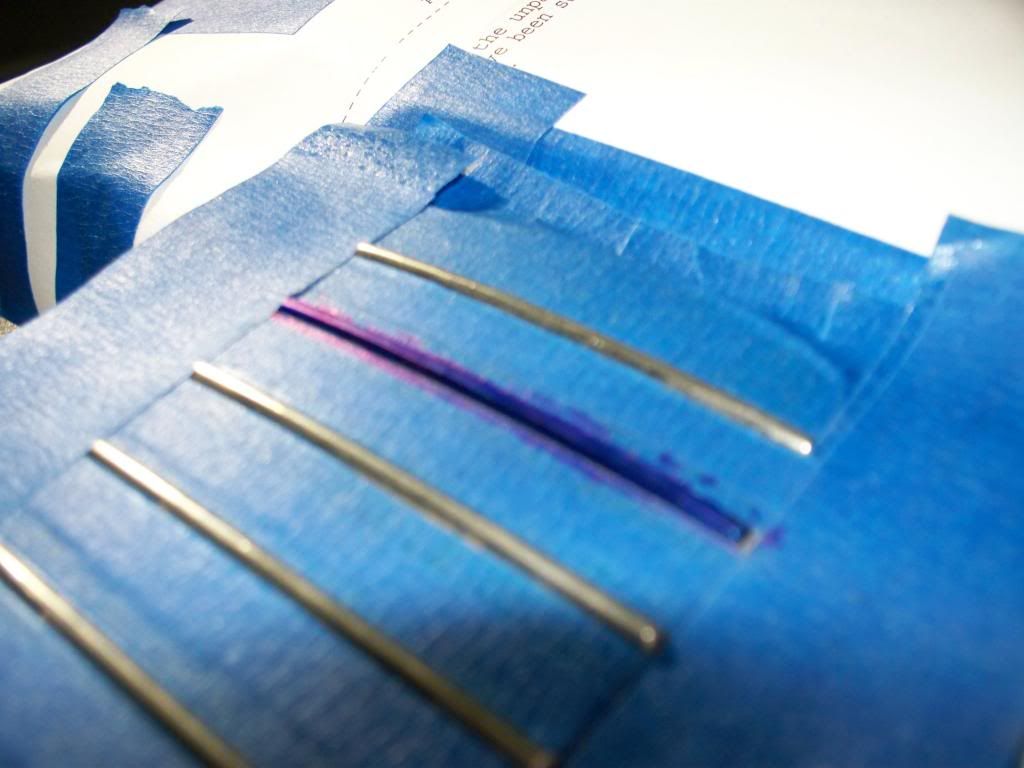
I used blue marker to tell what I'm doing while arching the sides to a nice oval shape. You want a straight thin blue line at the top without taking off too much metal.
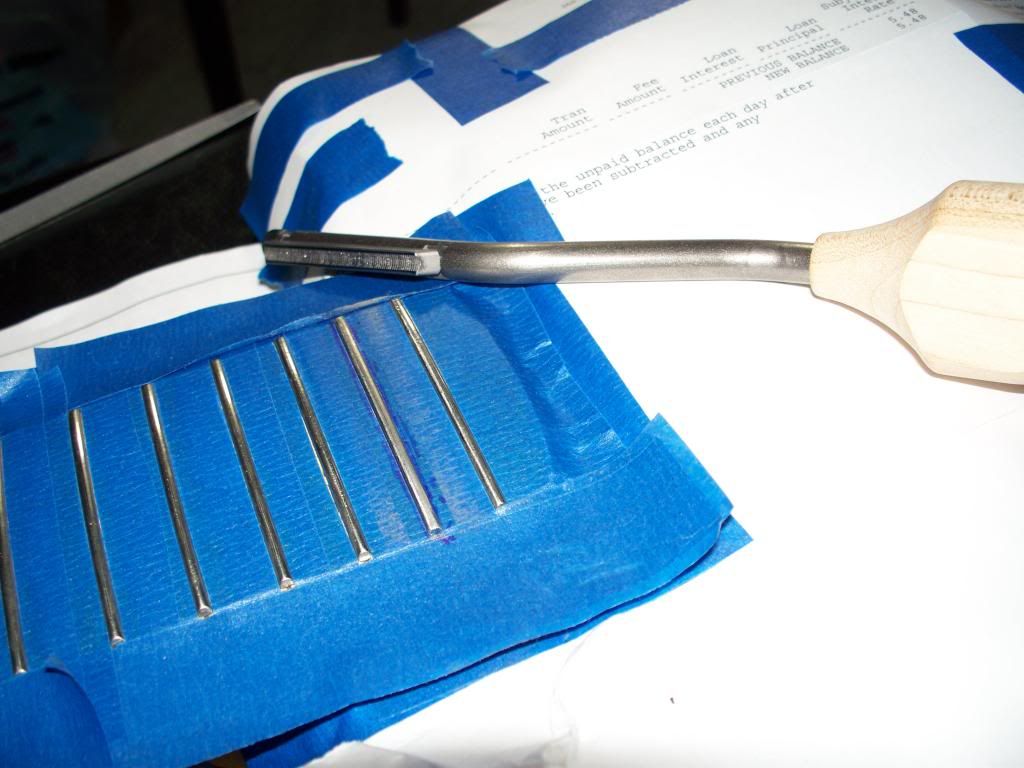
Purchased this Fret file from a local Guitar and Banjo supplier. I dont like it at all, left alot of chatter marks and cuts way too fast. I may invest in a diamond fret File next time or If i decide to build a neck (Mosrite Mark I )
smooth tool marks with an eraser covered in sandpaper of various grits going back and forth over the fret quickly.
Finish polishing with fine grade #0000 Steel Wool I got from Wally World. Looks pretty good.
Recheck with Fret Rocker. NICE!!
Turned out quite well for my first time, I think.
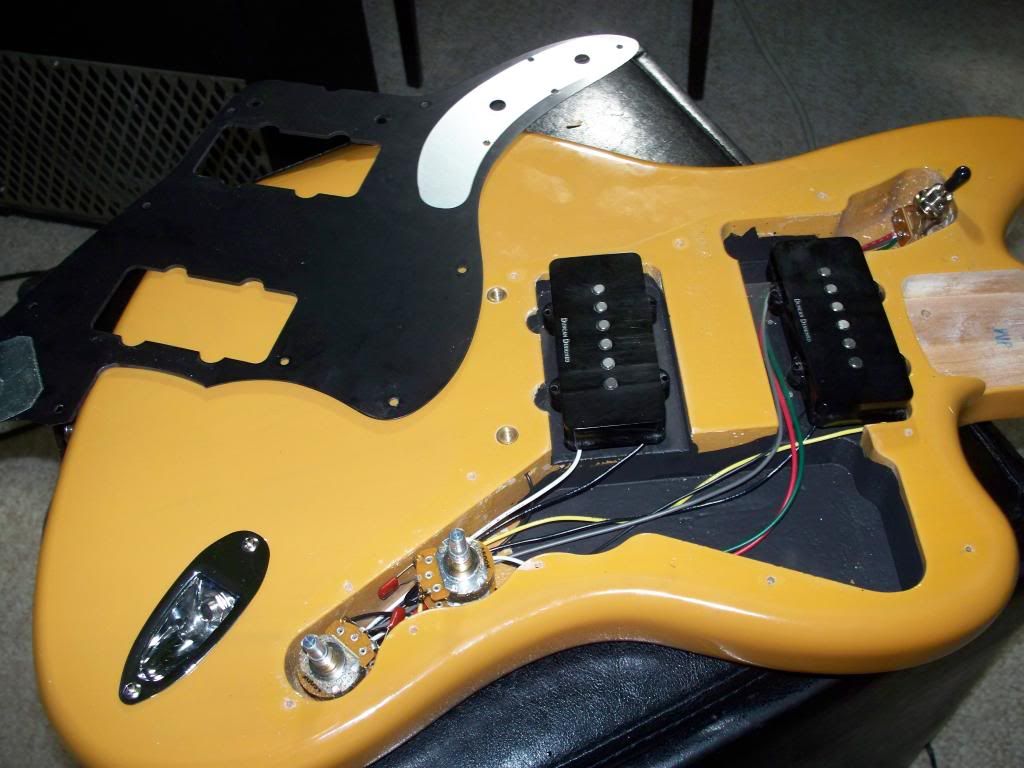
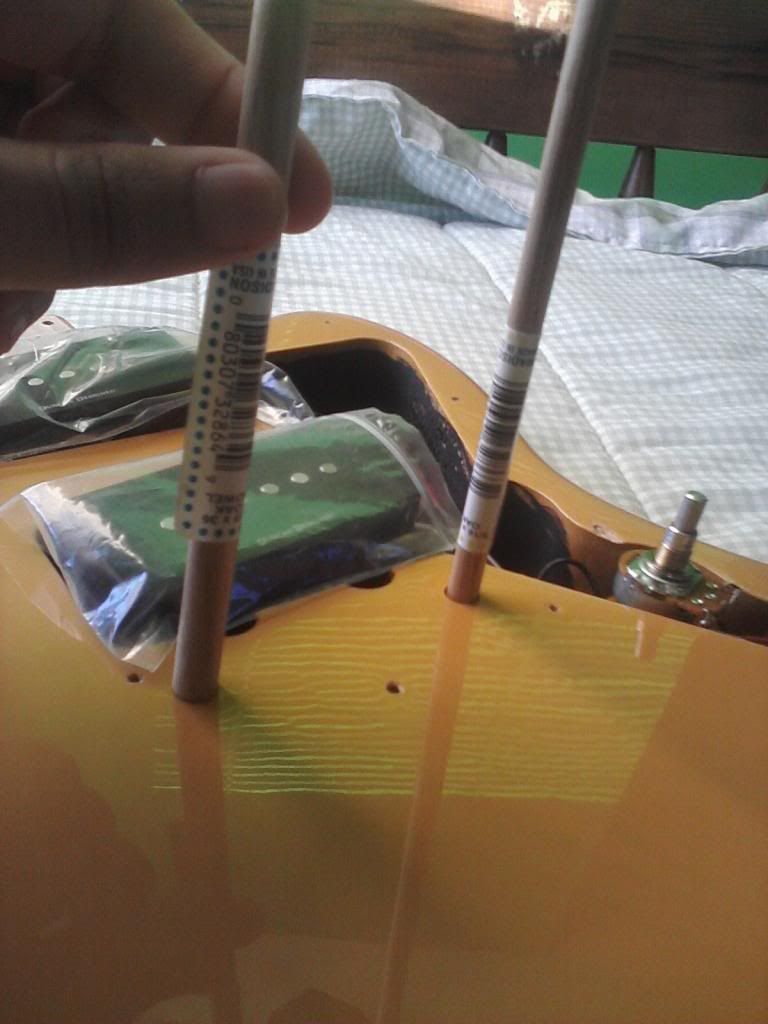
Next up Bridge Replacement
Here's the victim. A Butterscotch Blonde Squier Jazzy.
Laundry List of Problems
1. High 20th Fret causing buzz on low E
2. Missing one concentric volume knob
3. Gouge in 8th Fret that caught when bending the High E up.
4. Hardtail piece off-center causing the high E to slip of board frequently
5. NO TREMOLO!
GRRRR!! I HATE THIS Bridge!!!
This is one Battered Jazzy. I guess the previous owner dropped it several times and abused it and eventually got rid of it instead of opting for repair.
Other than the aforementioned problems, the neck feels great and I love the Pups.
I'm a big fan of Surf Music modern bands (El Ray, Daikaiju, MOAM, Bambi Molesters) and some Traditional so I just had to have one.
On to the REPAIRS
I ordered a cheap eBay replacement Concentric tone and volume knob. The Tone knob was too narrow to fit the post, but I only wanted the Volume anyway. Looks Janky, but a quick fix for now.
Next up are the Fret Repairs.
Complete Newb at this, so be go easy on me OK.
First things first. Make sure your neck is flat and straight as possible. I used a product called "neck check" off eBay. Its an aluminum machined straight edge with notches cut out to check both the board as well as the Fret straightness. Also support the neck so it wont bend while sanding. I just used a rolled up pair of jeans near the head stock since I would be working near the body end of the neck.
I used silver solder to fill the gouge in 8th fret. Just a Dab will do ya. Clean the fret first. I used rubbing alcohol because that's all I had on hand.
Then I sanded the solder down with various grits of sandpaper 400. 600. 1200 grit. I got a little overzealous and took off more material than I wanted. But I don't think it turned out too bad, it feels a lot smoother and hopefully wont catch the string when bending. Ill only know if it worked after restringing.
The 20th Fret is High and Causes Terrible buzzing on the low E. Taped up and ready for sanding.
I read somewhere that you can use marble as a flat planed surface, good enough to use as a fingerboard leveler. So I had an employee a Lowes cut up a Marble Threshold in various lengths and slapped some double-sided tape on it. I put a strip of Sandpaper near the top of one end and covered the other parts of tape with cut up notecards the same thickness of the sandpaper. That way I can focus on the problem fret while not effecting the others.
(did I mention that I was Cheap ) I'm trying to fight Stew-mac's tyrannical control of the guitar repair business.
Sand a little check with a fret rocker, keep doing until the fret is just shy of being level.
Nice level top, time for Recrowning.
I used blue marker to tell what I'm doing while arching the sides to a nice oval shape. You want a straight thin blue line at the top without taking off too much metal.
Purchased this Fret file from a local Guitar and Banjo supplier. I dont like it at all, left alot of chatter marks and cuts way too fast. I may invest in a diamond fret File next time or If i decide to build a neck (Mosrite Mark I )
smooth tool marks with an eraser covered in sandpaper of various grits going back and forth over the fret quickly.
Finish polishing with fine grade #0000 Steel Wool I got from Wally World. Looks pretty good.
Recheck with Fret Rocker. NICE!!
Turned out quite well for my first time, I think.
Next up Bridge Replacement