A Bass VI In Progress

Talk about modding or building your own guitar from scratch.
User avatar
Phil Mailloux
PAT PEND
PAT PEND
Posts: 12
Joined: Sat Aug 07, 2010 4:41 am
Location: Brisbane, Australia
Contact:

A Bass VI In Progress

Post by Phil Mailloux » Fri Dec 31, 2010 3:54 am

Hi Guys,

I thought I'd introduce myself since its my first post. I'm a bass luthier located in Brisbane, Australia, http://www.maillouxbasses.com" onclick="window.open(this.href);return false; Some time ago I was asked to build a Bass VI for a customer. I wasn't too familiar so had to do quite a bit of research on the net on them. Of course, this led me to Offsetguitars which has been a gold mine of knowledge on this.

I thought I'd post my build thread on here too. :) I'd like to first thank Roberto (motel_asimov) for the custom 1" bridge I sourced from him and also thank Paul (stereordinary) for the two control plates I sourced from him and also the very good CAD plans he's made. Thats really helped in the design phase.

First pic is the two plates I got from Paul, they look pretty nice.

Image

Next up is the plan I also bought from Paul, that was originally made in Ai format, I could easily import that in Rhino3D. The centre of the pic shows the drawing as Paul made it. All I had to do was copy and paste the curves I needed to create my 4 templates for the build from that plan. Under the original drawing is the pickguard model made from the original and at the left the neck blank also made from the original neck but with my headstock design added to it instead.

Image

Once I get all the templates done in there, I add toolpaths to them then cut them in 3mm MDF on my homemade CNC

Image

Here's the 4 templates I'll use during the build, the left side body one is made to facilitate cutting the neck pocket. Having all the dimensions calculated in CAD makes it super easy as you only need to stick the templates on and start cutting. Usually lining up the neck with the body is the hardest thing to do. Its all done for you now.

Image
Image

Body template stickied to Swamp Ash body

Image

Routs done on body

Image

A bit of bandsawing goin' on

Image

Corner edges done on the router table

Image

And a pic after the arm rest and belly carve done

Image

more to come in the next several days :)

User avatar
Britfingers
PAT. # 2.972.923
PAT. # 2.972.923
Posts: 810
Joined: Mon Oct 04, 2010 12:41 pm
Location: UK

Re: A Bass VI In Progress

Post by Britfingers » Fri Dec 31, 2010 4:05 am

Hi, welcome to the forum and a happy new year. You just made that body look very easy to make! Looks great.

User avatar
Phil Mailloux
PAT PEND
PAT PEND
Posts: 12
Joined: Sat Aug 07, 2010 4:41 am
Location: Brisbane, Australia
Contact:

Re: A Bass VI In Progress

Post by Phil Mailloux » Fri Dec 31, 2010 4:10 am

Thanks and happy new year to you to. Unfortunately a few pics don't show very well the amount of hours it takes to get there or shows all the filing and sanding required to make it look like that. ;D

User avatar
Britfingers
PAT. # 2.972.923
PAT. # 2.972.923
Posts: 810
Joined: Mon Oct 04, 2010 12:41 pm
Location: UK

Re: A Bass VI In Progress

Post by Britfingers » Fri Dec 31, 2010 4:15 am

That made me laugh...I know well what you mean! I have just had a peek at your website, some great stuff you build.

User avatar
mystic_whiskey
PAT. # 2.972.923
PAT. # 2.972.923
Posts: 95
Joined: Thu Oct 14, 2010 1:34 am
Location: Adelaide, Australia

Re: A Bass VI In Progress

Post by mystic_whiskey » Fri Dec 31, 2010 4:16 am

Phil Mailloux wrote:...my homemade CNC...
Oooh, tell me more!

User avatar
newdawnfades
PAT. # 2.972.923
PAT. # 2.972.923
Posts: 342
Joined: Mon Jan 18, 2010 6:10 pm

Re: A Bass VI In Progress

Post by newdawnfades » Fri Dec 31, 2010 4:17 am

yay! a Luthier in brisbane!! im on the gold coast, looking forward to your builds

User avatar
Phil Mailloux
PAT PEND
PAT PEND
Posts: 12
Joined: Sat Aug 07, 2010 4:41 am
Location: Brisbane, Australia
Contact:

Re: A Bass VI In Progress

Post by Phil Mailloux » Fri Dec 31, 2010 4:31 am

I'm in Cedar Vale to be more exact, near Jimboomba.

For the homemade CNC, I hung out for a couple of years on the CNCZone.com forum and researched them big time before I built it. I based my design on a couple of machines there and got quite a bit of help from the guys there. The machine is made from T-slot aluminium extrusions. All the Aluminium was ordered cut to size and only needed to be bolted together once I got it here. From what can be seen on that pic, the carriage is wood, I didn't have the time or patience to make it out of metal :D It did take me a while to tune the machine correctly. Its not all that obvious when you don't really know what you're doing. :P I finished building it more than 6 months ago and only now am I starting to get decents templates out of it. I need more power though. I'm only using a 1HP (700 watts) laminate trimmer on it for now so its slow.

Here's a little video I did of it when I first finished it, I was trying to cut block inlays with it. It didn't work out that great then but I fixed it. as you can see form the earlier picture, the trimmer is holding a whole lot better now than in the vid ;D

http://www.youtube.com/watch?v=ghjvx0tYDEo" onclick="window.open(this.href);return false;
Last edited by Phil Mailloux on Fri Feb 18, 2011 3:20 pm, edited 1 time in total.

User avatar
sookwinder
Mods
Mods
Posts: 11179
Joined: Mon Sep 11, 2006 6:47 pm
Location: Melbourne Australia

Re: A Bass VI In Progress

Post by sookwinder » Fri Dec 31, 2010 5:01 am

G'Day there and welcome ...
please take lots of photos .... I'd like you to write this up for our library section if you have time
relaxing alternative to doing actual work ...

User avatar
Phil Mailloux
PAT PEND
PAT PEND
Posts: 12
Joined: Sat Aug 07, 2010 4:41 am
Location: Brisbane, Australia
Contact:

Re: A Bass VI In Progress

Post by Phil Mailloux » Fri Dec 31, 2010 7:01 pm

Sure, what's involved in this? Just edit all my build realted posts into one big long post/story?

User avatar
Harvester
PAT. # 2.972.923
PAT. # 2.972.923
Posts: 1087
Joined: Thu Jan 08, 2009 5:34 am
Location: Young Router Jockey from Melbourne Australia
Contact:

Re: A Bass VI In Progress

Post by Harvester » Fri Dec 31, 2010 8:03 pm

classy work phil, welcome !

very impressed with the CNC setup :derp:
+ i know what you mean about the hours that fit inbetween each photograph ...

just spent christmas in brisbane, it was very surreal to not be hit with a wall of heat and humidity as i stepped off the plane, just the pounding of monsoonal rain for a week or so ...

cheers, AP

User avatar
sookwinder
Mods
Mods
Posts: 11179
Joined: Mon Sep 11, 2006 6:47 pm
Location: Melbourne Australia

Re: A Bass VI In Progress

Post by sookwinder » Fri Dec 31, 2010 8:29 pm

Phil I'll send you a PM
relaxing alternative to doing actual work ...

User avatar
Phil Mailloux
PAT PEND
PAT PEND
Posts: 12
Joined: Sat Aug 07, 2010 4:41 am
Location: Brisbane, Australia
Contact:

Re: A Bass VI In Progress

Post by Phil Mailloux » Wed Jan 05, 2011 11:39 pm

Thanks for the PM. I'll try to give more details as I go then edit it all for you into a proper tutorial.

Next step is the neck. The blank is selected, planed and jointed to size then it gets a little coutonr drawing on it to let me know where all the parts go.

Image

I then use a router with a fence to cut the truss rod rout. In this instance I've had to do some major changes, I normally use a welded two piece flat truss rod that installs in a flat channel right under the fingerboard, the rout is easy to cut and the install is easy. Unfortunately in this case, bass truss rods are too long for a bass VI and guitar truss rods are way too short for it, so I've had to use a custom rod for this. That means I had to install this rod as a compression rod. For those persons not aware, these are the regular truss rods used by Fender, Gibson and all the other manufacturers in the past/vintage years. A lot of them still use them today but most manufacturers have moved to the flat channel rods. Compression rods need to be installed in a curved channel. A curved strip of wood is then glued on top of the rod to make the rod rest in a concave channel inside the neck. By screwing the nut in, you're essentially pulling the rod into a striaght position which gives a backbow to the necks. This is how a compression rod works.

The rout is done, the rod is resting on top of the rout

Image

The rod has been pushed inside the cavity and the filet of wood has been blued on top of it.

Image

Once the glue is dry, the extra wood of the filet is cut away and the neck is sanded flat. No pics of all this since its all saded flat in my drum sander. All you can see of it is the rod's anchoring nut flat to the gluing edge of the fingerboard.

Image

Next step is the fingerboard, since the Bass Vi is 30" scale this means I need to cut this board the good ol' hard way instead of using my SCMS Saw and regular bass or guitar templates. For this I go to Fretfind 2d on the net and insert all the data needed for the scale calculation. I save the result as a multi-page PDF file which I print at home with no scaling. Before you tape it all together and use to cut the fingerboard, make sure the spacing is correct, the easy way is to measure the nut to 12th fret, result should be half the scale length. Glue the paper on the fingerboard. The fingerboard needs to be square and jointed properly to do the fret cutting accurately. Use a square to start the cuts accureately and off you go as in the pic.

Image

The result

Image

Once done rip off the paper and sand the rest of the bits away. Next step is to glue it on the neck. Line it all up nicely and square. Once its all like you want to have it, nail the two ends in with brad nails, inside the nut cavity at one end and inside a fret cavity at the other end. You only want to nail it a couple of mm's in the neck blank. The idea is to use the nails and the two holes to line up the fingerboard and hold it while clamping them together. The nails prevent the f'board from slipping and sliding because of the glue when you apply clamp pressure on it.

Image

Apply the glue to the neck and spread it evenly everywhere, then put the fingerboard on it, nail holes to line up with nails, and put some backing material poon top and bottom of neck before clamping to prevent clamps damaging the neck.

Image

Image

Image

Image

Don't be shy with the clamps, I wish I had more. Better too many than too few. The last thing you want is glue lines showing on your neck when its finished. Glue lines are weak joints and it means your board could delaminate or crack away at some point.

User avatar
Phil Mailloux
PAT PEND
PAT PEND
Posts: 12
Joined: Sat Aug 07, 2010 4:41 am
Location: Brisbane, Australia
Contact:

Re: A Bass VI In Progress

Post by Phil Mailloux » Wed Jan 05, 2011 11:56 pm

Contour of the neck is routed with the templates

Image

Image

Image

Next up is the tuner holes. I use the neck template as bushing guides for the 10mm drill bit in the drill press. Man, this is a whole lot easier to doing bass tuners ;D

Image

Image

The side dots. I normally use the plastic round bars that Stewmac sells in 5" lengths or so, easy peasy to install. My customer specifically asked for Mother of Pearl dots, D'oh! these are TINY!

First measure up all your holes and punch them (with a punch, not your fist) to make sure the drill bit doesn't wander when you drill it. Shove some glue in the hole then stick the dots in it. These are 1.5mm diameter, I'm not joking when I say they're tiny, there's one on the edge of the board.

Image

Image

Image

Then I trim the headstock thickness with a Safe-T-planer on my drill press

Image

...and sand the radius in the headstock transistion with a fence in the drill press

Image

Image

For the back of the neck, its all hard work, lots of cutting with rasps, files, planers and random orbit sander until you get a kick ass looking neck ;D

Image

Image

That's it for now

User avatar
arri93
PAT. # 2.972.923
PAT. # 2.972.923
Posts: 786
Joined: Mon Sep 20, 2010 11:21 pm
Location: Scotland

Re: A Bass VI In Progress

Post by arri93 » Thu Jan 06, 2011 8:55 am

Make me one :whistle: pretty please.
[img]http://offsetguitars.com/forums/download/file.php?avatar=8982_1331927459.jpg[/img] Sleazy Army

User avatar
Phil Mailloux
PAT PEND
PAT PEND
Posts: 12
Joined: Sat Aug 07, 2010 4:41 am
Location: Brisbane, Australia
Contact:

Re: A Bass VI In Progress

Post by Phil Mailloux » Wed Feb 23, 2011 3:30 am

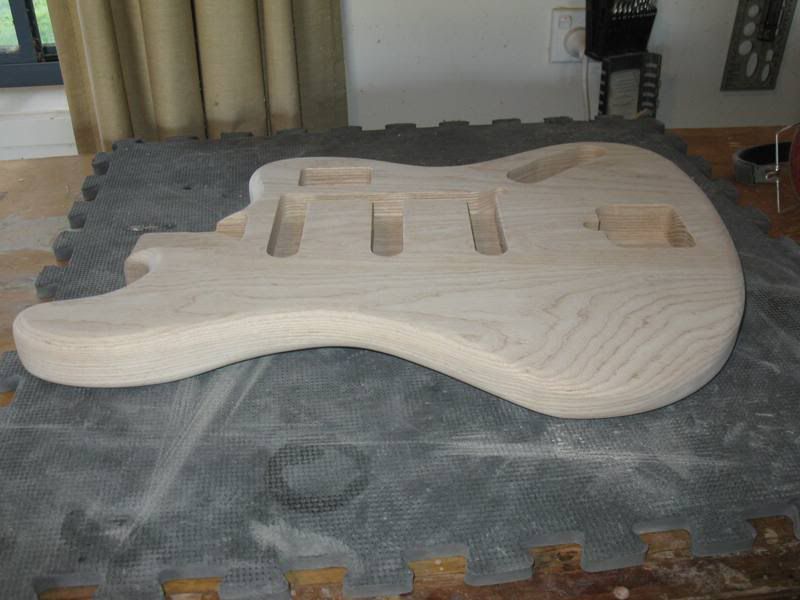
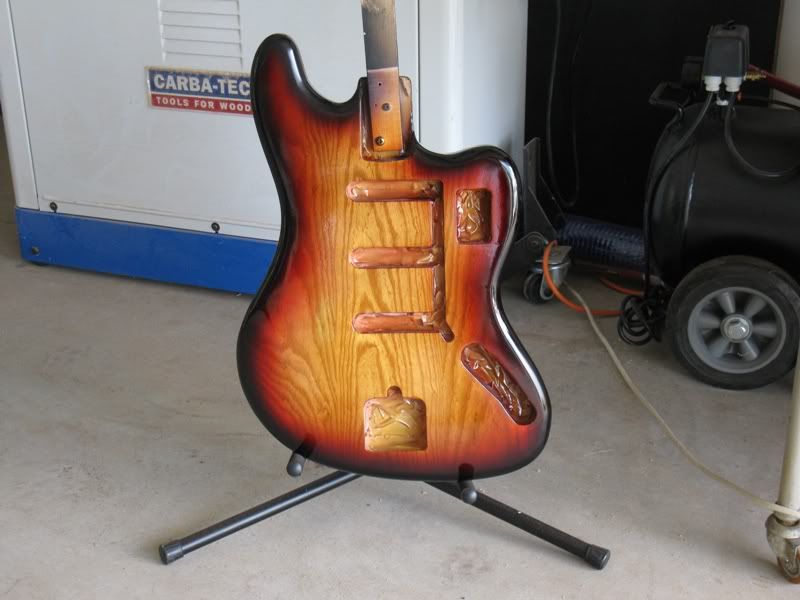
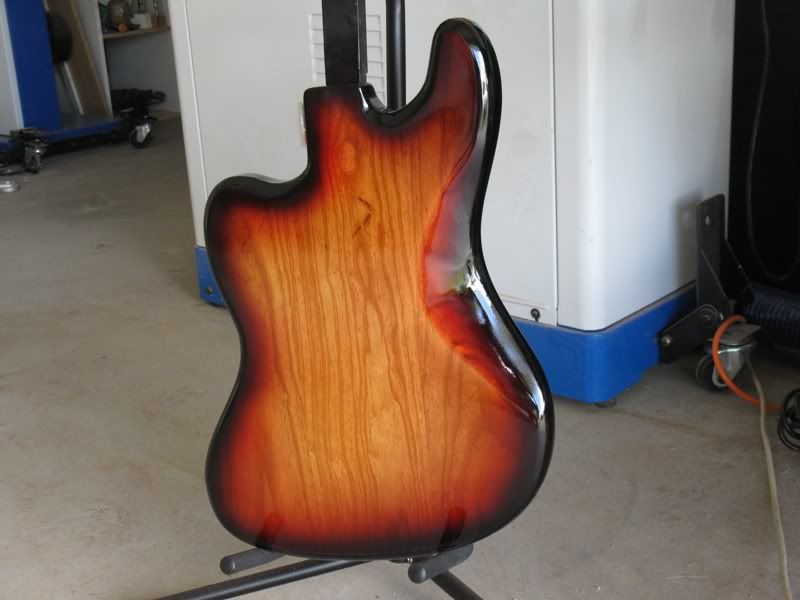
Here's a few pics of the finishing. That could be a whole book on its own so I won't bother to talk too much about it and just state what I did.

I started by shooting several coats of clear lacquer to fill the pores of the ash and let it fill up, sanded that flat then shot a coat of amber on the body. After the amber coat I shot 2 coats of clear on top of that. The coats of clear are to lock in the amber colour and give it a bit of protection when sanding the body so I don't sand through the colour.

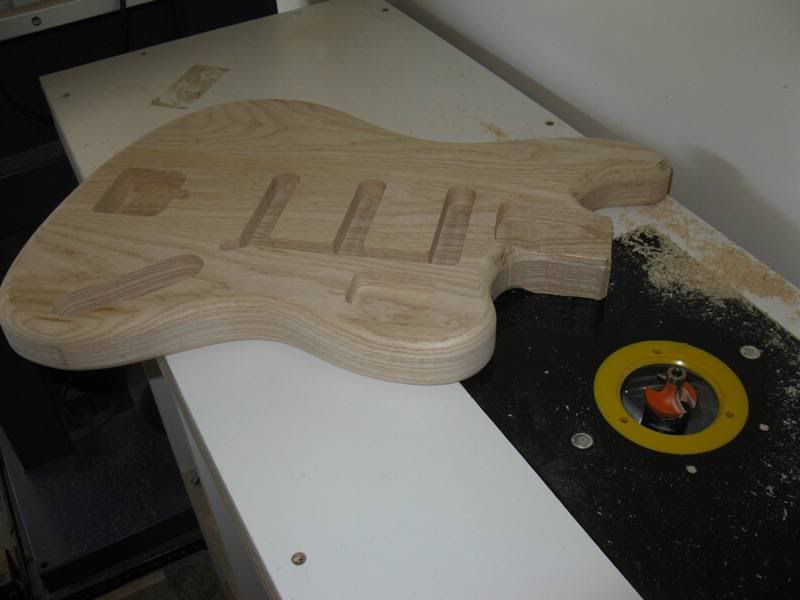
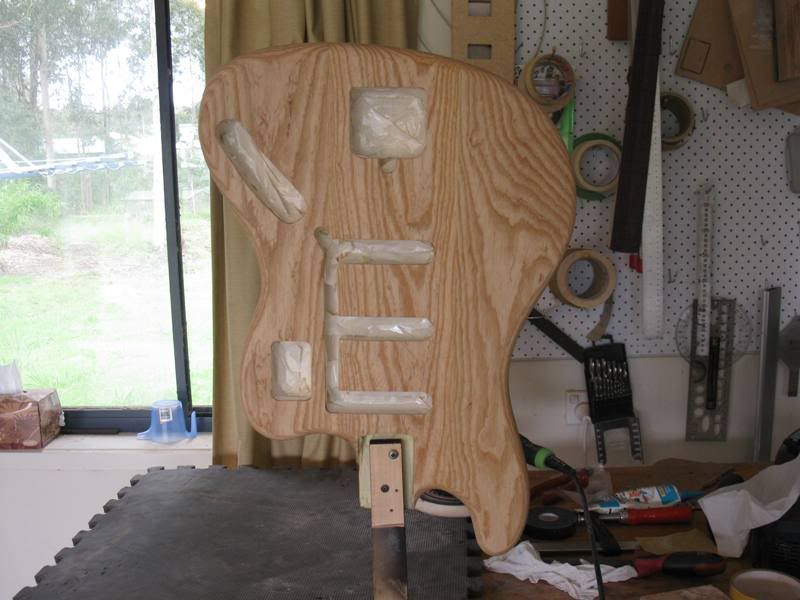
This pic just shows the body after in the raw after masking it before its first coat

Image

Once I had the clear and amber I then shot the dark edge of the sunburst whihc is a medium brown colour mixed with some black in it, it looks pretty black on pictures and in person but if you're in the sun outside, you can see its brown and can see through it to the wood.

Image

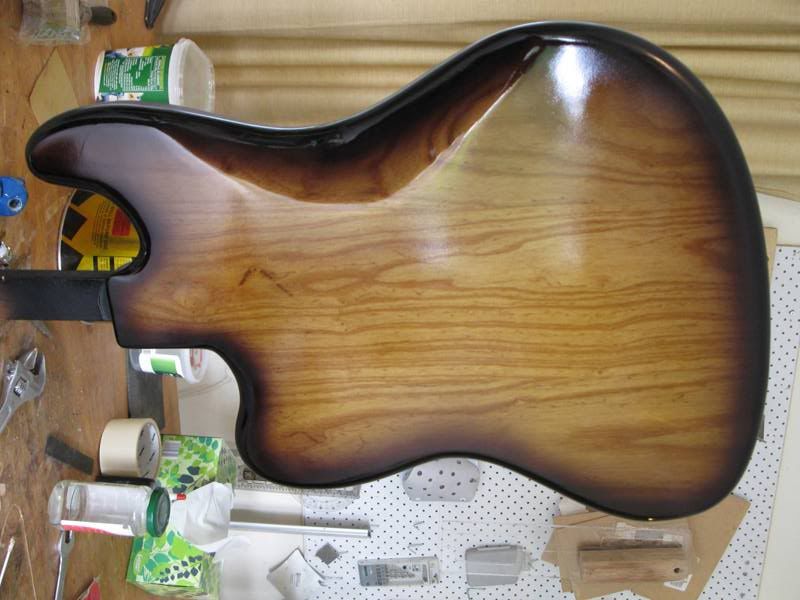
Once you shoot the black edge, you need to shoot a few coatgs of clear too to lock the colour in and prevent sanding through it. Finally you shoot the red band on the body then two coats of clear to lock it in then the day after sand it down and shoot another 5 or 6 coats of clear to buildup the clear, in the end we've got our 3 tone burst.

Image
Image

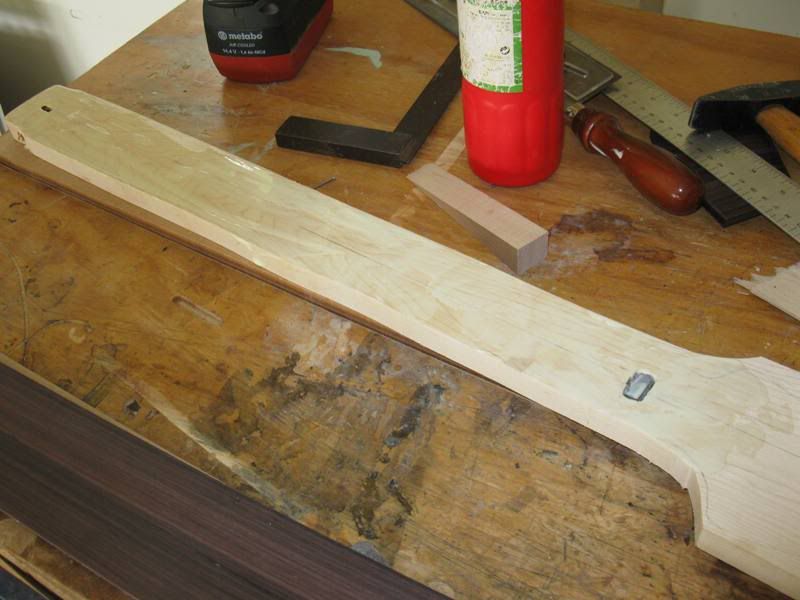
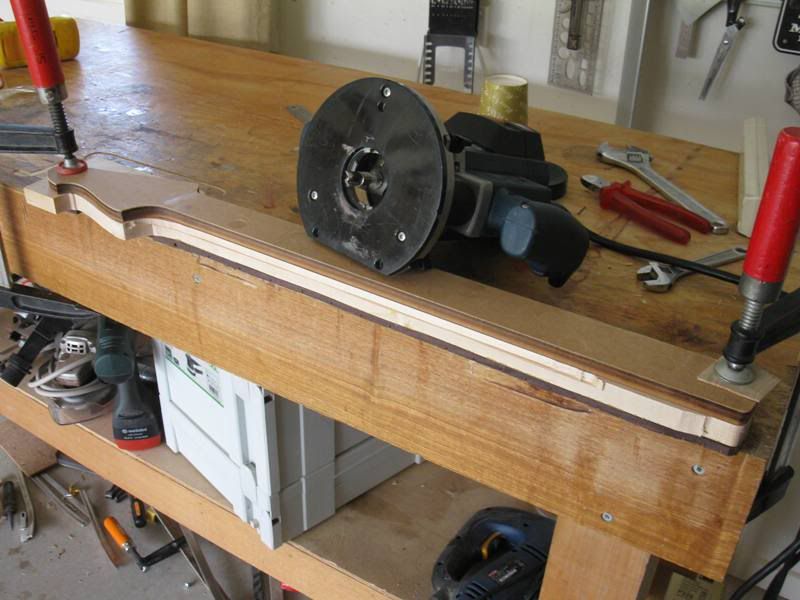
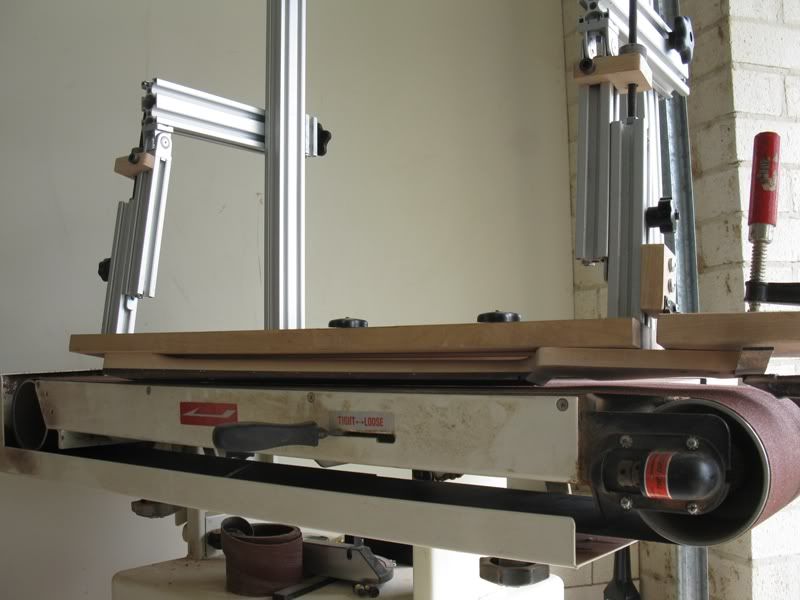
The fingerboard radius has recently become a fun job with the radius sanding jig I built. All the knobs on the arms are to adjust the height of them. With this I can do radiuses from about 7" until about 20"

Image

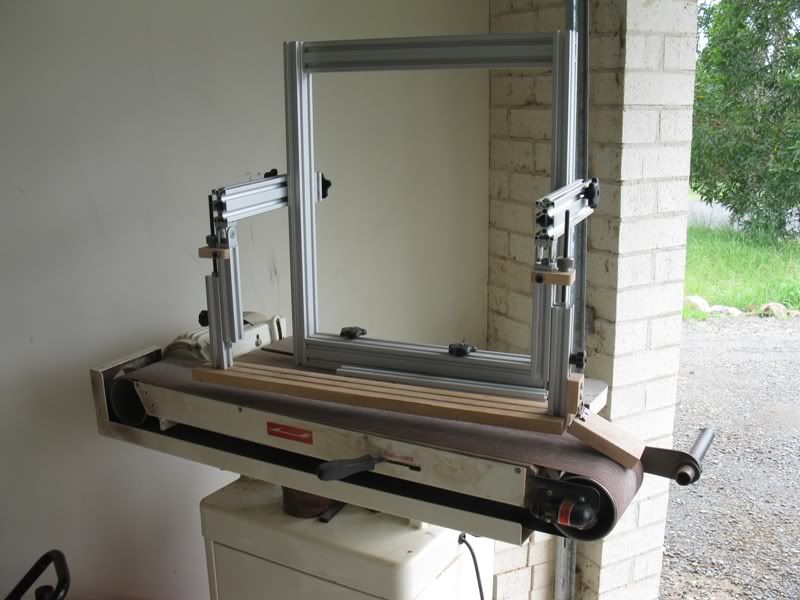
I tape the neck with double sticky tape under the jig then rock the neck back and forth on the sander for a minute and the radius comes out all ready to go.

Image
Image

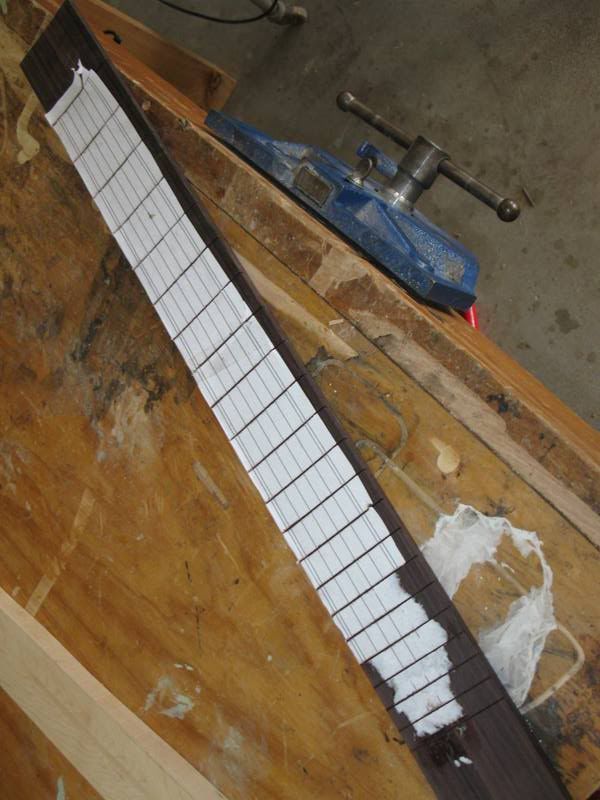
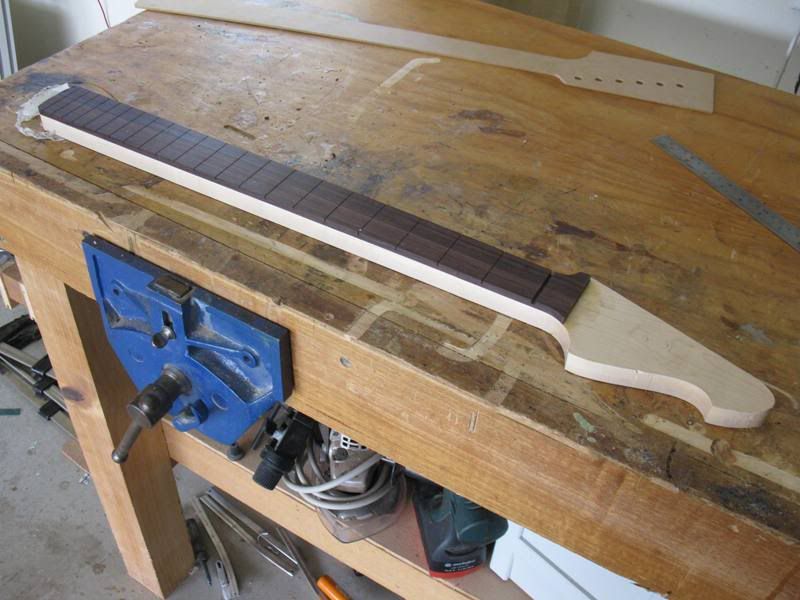
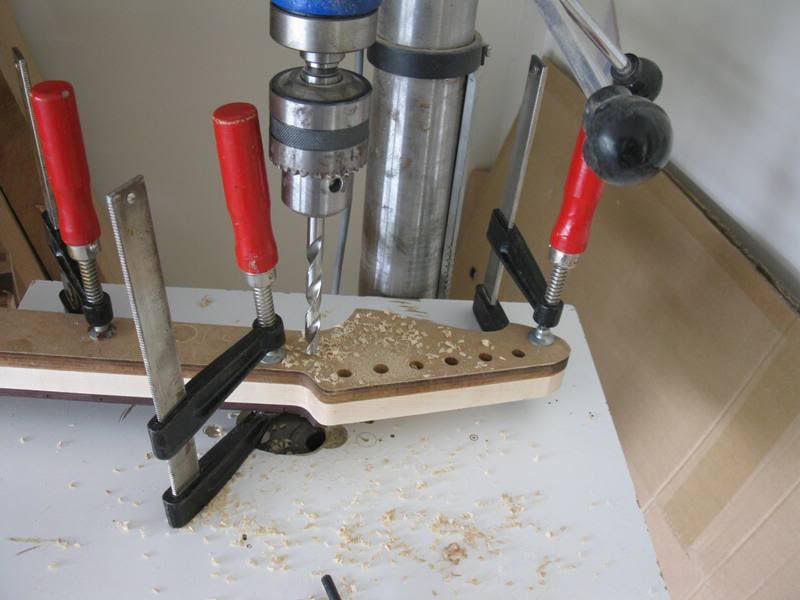
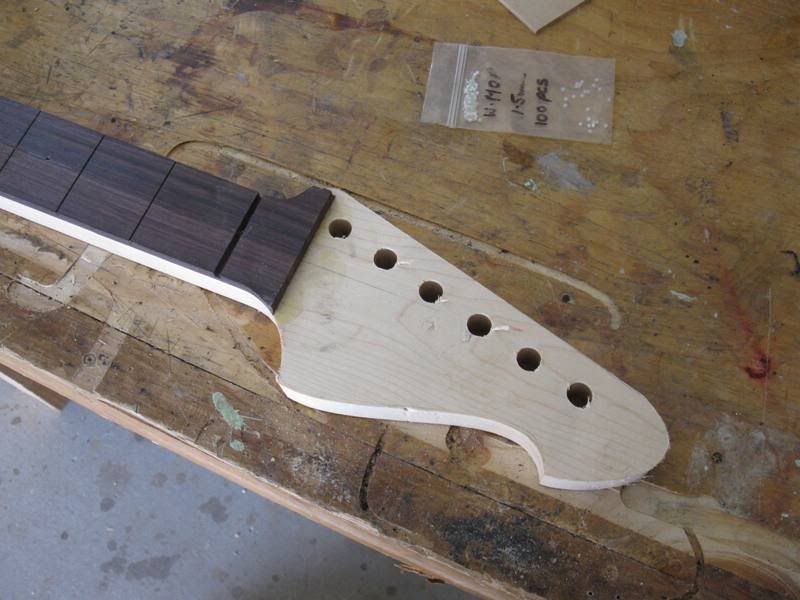
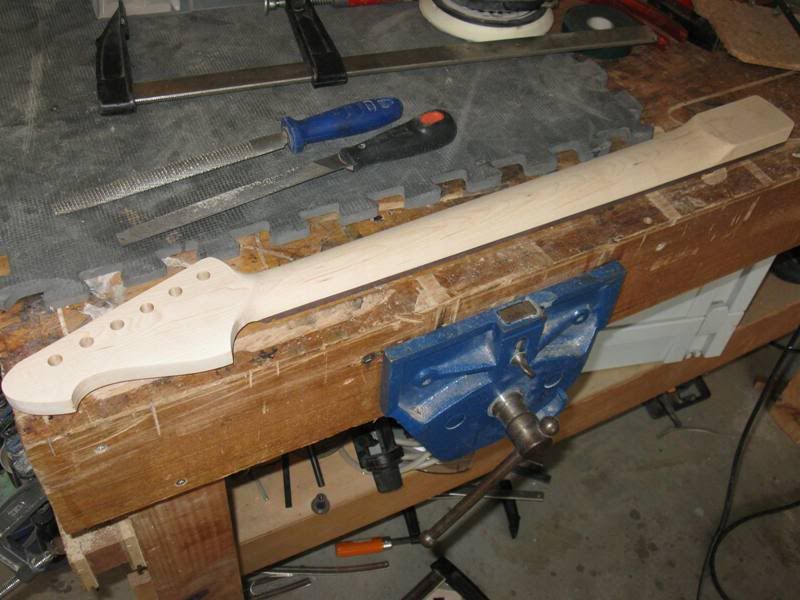
Next up is the fretwork :)

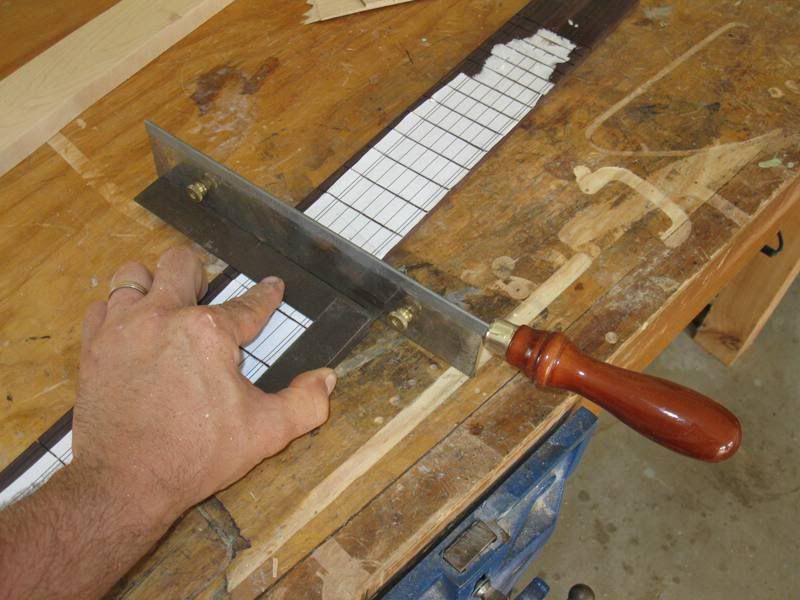
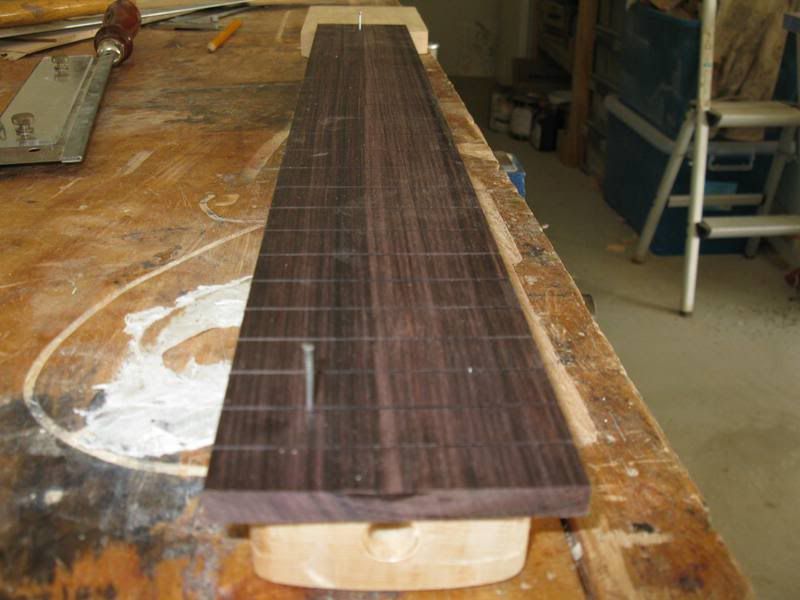
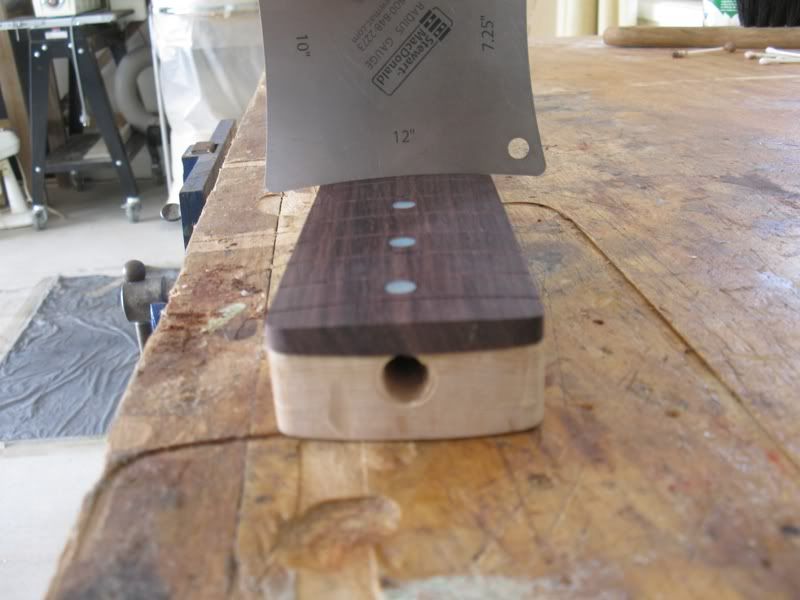
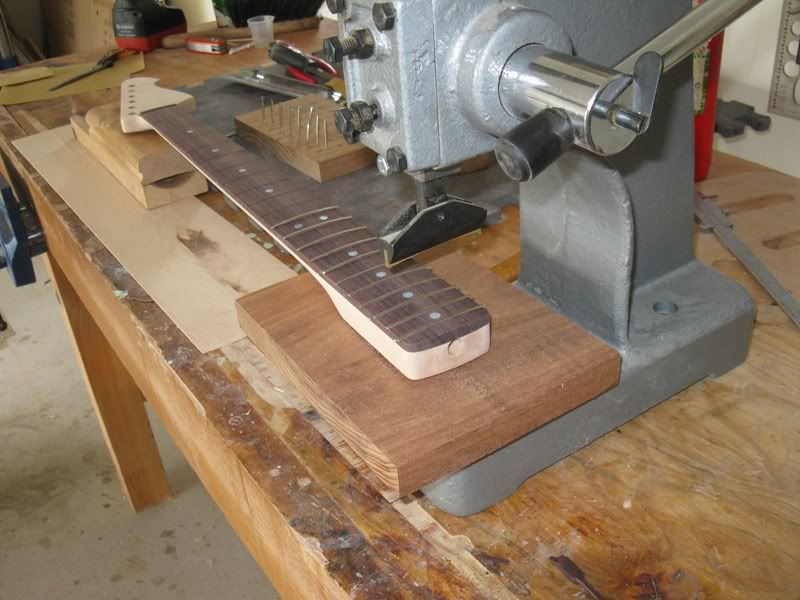
The fretwire has been cut to size and placed in order in that block of wood with the holes drilled in it. thats for making sure I use the right frets at the right place. The frets are all cut almost flush to the fingerboard to save on material.

Image

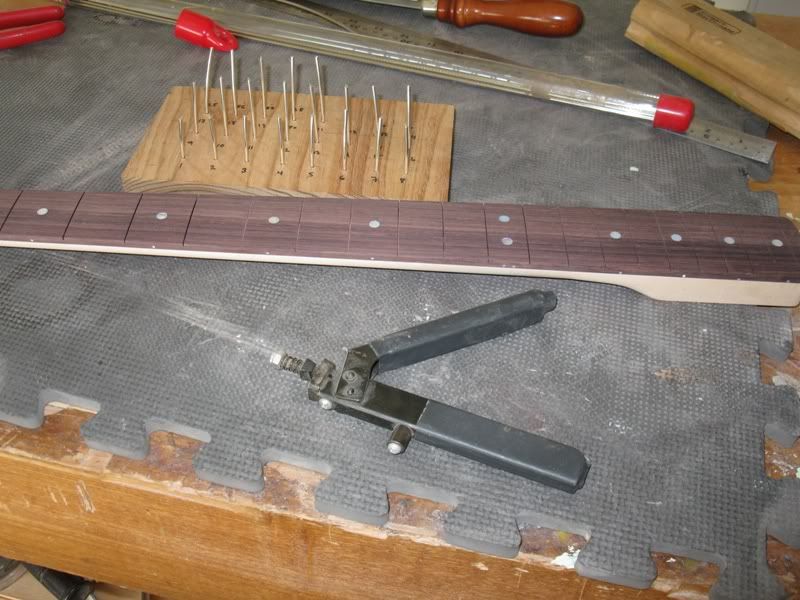
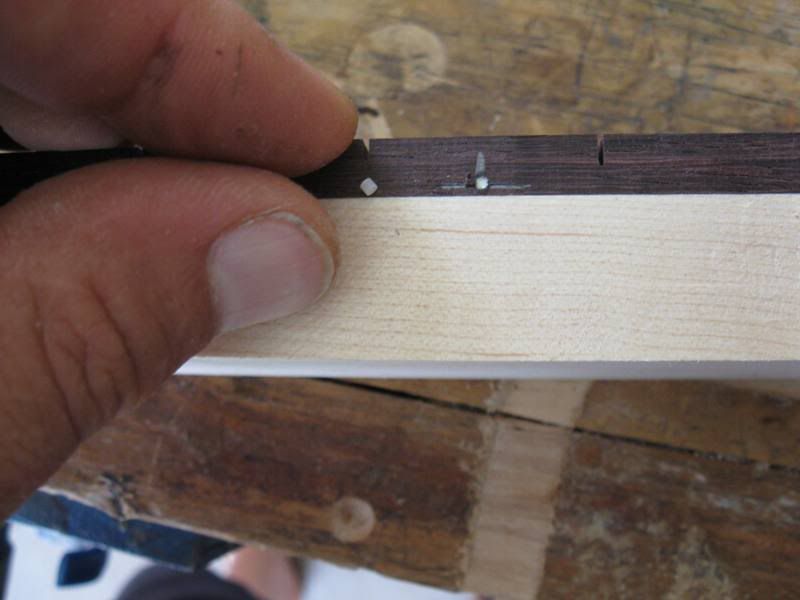
That fantastic tool is a tang cutter, its great and makes a tiresome job easy and fast, well worth its cost.

Image
Image

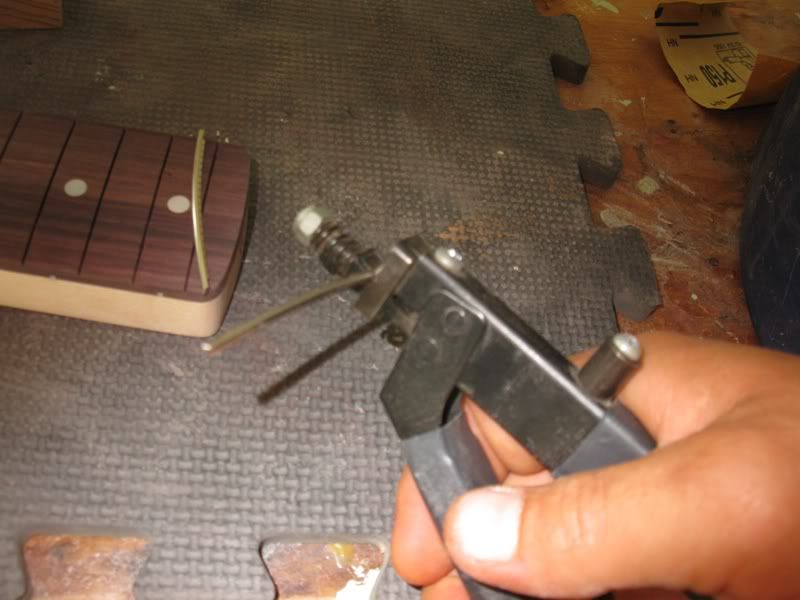
I cut the tangs on my necks as I don't like the look of them on the side of the fretboard. I also had a neck on a guitar years ago that used to shrink and expand depending on the weather. In the summer the tangs came out of the neck at the egde and would cut me all the time. This prevents that.

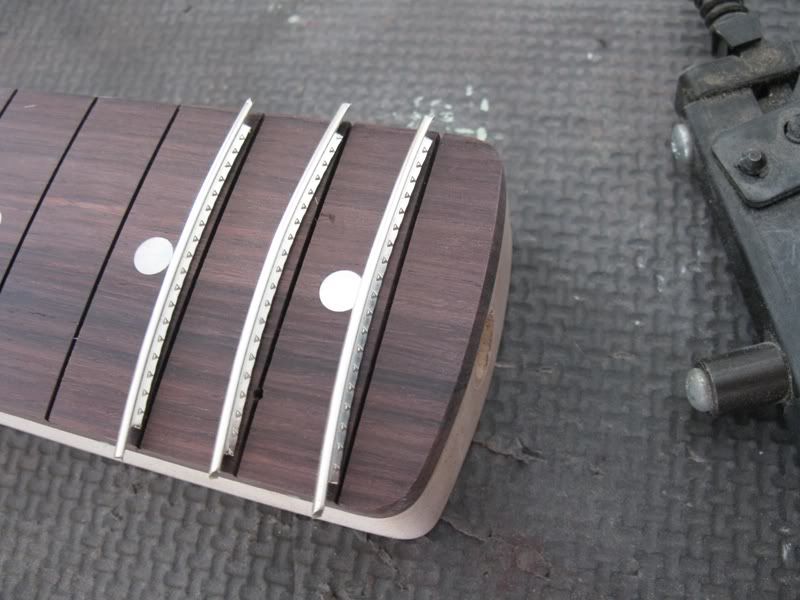
Tap the frets in the fretslot at both ends just to let them sit in the slots. The wire is always a smaller radius to the fingerboard to help push the wire in the slots and push the tangs inside the wood on the edges of the slot to help anchor them inside.

Image

Once tapped in, press the frets into place.

Image

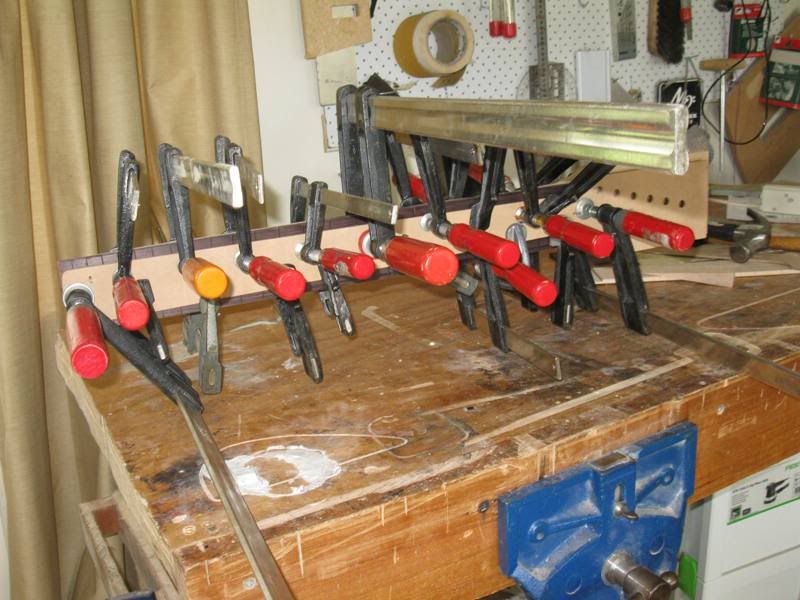
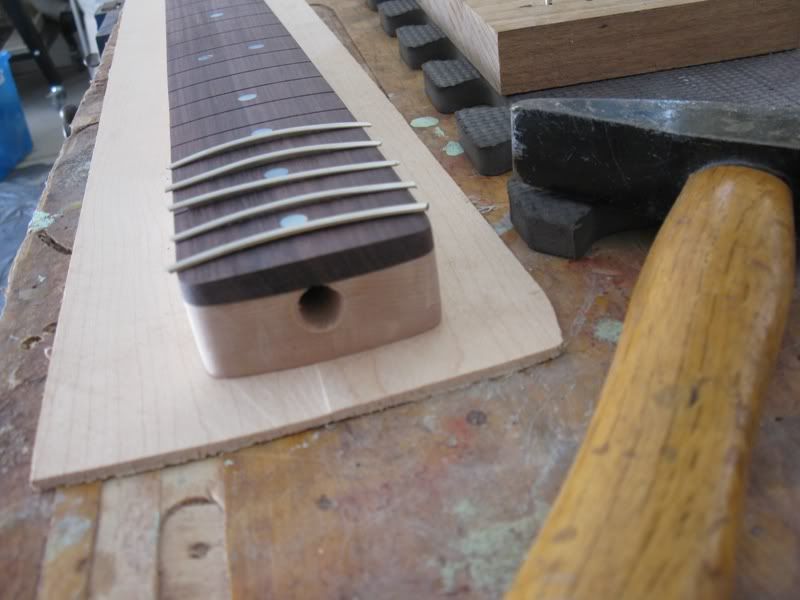
Next step is to glue the frets in. I clamp them on a 12" radius sanding beam, this assures the frets are all in properly and all flat then I put a drop of hot stuff cyanoacrylate (super glue) in the fret slot at both sides and let it sit for a minute, the fret is then glued in solid in there.

Image

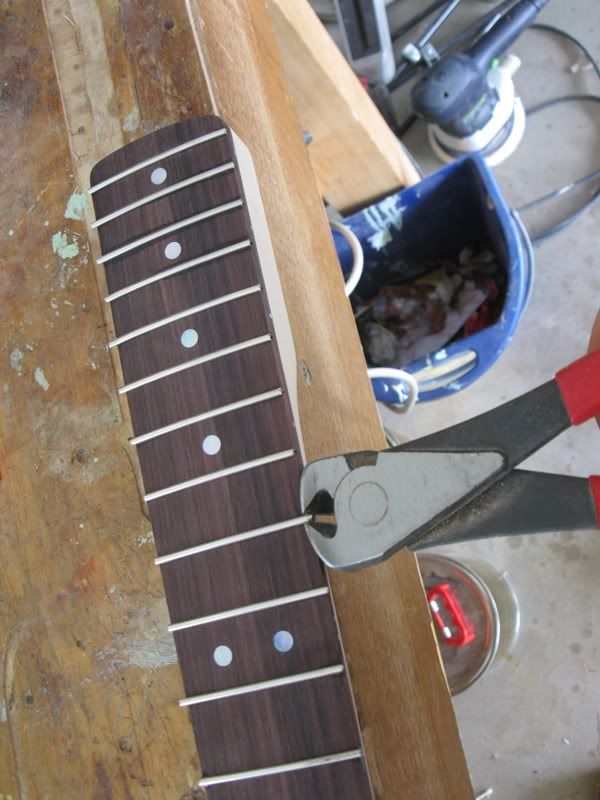
Cut off the leftover bits of fret wire

Image

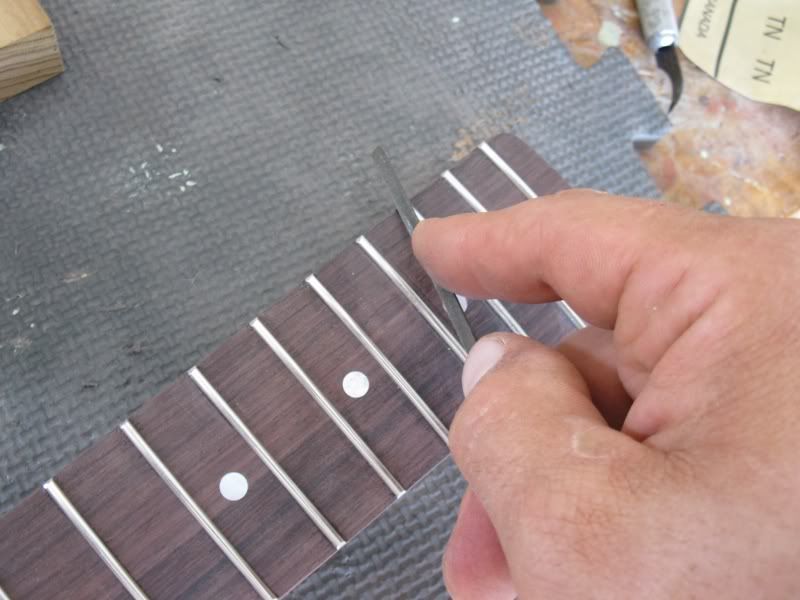
Take the angled file and shave the fret ends at an even angle along the length of the neck

Image

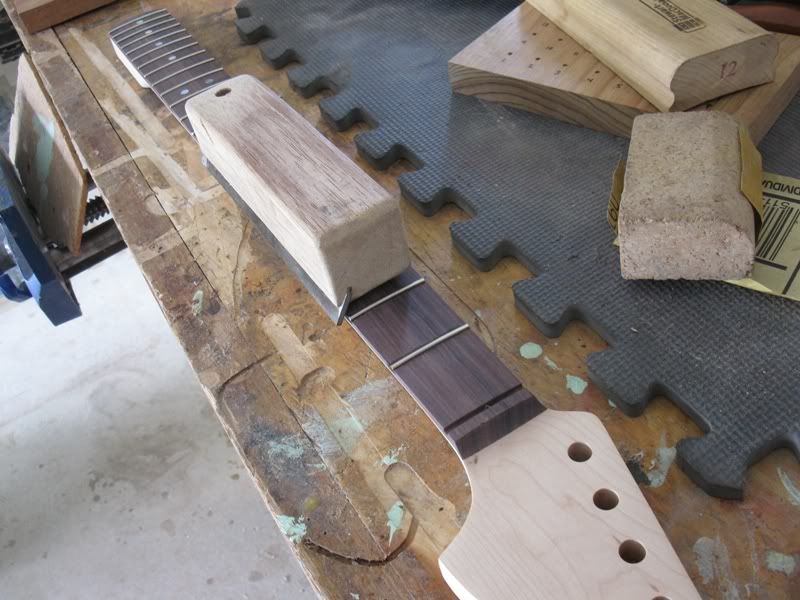
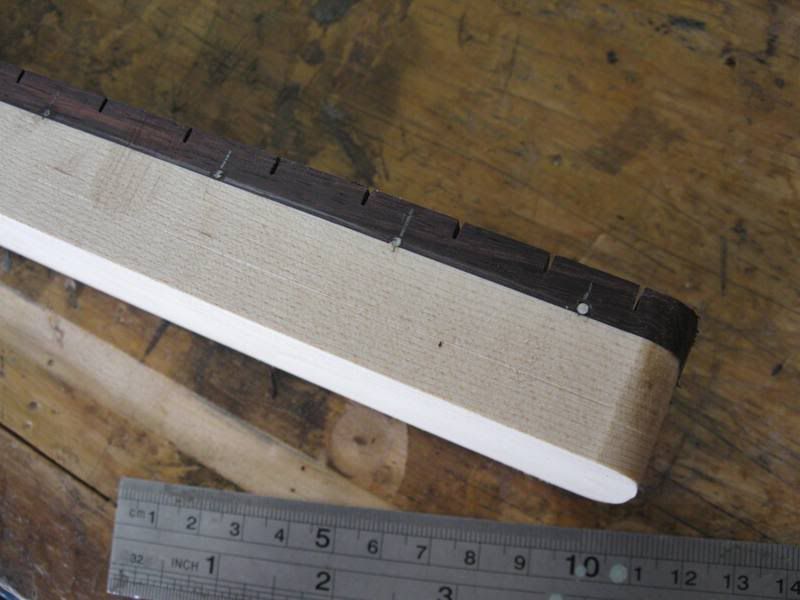
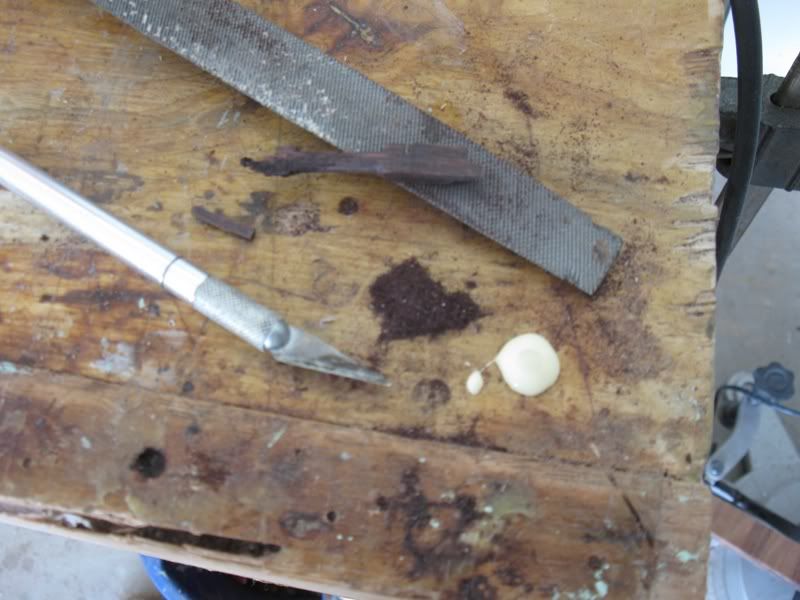
As you can see there's holes in the sides of the fretboard since we cut the tangs shorter...

Image

Take an offcut from the fingerboard and file it until you get a lot of dust from it, mix it with wood glue into a thick paste.

Image
Image

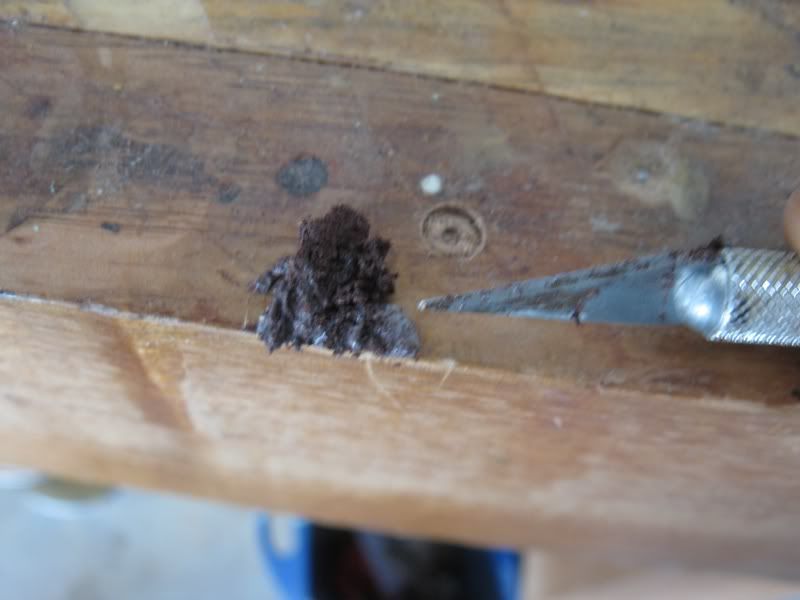
and squeeze it into the slots

Image

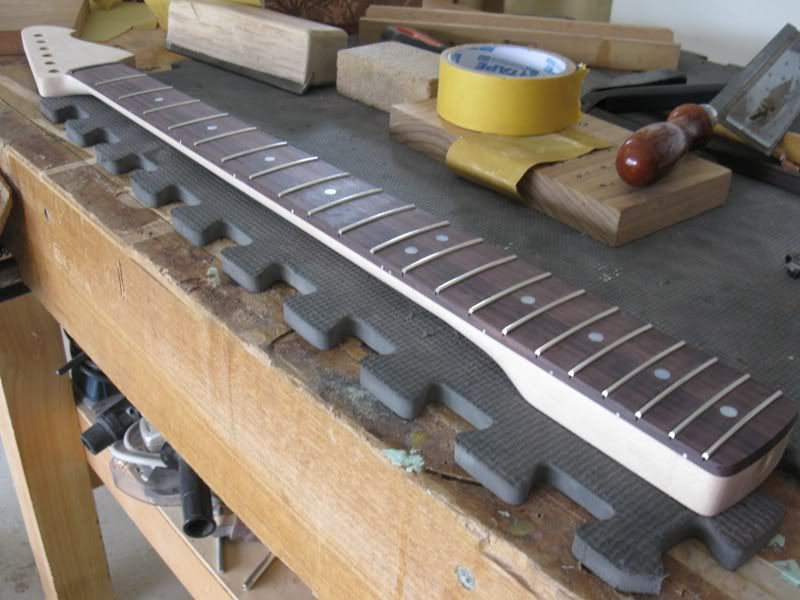
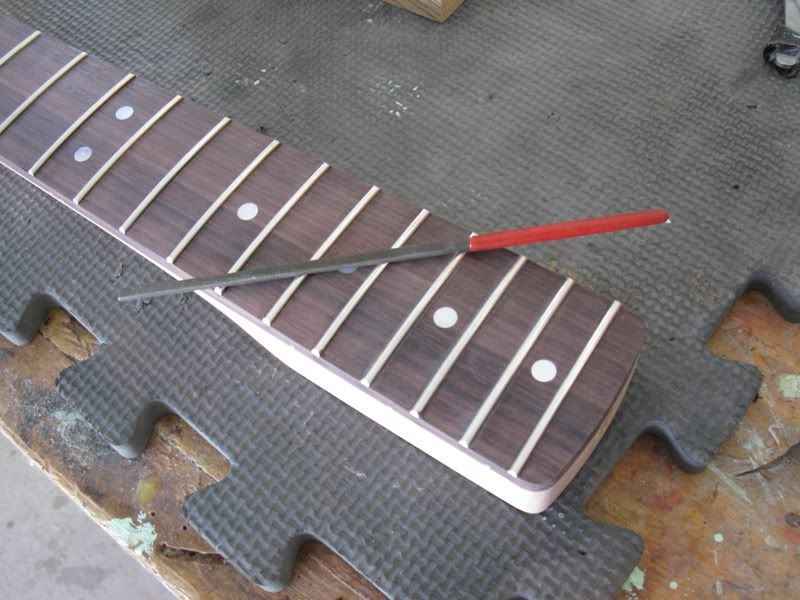
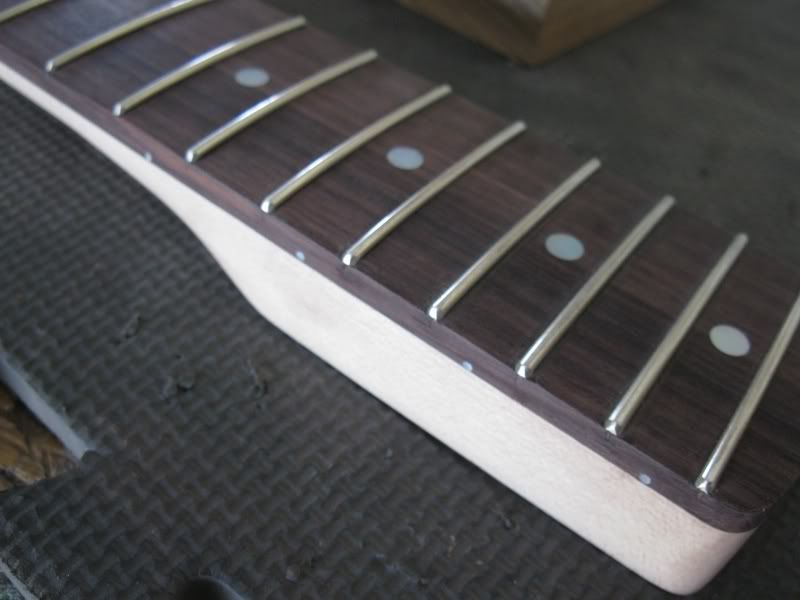
After half an hour you can sand it flat. You do end up with really sharp edges from filing the fret ends though

Image

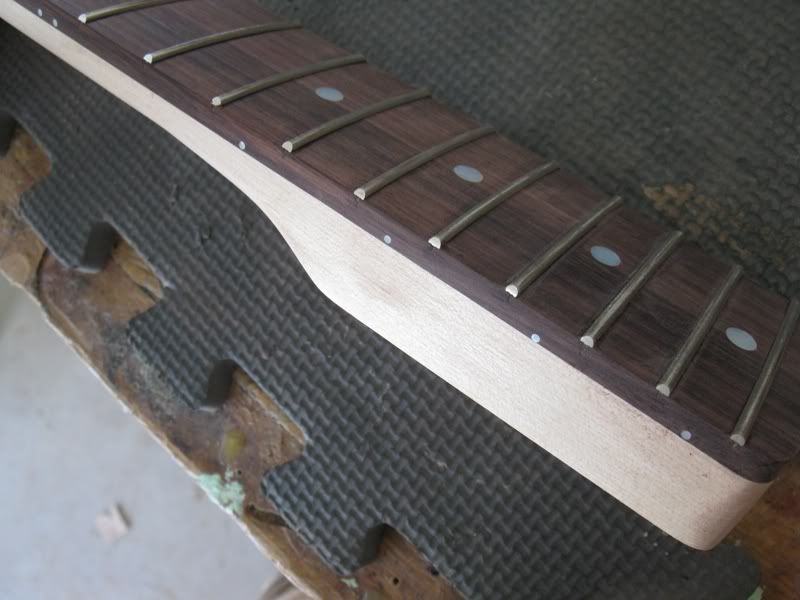
So grab your fret end file and round off the edges of the frets so they're all nice and smooth to the feel :)

Image
Image
Image

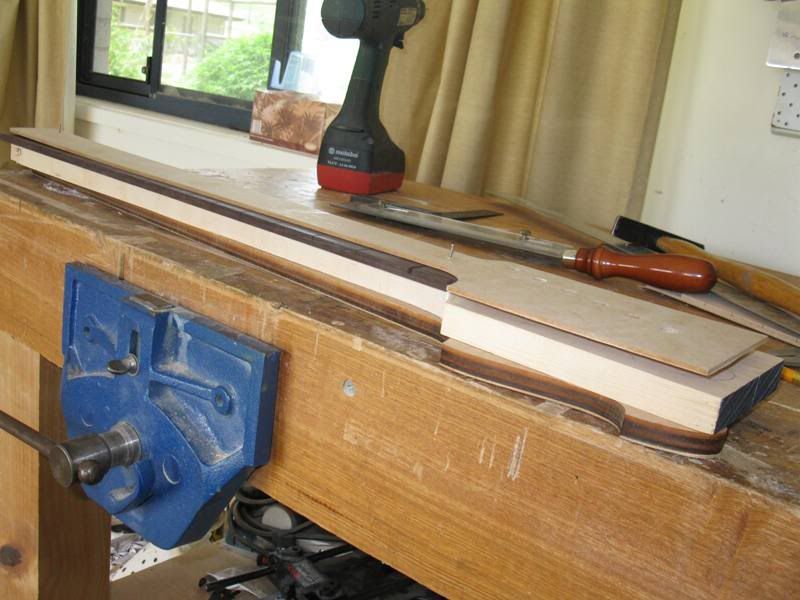
The next step is to mask off the fingerboard and then spray it, that'll be for another day.

Post Reply